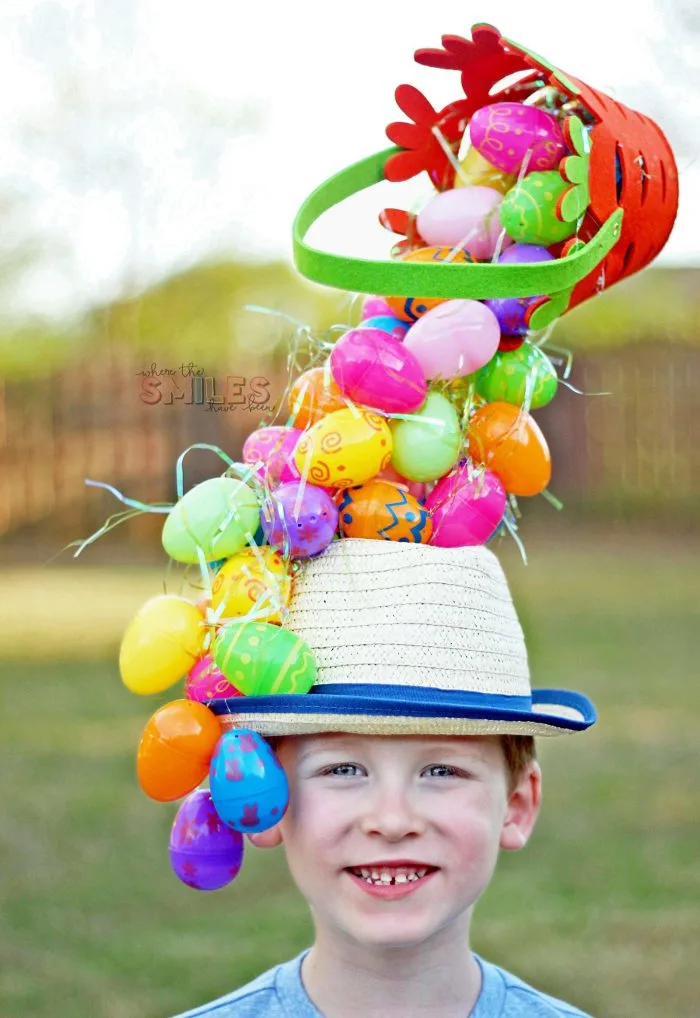
Your Ultimate Guide to Crafting the Perfect Easter Hat for Your Child
Welcome, creative parents and Easter enthusiasts! ? Are you ready to dive into the whimsical world of Easter hat making? With Easter on the horizon, it’s the perfect time to start thinking about that adorable and imaginative Easter hat for your little one. Whether you’re aiming for a simple design or something that’s the talk of the Easter Parade, we’re here to offer you a basket-full of ideas, tips, and tricks for crafting that perfect headpiece.
Why An Easter Hat?
The tradition of Easter hats dates back to centuries-old celebrations. Wearing new or special clothes at Easter symbolizes new life and the renewal of spring. And what better way to express this than with a handmade hat that lets your child’s imagination hop into the spotlight? Not only is it a fun and engaging activity for the family, but it also sparks creativity and makes whimsical memories that last a lifetime. ?
Getting Started: What You’ll Need
Before we hop into the crafting process, let’s make sure you have all your tools and materials at the ready:
- Base Hat: Any sturdy hat such as a bonnet, cap, or even a paper plate can serve as your base.
- Decorative Materials: Think of vibrant feathers, colorful ribbons, faux flowers, Easter eggs, bunnies, chicks, and anything else spring-related!
- Adhesives: A hot glue gun will be handy for quick sticking, but regular glue or double-sided tape are great alternatives for little fingers.
- Extra Accessories: Glitter, pom-poms, foam shapes, and stickers can add a pop of fun.
- Tools: Scissors, markers, and paint are essentials for cutting and adding details.
Conceptualizing Your Easter Hat
Now, before we get those creative juices flowing, let’s brainstorm! ? Talk with your child about their ideal Easter hat. Do they envision a hat brimming with flowers, a playful bunny scene, or something entirely unique? This is an excellent opportunity to bond and ensure the hat reflects your child’s personality and interests. You might even want to sketch a few ideas on paper to visualize the concept.
Health & Safety First
Before starting, it’s essential to remember safety. If you’re using a glue gun or sharp tools, parental supervision is crucial. Always make sure that the items you’re using are safe and non-toxic, especially if your child will be wearing the hat for extended periods.
Alright, are you all set with your supplies and safety tips? Great! Let’s dive straight into the crafting process, but first, why not put on some cheerful tunes? After all, crafting is more fun when you do it together with a sprinkle of joy and music in the air! ?
Step-by-Step Craft Magic
Starting with the base, help your child wrap or paint it to give a full bloom of color. Remember, the base is just that—the start. It’s the canvas for their imagination. And here’s where the magic truly begins. Go through your materials with your child and pick out their favorites.
For a classic look, we’ll begin with flowers. You can make these with tissue paper or buy pre-made ones at your local craft store.
- Cut your tissue paper into squares.
- Stack about six squares on top of each other.
- Fold the squares in a fan-fold pattern and then fasten the center with a twist tie or piece of wire.
- Gently pull apart each layer of tissue paper and fluff them out to form a flower.
- Once you’ve made several flowers, you can start attaching them to your hat base using glue or tape.
But that’s just the tip of the Easter iceberg! There’s an entire meadow of creative possibilities waiting for you! From cuddly critters to glittery eggs, your child’s Easter hat can transform into a parade-worthy masterpiece in no time. So, grab that basket of supplies, and let’s get cracking on some unforgettable Easter hat fun. Next up, we’ll talk about adding all those special details that’ll make your child’s hat sparkle in the sun and capture everyone’s attention. Stay tuned, because this Easter is bound to be a hoppin’ good time! ??

5 Essential Tips for Parents Preparing Easter Hats
As you embark on this crafty journey, there are some key things to keep in mind. Here are five things every parent should know when preparing for the delightful task of Easter hat-making:
-
Plan Ahead
Don’t wait until the last minute to start your Easter hat project. Planning ahead will give you ample time to gather materials, explore ideas with your child, and create a hat without the rush. This will also allow for any mishaps that might occur—crafting can be unpredictable, after all!
-
Involve Your Child in Every Step
From picking out colors to deciding on the theme, make sure your child is involved in the decision-making process. This not only ensures that they will love their Easter hat, but it also helps foster creativity, decision-making skills, and a sense of accomplishment once the project is complete.
-
Be Mindful of Comfort and Practicality
While aesthetics are important, don’t overlook comfort and practicality. The hat should fit well and not be too heavy or cumbersome for your child to wear. Try to use lightweight materials and ensure that any adornments are securely attached to avoid any accidents during the Easter festivities.
-
Recycle and Reuse
You don’t always have to buy new materials. Look around your home for items you can recycle or repurpose for your Easter hat. Old clothes, unused decorations, and even last year’s Easter crafts can provide unique and meaningful additions to your creation.
-
Test and Adjust
Once the hat is finished, have your child try it on and move around with it. Observe if anything is falling off or if it seems uncomfortable and make adjustments accordingly. This trial will allow you to fix any issues before the big Easter parade.
Crafting an Easter hat with your child is a great bonding experience and an opportunity to teach them about art, design, and even a bit of history regarding the tradition. With these tips and creative ideas, you’re well on your way to making this Easter a memorable one. So, embrace the spirit of spring, let your imaginations bloom, and create an Easter hat that your child will be proud to showcase. Happy crafting!


