
Ultimate Guide to Homemade Slime: Fun and Easy Recipes for Parents
Hello, wonderful parents! Are you ready to dive into the squishy, stretchy, and oh-so-satisfying world of homemade slime? Well, you’re in for a treat! Slime isn’t just a sensory delight for children, but it’s also a fantastic way to bond and engage in creative play. So, grab your little ones and let’s get ready to concoct some magical slime recipes that are sure to bring on the giggles and gasps of amazement!
Why Slime, You Ask? Not only is slime a great tool for sensory play, encouraging fine motor skill development, but it can also introduce basic chemistry concepts to young minds. Plus, what could be more fun than a bit of mess that’s actually easy to clean up?
What You’ll Need for Your Slime Adventure
- Basic ingredients: Most slime recipes require simple household items such as glue, baking soda, and contact lens solution.
- A large mixing bowl: Preferably one that you don’t mind getting a little sticky.
- Measuring spoons and cups: Perfect for the little scientists to practice their measuring skills.
- Spatula or mixing spoon: To mix up that gooey goodness.
- Storage containers: To keep your slime fresh for as long as possible.
Non-Toxic Slime Recipe: The Classic
Let’s start with a classic slime recipe that’s both easy and safe for kids. This non-toxic slime is perfect for all ages and is made with common ingredients you probably have lying around the house.
Ingredients:
- 1/2 cup of non-toxic PVA school glue
- 1/2 cup of water
- 1/4 teaspoon baking soda
- 2-3 tablespoons contact lens solution (containing boric acid)
- Food coloring or glitter (optional)
Instructions:
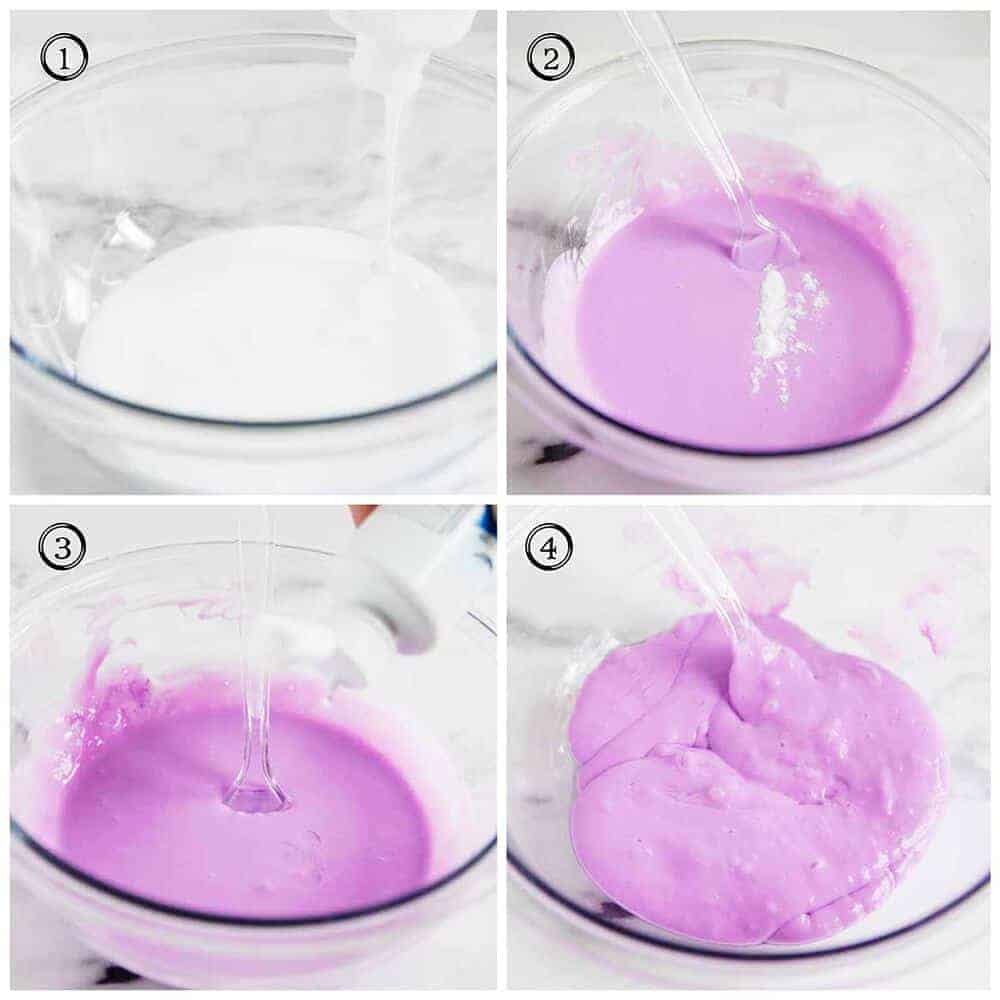
- In your mixing bowl, pour in 1/2 cup of PVA glue.
- Add your food coloring or glitter if desired and mix thoroughly.
- Dilute the baking soda in water and then add the mixture to your glue. Stir until well combined.
- Gradually add the contact lens solution, stirring constantly. As you add more, the mixture will begin to thicken and pull away from the sides of the bowl.
- Once the slime has formed and it’s not too sticky, knead it with your hands. If it’s still sticky, add a drop or two more of the contact lens solution until you reach the perfect slimy consistency.
And voila! You’ve created your very own classic slime! It’s that simple.
Fun Variations on Your Classic Slime
Want to spice up your slime-creating experience? Here’s where you can really get creative and personalize your slime:
- Fluffy Slime: Add some shaving cream to your initial glue mixture for an extra fluffy texture.
- Crunchy Slime: Mix in foam beads or plastic snow for a satisfyingly crunchy texture.
- Glow-in-the-Dark Slime: Use glow-in-the-dark paint to add a mesmerizing effect that kids will love.
We know how important it is for children to play and explore with all of their senses. Making slime provides a unique tactile experience that can be both therapeutic and educational. It teaches patience, following instructions, and even the joy of creating something from scratch.
As you can see, making homemade slime with your kids is not just a fun activity – it’s an immersive experience that combines play with learning. Stick around, as we’ll explore more fascinating and colorful slime recipes, tips for making your slime last longer, and ideas on how you can use slime play to boost cognitive development in our comprehensive guide.
So, let’s keep the fun oozing and stay tuned for more slimy adventures!
5 Essential Tips for Parents Preparing for Slime-making
As you embark on your slime-making journey, there are a few things you should keep in mind to ensure a successful and enjoyable slime-creating experience. Here are five essential tips to get you prepared:
1. Choose a Suitable Workspace
Pick an area that’s easy to clean and won’t be damaged by potential spills. Hard, non-porous surfaces or a covered table are ideal. You can use old newspapers or a plastic tablecloth to protect your workspace. Making slime can be a bit messy, so a prepared area can make clean-up a breeze!
2. Safety Comes First
Always use safe, non-toxic ingredients for your slime recipes, especially if younger children will be involved in the creation process. Ensure that kids are supervised at all times and know not to put slime in their mouths. It’s also a good idea to have them wear old clothes or aprons to protect from stains.
3. Allergy Awareness
While most slime recipes are safe, some kids may have sensitive skin or allergies to certain ingredients. Please do a patch test with the raw materials like glue and contact lens solution before letting your child handle large quantities of these substances, and always look for hypoallergenic options if necessary.
4. Experiment with Slime Ingredients
The beauty of making homemade slime is that you can experiment with different ingredients to alter the texture and appearance. Whether you add food coloring, glitter, or scented oils, have fun with it! But remember to introduce new ingredients slowly to observe any changes in texture or consistency.
5. Slime Storage Know-How
To maintain the freshness and pliability of your slime, store it in an airtight container when not in use. If you notice the slime starting to dry out, kneading it in your hands can sometimes bring back its stretchiness. If it becomes too sticky, a bit more contact lens solution can do the trick.
Creating a Safe and Eco-Friendly Slime Experience
In today’s environmentally-conscious world, we also want to make sure our fun doesn’t harm the planet. Here are a few tips to create a more eco-friendly slime experience:
- Opt for eco-friendly ingredients: Look for biodegradable glitter and natural food coloring to reduce microplastic contamination and chemical intake.
- Reuse and recycle: Use containers you already have at home to mix and store your slime, reducing waste.
- Non-toxic disposal: When it’s time to bid farewell to your slime, dispose of it in the trash rather than washing it down the sink to avoid clogging your pipes or releasing non-biodegradable elements into the water system.
By following these tips and choosing the right slime recipe for your family, you can foster a fun, educational, and responsible activity that everyone will love. Remember, the goal is to create happy memories and spark creativity – and homemade slime is just the right mix of fun and learning for that!
Let your imaginations run wild, and may your hands be forever slimy (in the very best way) as you explore the endless possibilities of homemade slime!
See more great Things to Do with Kids in New Zealand here. For more information see here
Disclaimer
The articles available via our website provide general information only and we strongly urge readers to exercise caution and conduct their own thorough research and fact-checking. The information presented should not be taken as absolute truth, and, to the maximum extent permitted by law, we will not be held liable for any inaccuracies or errors in the content. It is essential for individuals to independently verify and validate the information before making any decisions or taking any actions based on the articles.


