
A Parent’s Guide to Safely Heating a Wheat Bag in the Microwave
Welcome, dear parents, to your go-to guide for heating those cuddly wheat bags that bring comfort to our little ones (and let’s be honest, us adults too)!
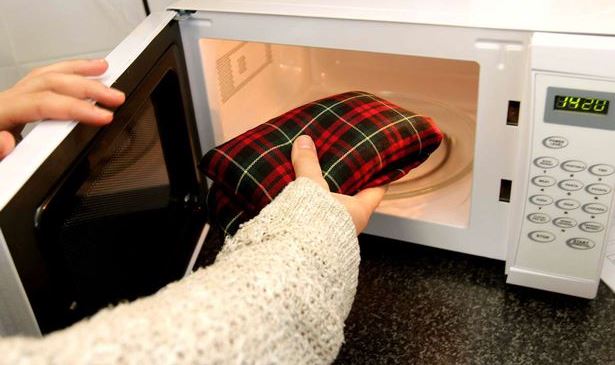
Wheat bags, also known as wheat packs or heat pillows, are a fantastic and natural way to soothe aches and pains, warm up chilly toes, or just to snuggle with for a sense of comfort. But as with any heating element, especially when used for or by children, safety is paramount. Understanding how long to heat a wheat bag in the microwave is essential for a safe, cozy experience every time.
Understanding Wheat Bag Basics
Before we dive into the heartwarming details of microwaving that snuggly wheat bag, let’s understand what a wheat bag is. It’s pretty simple: a fabric pouch filled with grains, most often wheat, which can be heated or chilled to provide relief and comfort. Safety comes first, and there are a few key factors we need to consider:
- Wheat Bag Type: Make sure the wheat bag you’re using is suitable for microwave heating. Always check the label!
- Microwave Specifications: The wattage of your microwave greatly affects heating times, so find out yours as it’s vital for precision.
- Even Heating: No one likes hot spots or, worse, a scorched wheat bag. We’ll cover how to achieve even heating.
- Moisture Content: Wheat needs moisture to prevent burning and to create a lovely, moist heat that’s beneficial for muscles.
The Perfect Heating Time
Ahh, here comes the big question, “How long should I heat my wheat bag in the microwave?” Drum roll, please… It depends! But worry not, as we’re here to demystify it for you.
Generally, a standard-sized wheat bag should be heated for about 1 to 3 minutes, depending on the microwave wattage. A bag that is smaller or larger than average, or one that’s divided into sections, may need adjustments to that time. Here’s a simple chart to help you start:
| Microwave Wattage | Heating Time Guidelines |
|---|---|
| 600 – 700W | 2-3 minutes |
| 800 – 1000W | 1.5-2.5 minutes |
| 1100W+ | 1-2 minutes |
Note: These times are estimates and should be adjusted based on your bag’s instructions and your own experience over time. Always start on the lower end of the time range and check the warmth level before using it.
Step-by-Step Heating Instructions
To get you started, we’ve broken down the heating process into simple steps:
- Check the Wheat Bag: Give it a look-over for any damage. If any part of the bag is damaged or if the wheat inside seems burnt or smells off, it’s time for a new one.
- Hydration for Safety: Sprinkle water over the wheat bag or place a cup of water alongside it in the microwave to help maintain its moisture level.
- Microwave Time: Set the microwave to the correct time based on the guidelines, considering your specific microwave’s wattage.
- Patience and Testing: After the microwave beeps, let the wheat bag sit for a moment, then carefully feel it with the back of your hand to check for even heating.
Modern parenting is about blending the comforting traditions of the past with the savvy safety techniques of today. By following this guide, you can confidently add the simple pleasure of a warm wheat bag to your family’s list of cozy comforts.
Remember, our journey doesn’t end here; stay tuned for the next section, where we’ll discuss important safety tips, how to cool down your wheat bag for a refreshing experience, and insights into how regularly you should replace it — ensuring that your family’s snuggle time remains both safe and soothing.
Ensuring your child’s safety is essential, so stick around as we continue to detail every parent’s need-to-knows about wheat bags, which will serve as a valuable recourse for many heartwarming moments to come.
5 Essential Tips for Parents Preparing to Heat a Wheat Bag in the Microwave
1. Wheat Bag Selection and Usage
When selecting a wheat bag for your family, opt for one with clear heating instructions. It should be made of microwave-safe materials and not have any metallic embellishments. Teach older children the proper way to heat and handle the wheat bag to foster a sense of responsibility.
2. Understanding Your Microwave
To ensure you’re using the correct heating time, you must be aware of your microwave’s wattage. This can usually be found on the inside of the microwave door or in the user manual. Once you know this, adhere to the time guidelines for a safe heating process.
3. Avoid Overheating
Overheating can lead to the wheat burning or even catching fire, so it’s vital to start at the lowest recommended time. After heating, shake the bag to distribute the heat evenly. If you feel it’s not warm enough, heat in additional 15-second increments, but be cautious not to overdo it.
4. Evenly Distribute the Wheat
Prior to heating, make sure the wheat is evenly distributed within the bag to prevent hot spots. This can be done by shaking or massaging the bag. This is not only for comfort but also for safety, as uneven heating can cause damage to the wheat bag over time.
5. Regular Inspection and Replacement
Regularly inspect the wheat bag for signs of wear and tear. If the fabric looks threadbare or you notice a burnt smell, it’s time to replace it. Wheat bags should not be used for more than a couple of years, even with careful usage, as the risk of combustion increases with age and dryness of the grain.
Wheat Bag Safety Tips
Here are some additional safety tips to keep in mind:
- Never leave a microwaving wheat bag unattended. Always stay close by while heating.
- Do not place the wheat bag directly against the skin immediately after microwaving. Allow it to cool slightly.
- Always use a turntable in the microwave to assist with even heating.
- For little ones, ensure the bag is not too hot and remains a comfortable temperature before handing it over for them to cuddle.
- Store the wheat bag in a cool, dry place, preferably in a breathable container to maintain its moisture.
Cooling Down Your Wheat Bag
Did you know? Wheat bags aren’t just for keeping warm! They can also be used as a cold compress. Simply place the bag in a sealed plastic bag and then in the freezer for a couple of hours. This can be incredibly soothing for bumps and bruises or to cool down on a hot summer day.
When to Replace Your Wheat Bag
Consistently checking on the condition of your family’s wheat bag ensures safety at all times. A good rule of thumb is to replace the wheat bag if the fabric starts to disintegrate, the wheat smells burnt or musty, or if you notice any changes in texture when heating. Being proactive in maintaining and replacing the bag when needed will provide endless snuggles without worry.
With your newfound knowledge, you’re all set to provide the warmth and comfort your family deserves, all while being a super-smart, safety-conscious parent. Warm wishes and cozy cuddles to all!
See more great Things to Do with Kids in New Zealand here. For more information see here
Disclaimer
The articles available via our website provide general information only and we strongly urge readers to exercise caution and conduct their own thorough research and fact-checking. The information presented should not be taken as absolute truth, and, to the maximum extent permitted by law, we will not be held liable for any inaccuracies or errors in the content. It is essential for individuals to independently verify and validate the information before making any decisions or taking any actions based on the articles.


