
How To Build A Kite: A Step-by-Step Guide for Family Fun!
Welcome to our kite-building extravaganza where the sky is literally the limit! Building a kite with your kids is not only a blast, but it’s also an incredible way to teach a little bit about science, art, and good ol’ fashioned handiwork. So, let’s get started on creating a masterpiece that will soar high and bring smiles all around!
The Joy of Kite Making
From selecting the perfect materials to watching your handcrafted kite take its first flight, the process of making a kite is as rewarding as it is fun. Not to mention, it’s a perfect weekend project that the whole family can enjoy together. Let the winds of creativity and bonding blow strong!
Gathering Your Kite-Making Materials
Before we dive into the nitty-gritty of kite construction, let’s talk about what you’ll need. Good news: you might already have most of these items around your house!
- Dowel Rods or Bamboo Sticks: These will become the frame of your kite. They should be lightweight but sturdy.
- Kite Paper or a Trash Bag: This will form the sail of your kite. Kite paper is ideal, but a large, plastic trash bag can also do the trick.
- String: You will need strong string for the kite’s bridle and flying line.
- Ruler and Pencil: Precision is key, so measure twice, cut once!
- Scissors: For cutting your materials to the right size.
- Kite Tape or Packaging Tape: To secure your sail to the frame.
- Ribbon or Fabric: For creating a tail that stabilizes your kite in the air.
Once you’ve gathered all your materials, clear a large workspace like a dining table or a clean floor, and let’s craft!
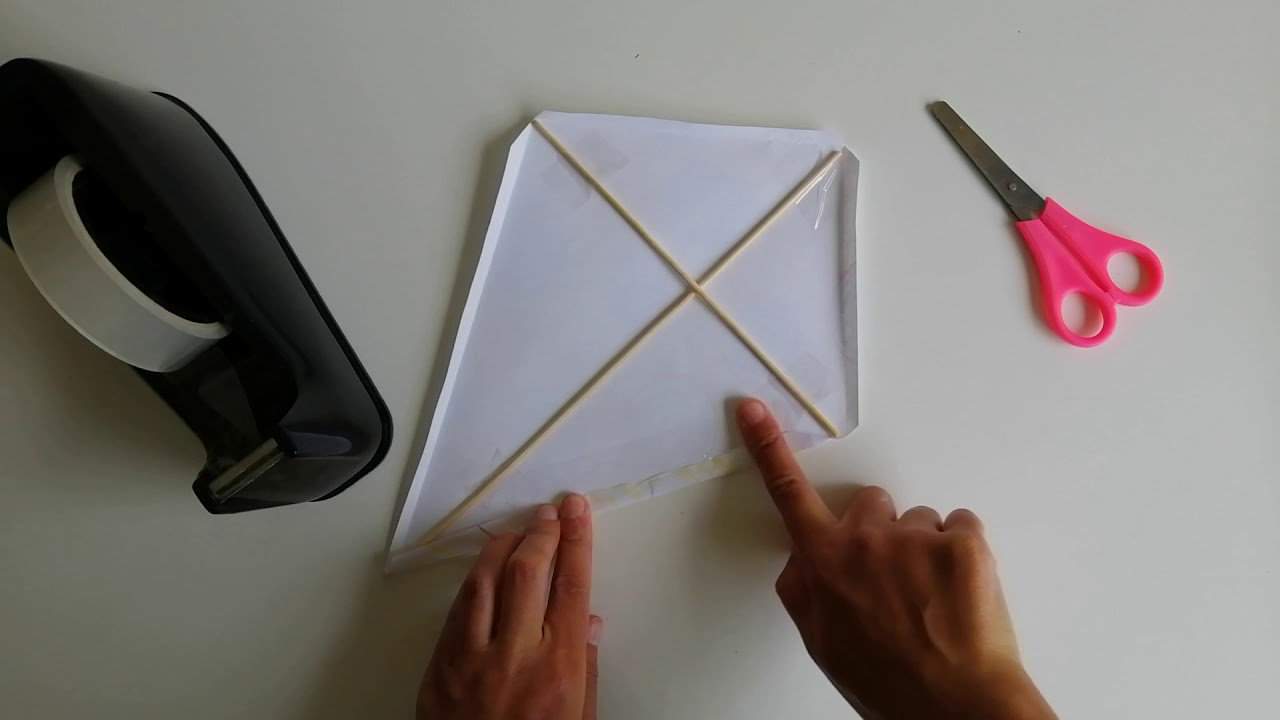
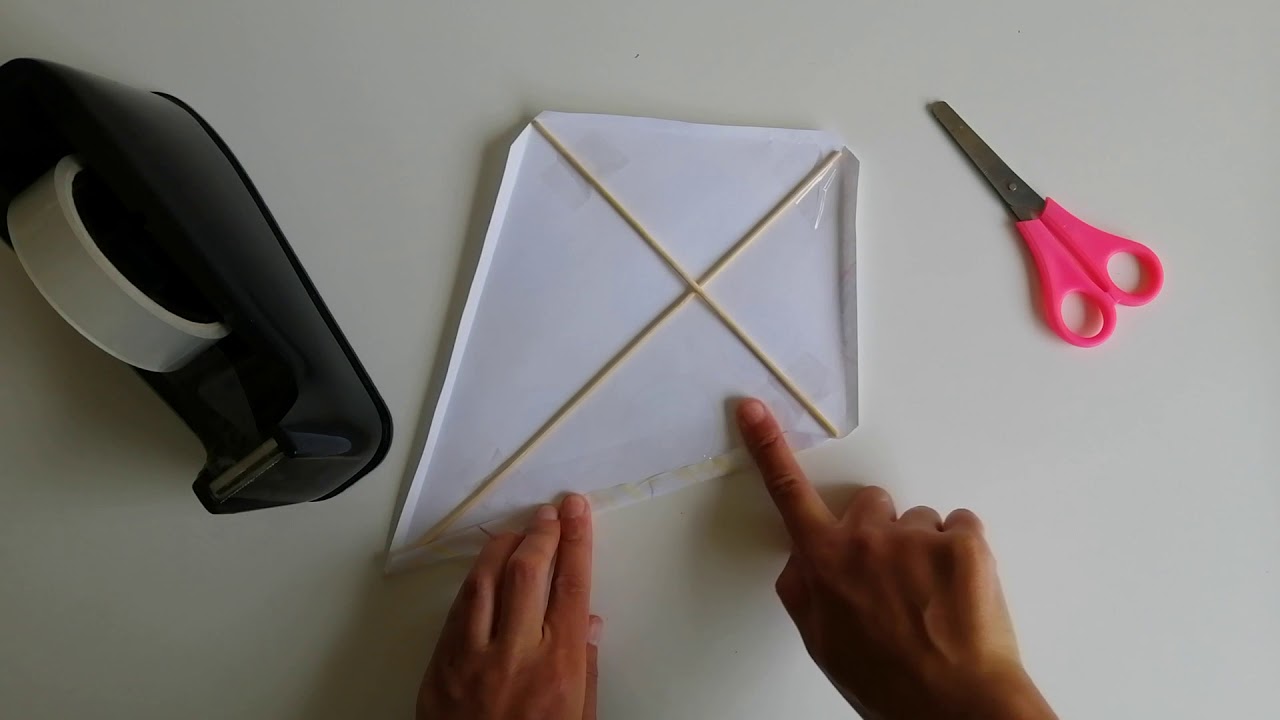
Creating the Kite Frame
The frame is the skeleton of your kite; it defines its shape and ensures it can withstand breezy weather. Here’s how to put it together:
- Measure the Dowel Rods or Bamboo Sticks: For a standard diamond-shaped kite, you’ll want one vertical rod and one horizontal rod. The vertical rod should be around 24-30 inches, and the horizontal rod should be roughly 20 inches.
- Notch the Ends: Carve small notches at each end of both rods. This is where you’ll attach the string to form your kite’s perimeter.
- Form the Cross Shape: Lay the shorter rod horizontally across the vertical one, creating a ‘T’ shape. The horizontal rod should be placed about 1/3 of the way down from the top of the vertical rod.
- Secure the Rods Together: Use string to tie the rods where they intersect, making sure it’s tight and secure. A simple square knot will do the trick.
- Create the Kite Perimeter: Take your string and wrap it around the notches at the end of each rod, forming a diamond shape. Knot the string securely at each notch.
With the frame ready, you’re halfway to having a kite that’s all set to paint the sky!
Attaching the Sail
The sail is what catches the wind and gives your kite flight. Here’s how you’ll attach it to the frame:
- Cut the Sail: Lay your kite frame on top of your chosen material (kite paper or plastic bag). Use a pencil to trace around the frame, adding an extra inch around the perimeter for folding over the frame.
- Fold and Tape: Cut out the sail and fold the edges over the string perimeter of the frame. Secure the edges with kite tape or packaging tape, making sure it’s smooth and taut.
Now your kite is really shaping up! The next step will ensure it’s flight-ready and steady.
5 Essential Tips for Parents Preparing to Build a Kite
Before the crafting begins, here are five vital tips to ensure a seamless kite-building experience with your little aviators:
- Plan Ahead: Set aside ample time for this activity. Kite building isn’t a rush job—it’s a labor of love that can take a few hours. Choose a day when you can enjoy this craft without looking at the clock.
- Weather Matters: Select a day for kite flying that is breezy but not too windy. A gentle to moderate wind, about 5-25 mph, is perfect for your kite’s maiden voyage.
- Safety First: Make sure to build and fly your kite in an open area away from trees, power lines, and buildings. Safety should be a top priority when choosing your construction and launch zones.
- Involve Your Kids: The kite building process should be a team effort. Assign age-appropriate tasks to your children, whether it’s holding materials in place, decorating the sail, or learning to tie the knots.
- Customize Your Creation: Encourage your kids to personalize the kite with their own designs and colors. This not only makes the experience more memorable but also gives them pride when they see their art take flight!
With these key tips in mind, preparing for your kite-building day will be a breeze, and you’ll be ready to create lasting memories—and potentially a new family tradition!
Building the Kite Tail
The kite tail isn’t just a pretty feature—it plays a crucial role in stabilizing the kite in the air. Here are the steps to create a functional and decorative tail:
- Choose Your Material: A good kite tail can be made from ribbons, fabric strips, or even plastic strips. Aim for a tail that’s light but has enough surface area to provide stability.
- Measure and Cut: The length of the tail should be around 3 to 4 times the length of your kite. Cut your material accordingly.
- Attach the Tail: Secure the top end of your tail to the bottom part of the kite frame using a bowline or a slip knot for easy adjustments.
- Add Decorative Bows: You can tie additional ribbons or bows along the tail to create more drag and add a festive flair to your kite.
After these steps, your kite should have a colorful, fluttering tail that will help keep it balanced as it sweeps across the sky.
Attaching the Bridle and Flying Line
A bridle is a vital part of your kite that helps control its angle to the wind. Here’s how to rig the bridle and attach the flying line:
- Attach the Bridle: Tie a string in a small loop to the top and bottom of the vertical rod. Your bridle line will go through these loops.
- Attach the Flying Line: Add a swivel to the end of your flying string and then tie the kite’s bridle to the swivel. This prevents tangling when the kite spins.
- Adjust for Stability: You may need to adjust the bridle if your kite doesn’t fly straight. Move it towards the top if the kite dives and towards the bottom if it over steers.
With the bridle and flying line in place, your kite is nearly ready to take off. But first, it’s time for the fun part—decoration!
Decorating Your Kite
Decoration is key to making your kite not just fly—but truly come alive in the air. Encourage your children to unleash their creativity with these tips:
- Use Bright Colors: Brightly colored markers, paints, and stickers stand out against the blue sky and make your kite a pleasure to watch.
- Add Patterns: Stripes, polka dots, or even a superhero logo—patterns add personality and flair to your flying wonder!
- Keep it Light: While decorating, remember not to add too much weight. Heavy decorations can affect the kite’s ability to fly.
Once the decorations are dry and everyone’s excited to see their artwork take flight, it’ll be time to head out for the ultimate test launch!
See more great Things to Do with Kids in New Zealand here. For more information see here
Disclaimer
The articles available via our website provide general information only and we strongly urge readers to exercise caution and conduct their own thorough research and fact-checking. The information presented should not be taken as absolute truth, and, to the maximum extent permitted by law, we will not be held liable for any inaccuracies or errors in the content. It is essential for individuals to independently verify and validate the information before making any decisions or taking any actions based on the articles.


