
Reindeer Directed Drawing for Kids: A Step-by-Step Guide for Parents
Welcome, festive parents! Are you ready to spread some holiday cheer with a sprinkle of creativity? Today, we’re embarking on a magical sleigh ride into the world of reindeer directed drawing with your kids. No need to worry if you’re not a Van Gogh; this is all about having fun and creating merry memories with your children. So grab your markers or crayons as we guide Rudolph and his friends from your imagination onto paper!
Why Reindeer Directed Drawing is a Gift That Keeps on Giving
Before we dive in, let’s explore why directed drawing is such a wonderful activity for kids. Directed drawing:
- Enhances fine motor skills
- Boosts listening and following directions
- Encourages creativity and imagination
- Builds confidence in their artistic abilities
- Provides a delightful way to learn about shapes and proportions
And the best part? It’s a holiday activity that’s perfect for cozy indoor days when the weather outside is frightful. Now let’s get our hooves—er, hands ready for some drawing action.
What You’ll Need for This Reindeer Adventure
Gather your drawing supplies and let’s prance into preparation:
- Drawing paper or sketch pads
- Pencils (for sketching)
- Eraser (for those oopsie daisy moments)
- Markers, crayons, or colored pencils (for the grand finale of coloring)
Optional but oh-so-fun extras:
- Glitter pens or stickers to jazz up your reindeer
- Background decorations like snowflakes or stars
- An easel to make them feel like true artists
All set? Take a deep breath, put on some jolly tunes, and let’s trot on to our step-by-step drawing guide!
Step-by-Step Guide to Drawing a Reindeer
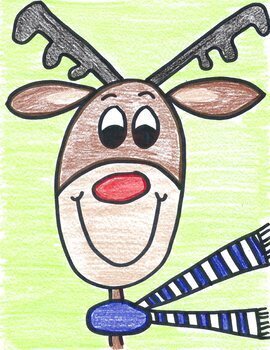
- Step 1: The Head Shape – Begin with a medium-sized, upside-down U shape to form the reindeer’s head. Make sure there’s enough room at the top for magnificent antlers!
- Step 2: Antler Time – Draw two branches sticking up from the head for the antlers. Add smaller branches stemming from each to make them full of festive character.
- Step 3: A Cute Reindeer Face – Sketch two small circles for the eyes, a triangle for the nose, and a smile to give your reindeer its personality. Don’t forget to add a tiny circle inside the nose; we all know who has a shiny one!
This is just the beginning of our reindeer drawing expedition. As we follow along, encourage your kids to add their unique style to each element. There’s no such thing as “wrong” in art. Every line brings us closer to a whimsical winter wonderland creation that’s uniquely theirs. Up next, we’ll wrap up our directed drawing guide by bringing the rest of the reindeer’s body to life. Get ready for some artistic magic!
Reindeer Directed Drawing for Kids: A Step-by-Step Guide for Parents
Hello, creative parents and guardians! The holiday season is upon us, and what better way to enjoy it than by engaging in a festive art activity with your children? Enter the joyful world of reindeer directed drawing, an activity that is not only fun but also educative for your little elves. Seize your art tools, and let’s embark on a drawing journey that will leave your kids beaming with pride over their handmade reindeer art.
5 Things Parents Should Know in Preparing for Reindeer Directed Drawing
- Patience is Key: Little hands might not get it right on the first try, and that’s okay! Encourage your child to enjoy the process rather than aiming for perfection.
- Embrace Individuality: Each child’s drawing will be unique. Celebrate their creative choices, whether it’s a polka-dotted reindeer or one with rainbow antlers!
- Preparation Matters: Have all materials ready before starting. This ensures a smooth and interruption-free drawing session, keeping little artists focused and happy.
- Learning Opportunity: Use this activity to teach about reindeer and their habitats. Mix drawing time with storytelling for educational fun!
- Display with Pride: Plan where you’ll showcase the finished artwork. Children love seeing their work appreciated, and it’ll add to your holiday decor!
Once you have these tips in your sleigh, you’re all set for a drawing bonanza filled with laughter and creative expression. Let’s continue shaping our reindeer and bringing it to life!
Completing Your Reindeer Masterpiece
- Step 4: The Reindeer’s Body – Draw a large oval shape beneath the head for the body. Encourage your child to draw it big enough for all the treats that Santa’s helpers carry.
- Step 5: Leg Works – Add four long and slightly curved lines from the body for the legs. Make sure the front legs are straighter and the back legs are a bit more bent for a natural stance.
- Step 6: Hoof Highlight – At the end of each leg, draw a smaller rectangle for the hooves. These are crucial for prancing on rooftops!
- Step 7: Tail Time – An adorable fluffy tail is next. A small cloud-like shape at the back will do the trick!
- Step 8: Final Touches – Let’s not forget the ears – two small half ovals on top of the head will be perfect. Now, it’s time for the reindeer’s fur. Add small stroke lines along the body and legs to give it a textured look.
With all the steps in place, it’s time for the best part – personalization! Offer your young artist a palette of colors. They can unleash their creativity, coloring in their reindeer with traditional browns or going wild with a burst of different hues. Sparkles, stickers, and other craft supplies can also be used to embellish their artwork.
As you can see, reindeer directed drawing is more than just an art activity; it’s a chance to bond, giggle, and make treasured holiday memories with your children. So tuck these steps into your Santa hat, and enjoy the festive season filled with cozy drawing sessions and lots of love. Happy drawing and happy holidays!
See more great Things to Do with Kids in New Zealand here. For more information see here
Disclaimer
The articles available via our website provide general information only and we strongly urge readers to exercise caution and conduct their own thorough research and fact-checking. The information presented should not be taken as absolute truth, and, to the maximum extent permitted by law, we will not be held liable for any inaccuracies or errors in the content. It is essential for individuals to independently verify and validate the information before making any decisions or taking any actions based on the articles.


