
How to Draw the Easter Bunny: A Fun Guide for Parents and Kids!
? Welcome, springtime artists! ? Are you on the lookout for a delightful Easter activity that you and your little ones can enjoy together? Look no further! Drawing the Easter Bunny can be a great way for your family to bond and get into the spirit of Easter. Don’t worry if neither of you is a natural Picasso; this guide is designed to make the drawing process easy and fun for all! So grab your pencils, crayons, and paper, and let’s hop into the world of creativity. ???
?? What You’ll Need
- Pencil
- Eraser
- Paper or drawing pad
- Colored pencils, markers, or crayons
- Smiles and a dash of imagination!
Gathering your art supplies is just the beginning of our creative excursion. Once you’ve got everything ready, find a comfortable spot where you and your children can draw together. A kitchen table, living room floor, or even outside in the backyard are perfect spots.—anywhere you can spread out and let your creativity flow!
? Step-by-Step Guide to Drawing Your Easter Bunny
Drawing can seem complex, but it’s all about breaking down the image into simple shapes. We’ll start with the basics and slowly add details to bring your Easter Bunny to life. Here we go!
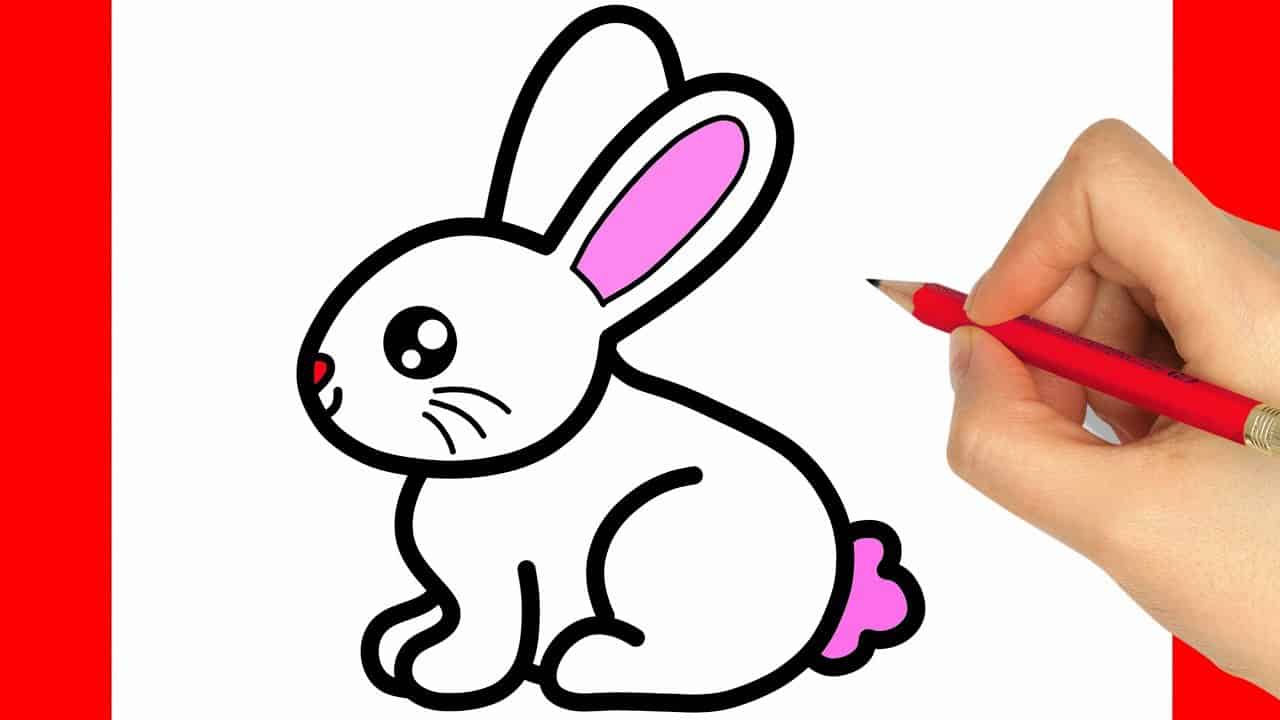
Step 1: Sketch the Basic Shapes
Begin by lightly drawing a large oval for the bunny’s body and a smaller circle for its head. This doesn’t have to be perfect— these are just guidelines. Connect the circle and oval with a smooth curve to outline your bunny’s neck. For the ears, draw two long, upright ovals atop the head. Remember, bunny ears can be floppy or perky, so feel free to give your bunny its unique personality right from the start!
Step 2: Add Facial Features
Inside the head circle, draw two smaller ovals for the eyes. A tiny circle inside each eye will give your bunny that spark of life. Sketch a triangle nose and draw a line down from it to create the mouth. Add a curved line on either side of the mouth to make the cheeks fuller. Don’t forget the whiskers—long, light strokes from the nose outward should do the trick!
Step 3: Finishing the Body
Underneath the head, draw two small ovals for the paws, with little lines to suggest the toes. For the feet, larger ovals at the bottom of the body will work nicely. Inside these, draw small curved lines for the bunny’s foot pads. Now, to complete the body, gently erase the parts of the initial oval that overlap with the head and the paws, refining the shape of your bunny’s cozy, fluffy body.
Remember, the Easter Bunny wouldn’t be complete without a fluffy tail! Create a small, round puff at the back of the bunny’s body to represent this. Make it as big and fluffy as you like to give your bunny that extra cute factor.
Step 4: Accessorizing Your Bunny
It’s time to dress up your bunny! Will it be wearing a bow, a festive Easter vest, or maybe a pair of quirky glasses? Let your imagination guide you as you accessorize your bunny. Draw a simple bow tie under the chin or a fancy Easter egg in its paw. These little touches add character and charm to your creation.
With all the basic elements in place, you can now start erasing any unnecessary lines and make sure every part feels connected and complete. Your Easter Bunny is almost ready to hop off the page!
Sweet as a jellybean, you’ve successfully created the basic outline of your Easter Bunny. The next steps will guide you through shading, coloring, and adding those final touches that will bring your drawing to life. Stay tuned, and we’ll color our world in Easter hues next! ??
Keep those pencils twirling and those markers at the ready because we’re about to dive into a world of color, shading, and breathtaking detail that will make your Easter Bunny the star of the season. The smiles on your children’s faces will be as bright as the colors on your canvas!
5 Things Parents Should Know in Preparing to Draw the Easter Bunny
1. Embrace the Process, Not Just the Final Product
It’s essential to remember that the activity of drawing with your children is about spending quality time together and fostering creativity, not just about the end result. Encourage your kids to enjoy the process of creating, and reassure them that there’s no such thing as a “bad” drawing. It’s the perfect opportunity to teach them that practice and patience lead to improvement and that it’s okay if the bunny isn’t “perfect” on the first try.
2. Create a Conducive Environment
Before you begin, it’s helpful to set up an environment that’s conducive to concentration and creativity. This means finding a quiet, well-lit space where you and your kids can sit comfortably. Make sure all your drawing supplies are within easy reach so that you can focus on drawing without frequent interruptions to search for materials.
3. Use Age-Appropriate Language and Instructions
When explaining the steps to draw the bunny, use language and concepts that your kids can understand based on their age. For younger children, simple terms and comparisons to things they’re familiar with (like comparing the shape of the bunny’s tail to a cotton ball) can make the instructions more relatable and less intimidating.
4. Be Prepared to Guide and Assist
Children may need help holding the pencil correctly, understanding the shapes, or even visualizing the next step in their drawing. Be prepared to guide their hands or offer suggestions on how to make their bunnies uniquely theirs. It’s a good idea to familiarize yourself with the drawing steps beforehand so you can provide clear and confident assistance.
5. Discuss the Significance of the Easter Bunny
While drawing, it’s the perfect time to chat with your kids about the Easter Bunny and what it symbolizes. Share stories or fun facts about Easter traditions around the world to make the drawing session educational as well as fun.
Now that you’re equipped with these helpful tidbits, you’re all set to create some fabulous Easter Bunny art with your kiddos. So put on your artist caps, and let’s make some magical Easter memories! ???
Ready to color your bunny? Here’s how you can guide your children through the coloring process to add life and vibrancy to their drawings. Follow along for more!
See more great Things to Do with Kids in New Zealand here. For more information see here
Disclaimer
The articles available via our website provide general information only and we strongly urge readers to exercise caution and conduct their own thorough research and fact-checking. The information presented should not be taken as absolute truth, and, to the maximum extent permitted by law, we will not be held liable for any inaccuracies or errors in the content. It is essential for individuals to independently verify and validate the information before making any decisions or taking any actions based on the articles.


