
How to End French Knitting Flawlessly
Hey there, crafty parents and young artisans! Have you been looping and swooping your way through the charming world of French knitting, only to find yourself a little puzzled when it comes to ending your project? Worry not! We have just the right tips to help you finish off that cozy scarf or cute doll accessory with finesse. In the spirit of crafting fun, let’s tie up those loose ends and give your French knitting the neat and tidy finish it deserves!
Supplies You’ll Need to Finish Your Project
- French knitting doll or spool (you’ve been working with this already!)
- Yarn or wool (the same yarn you’ve been knitting with)
- A blunt-ended yarn needle (for weaving in loose yarn)
- Scissors (for snipping the yarn)
Step by Step Guide to Ending French Knitting
By now, your French knitting tube is probably looking splendid, and you’re a few moments away from admiring your completed project. Here’s what to do:
Step 1: Preparing to Finish
The running stitch method is one of the simplest ways to end your French knitting.
- Cut the yarn leaving a tail about 20cm long. Thread the yarn through your needle.
- Identify the last row of loops on your spool. They should still be on the pegs of your spool or knitting doll.
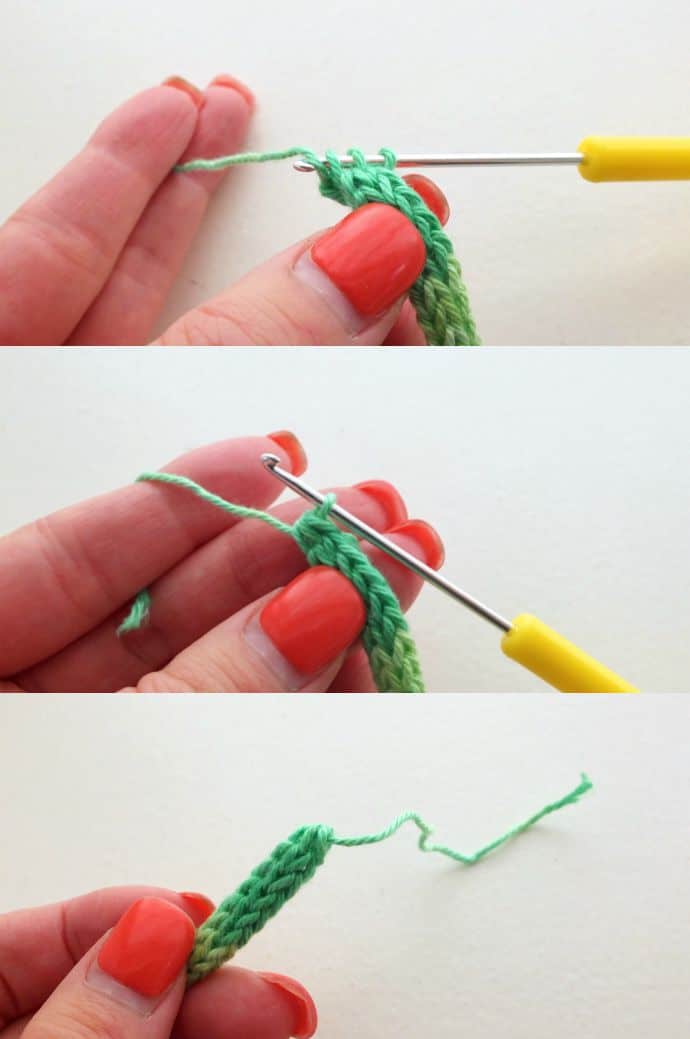
Step 2: Running Stitch Through the Loops
Just like threading beads onto a string, you’ll thread your needle through each loop.
- Gently lift the first loop off its peg and pass the needle through it.
- Repeat this for each loop, ensuring you’ve threaded through each one before you remove them from the spool. Keep the loops on the needle, and don’t pull too tight just yet.
Step 3: Tightening the End
After all your loops are on the yarn tail, it’s time to pull.
- Hold your knitting with one hand and pull the yarn end with the other hand to tighten the loops together.
- Adjust as necessary to ensure that the closure is firm but not puckered.
Step 4: Securing the Tail
A neat finish means secure stitching.
- Knot the tail to the closest loop on the underside of your work to secure it.
- Weave the remaining tail in and out of several stitches on the underside of your work for added security.
- Snip any excess yarn, leaving just enough so the tail doesn’t come loose.
Congratulations! Your French knitting project is complete with a seamless and stable finish! With these easy steps, you’ve transformed strands of yarn into a tangible creation of love. Whether it’s a whimsical knit chain, a playful accessory, or even a charming ornament, the pride of crafting something beautiful is just unbeatable.
Remember, French knitting isn’t just about what you make; it’s about the magical process of creating and the joy of learning alongside your little ones. Don’t hesitate to show off your newfound skills and engage in more creative adventures with your family! And for those of you who are ready to take your French knitting to the next level, stay tuned for advanced finishing techniques and project ideas that will keep those needles clacking!
Keep those nimble fingers busy, and let the warmth of your creations spread smiles in every stitch. Until next time, happy knitting!
How to End French Knitting Flawlessly: A Guide for Parents
Welcome, creative parents! Are you ready to guide those eager little hands to a successful end on their French knitting journey? Finishing a French knitting project is like the cherry on top of a delightful crafting experience. So, let’s add that perfect finish and watch your child’s eyes light up with accomplishment!
Before We Begin: 5 Things Parents Should Know
- Patient Practice: Remember, the finishing touches of French knitting might require a bit of practice. Encourage patience both in yourself and your young knitter—it’s a valuable life lesson!
- Gather Supplies: Ensure you have all your supplies within reach to avoid any mid-process hiccups. It’ll keep the experience smooth and enjoyable.
- Comfortable Workspace: Choose a comfy, well-lit space where you and your little one can focus on the finishing steps without distractions.
- Secure Finishing: The end of your project needs to be secure to withstand the love and play it’s sure to receive. We’ll ensure it’s done right!
- Embrace Imperfection: If your first try doesn’t turn out perfect, no worries! Each project is a learning curve and it’s all about the fun of crafting together.
Let’s Get Finishing: Your Step by Step Guide
Ready to finish up? Your French knitting project, whether it’s a vibrant snake or a chic bracelet, deserves a great closing. Parents, this is your time to shine and show your little ones how it’s done!
Step 1: Preparing the End
Let’s set the stage with a smooth ending. Don’t rush this part; it sets the foundation for a polished final product.
- Cut the yarn, leaving a tail that’s generous to work with—about 20cm should do it! This long tail will allow for easy weaving and securing. Thread it onto your yarn needle.
- Spot the very last row of loops that are on the needles of your French knitting tool. They’re about to become the finale of your project!
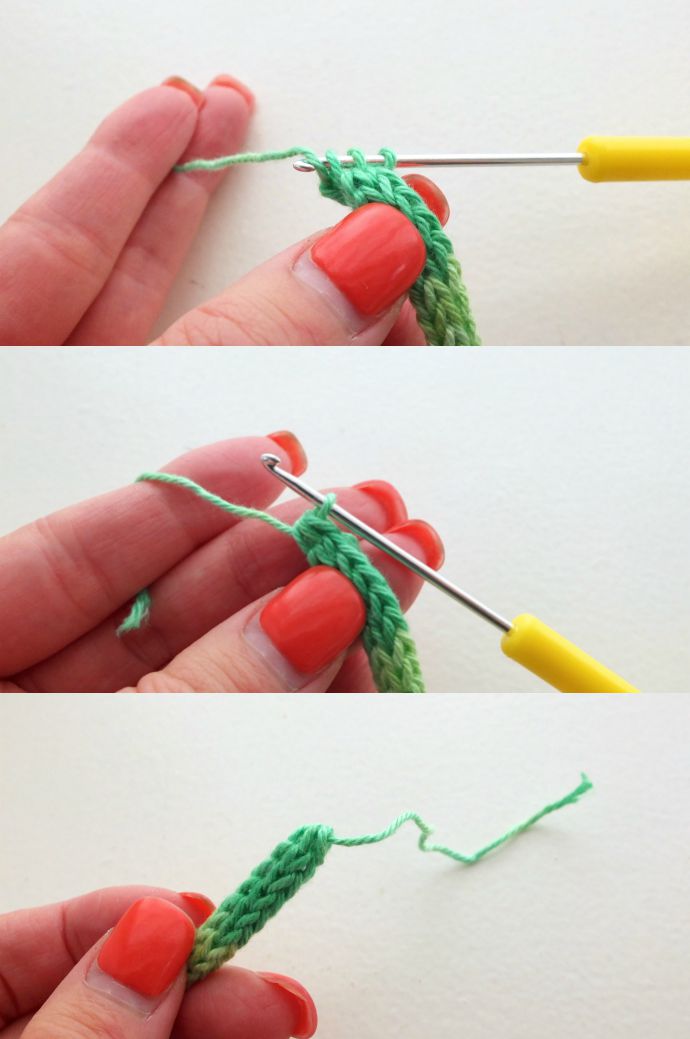
Step 2: Weaving Through the Loops
With the precision of threading pearls, your needle will bring everything together. Think of it as connecting the dots to complete a beautiful picture.
- Carefully lift the first loop off its peg and guide your needle through, as if the yarn were whispering sweet farewells to each loop.
- Do this for each loop, gracefully lifting them from their posts and onto the yarn bridge you’re creating. Hold onto those loops; they’re precious!
Step 3: The Tightening Twist
As the loops enjoy their last dance on the needle, draw them together for the grand finale.
- Cup your project in one hand, gently whisper encouragement, and with the other hand, pull the yarn’s end to gather your loops into a close-knit circle. Like friends in a huddle, they should be close but not squished.
- Take a moment to adjust the tightness. It’s a delicate balance between too loose and too puckered—aim for just right!
Step 4: The Final Knot
The end is in sight, and you’re securing the memories of this craft forever with these lasting stitches.
- Knot the yarn tail to the nearest loop on the underside of your knitting. It’s like a secret handshake, sealing the deal.
- Weave the yarn end through several stitches underneath—the underbelly of your project will hold onto the secret of its strength.
- Trim the excess yarn, waving a little goodbye as you do. Just like fairy tales, we leave just enough behind to tell the tale.
Wowza! You and your mini-knitter have crossed the finish line with style and skills that will last a lifetime! Your French knitting piece is a testament to the time spent together, the giggles shared, and the patience nurtured. Now, marvel at your collective handiwork and the seamless finish that’ll make it a cherished keepsake.
As you progress in your French knitting saga, remember each project adds a stitch to the fabric of family memories. What’s next on the horizon? Perhaps a French knitting project that’s a tad more challenging? Whatever it is, you’ve got this, because every yarn tells a story and together, you’re spinning a yarn of creativity and love. Happy knitting and happy bonding!
Keep those nimble fingers busy, and let the warmth of your creations spread smiles in every stitch. Happy knitting!
See more great Things to Do with Kids in New Zealand here. For more information see here
Disclaimer
The articles available via our website provide general information only and we strongly urge readers to exercise caution and conduct their own thorough research and fact-checking. The information presented should not be taken as absolute truth, and, to the maximum extent permitted by law, we will not be held liable for any inaccuracies or errors in the content. It is essential for individuals to independently verify and validate the information before making any decisions or taking any actions based on the articles.


