
Delightful Choc Ripple Cake: A Step-by-Step Guide for Parents
Hello, amazing parents! Are you ready to whip up some chocolatey goodness that will make your family’s taste buds dance with joy? Well, buckle up, because we’re about to embark on a fun and delightful journey into the world of Choc Ripple Cakes!
What Exactly is a Choc Ripple Cake?
You might be wondering, “What’s this choc extravaganza?” Let me tell you, it’s a classic no-bake sensation that’s been bringing smiles to faces for generations. A Choc Ripple Cake is cherry on top for any gathering, combining simple ingredients like chocolate cookies and whipped cream to create a dessert that’s as scrumptious to eat as it is easy to make.
Why Choc Ripple Cake is a Family Favorite
- Minimal Ingredients: With a short ingredient list, it’s budget-friendly and easy to prepare.
- No-Bake Wonder: Say goodbye to preheating ovens; this dessert comes together in your fridge!
- Perfect for Bonding: Creating this cake with your kids is a wonderful opportunity to spend quality time together.
- Endlessly Customizable: Let your family’s creativity shine by adding your unique twists.
Gathering Your Ingredients
Before you roll up your sleeves and dive in, let’s make sure you have everything you need:
- A packet of choc ripple cookies
- Fresh whipping cream
- Vanilla extract
- Confectioner’s sugar
- Your favorite fruit, for a fresh twist
Now, isn’t that a refreshingly short shopping list? That’s the beauty of this dessert—it’s all about simplicity mixed with a dash of deliciousness!
Getting Started: The Prep Work
First things first, let’s lay the groundwork for your choc ripple creation:
- Open the package of cookies and lay them out for easy access.
- Pour your whipping cream into a large bowl and add a splash of vanilla extract.
- With an electric mixer, whisk the cream until it forms stiff peaks, sprinkling in confectioner’s sugar to taste.
- Choose a nice serving tray or plate – this is where you’ll build your masterpiece.
Smooth sailing so far, right? You’ve taken the first few steps towards a dessert that will have everyone coming back for seconds (or thirds!).
Assembling Your Choc Ripple Cake
Now, get ready for the magic to happen! Spoiler alert: this is where it gets super fun!
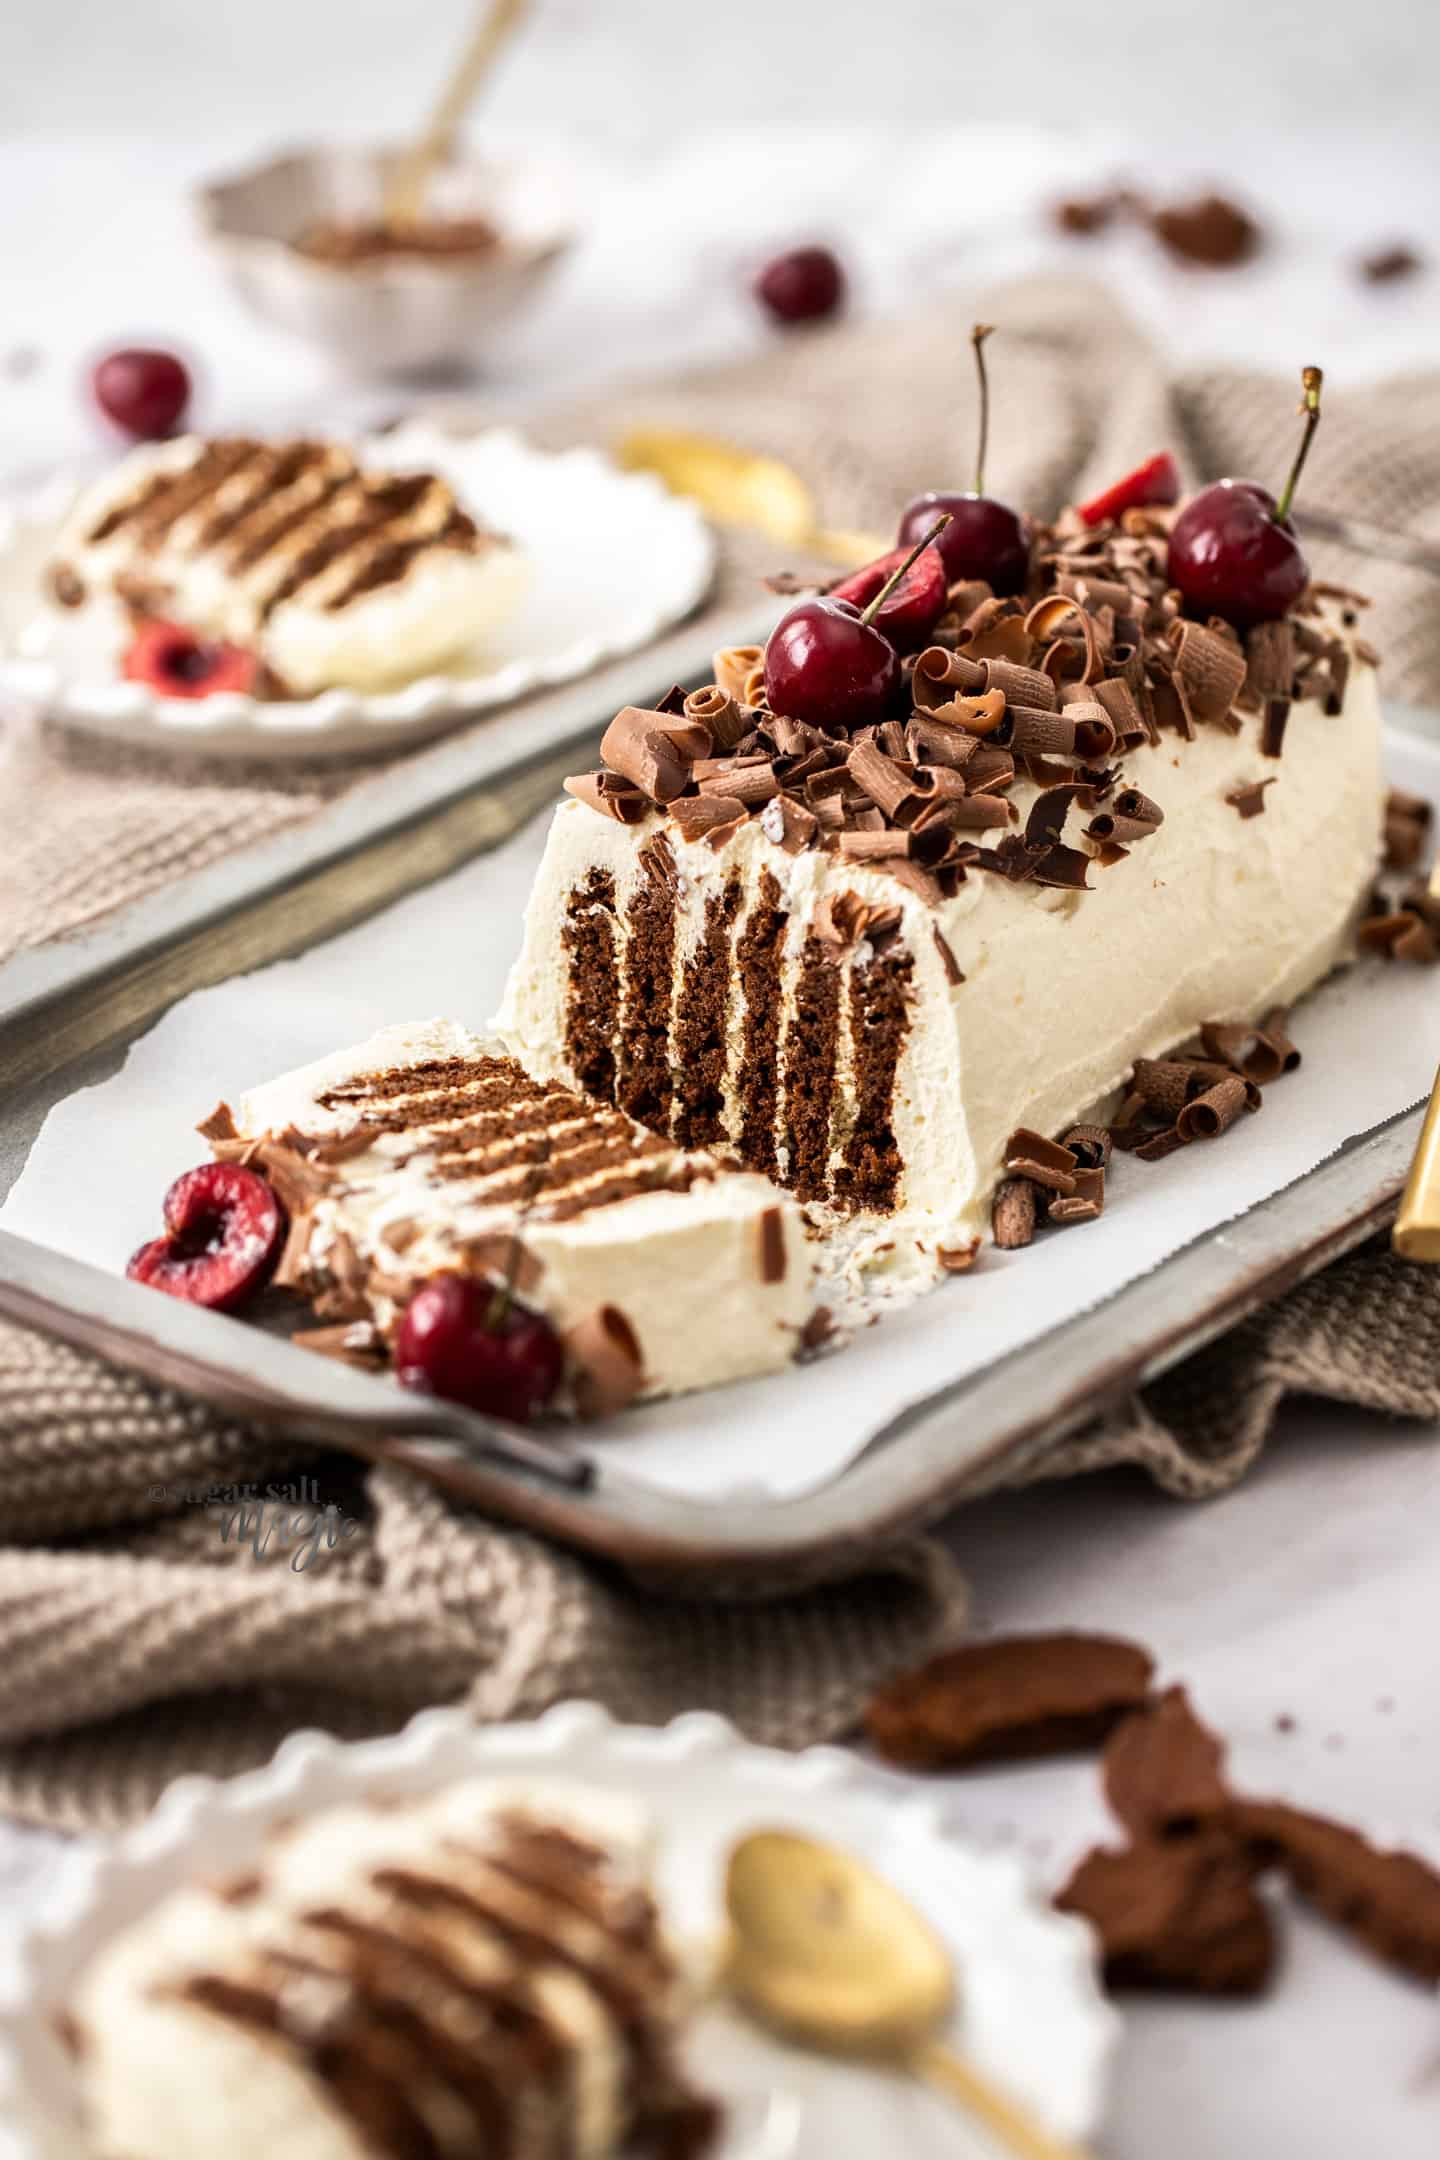
Starting with one cookie, generously spread one side with your whipped cream. Then, sandwich it with another cookie. Continue this process until you have a lovely log of chocolate and cream. Once your log is complete, cover the entire creation with the remaining whipped cream.
Oh, and here’s a little tip: for extra flair, arrange your fruit on top of the whipped cream for an extra pop of color and flavor.
Next comes the hardest part—waiting! This cake needs time to set in the fridge. Think of it as a dessert siesta; everything’s resting up to give you the best taste experience possible.
So, off to the fridge your masterpiece goes, typically for a few hours, but overnight is best for those dreamy, soft cookies that just melt in your mouth.
And voilà, patience rewarded! After your choc ripple cake has had its beauty sleep in the fridge, it’s ready to be devoured. Slice it diagonally to give patrons a peek at the beautiful layers, and serve it up with smiles all around.
Stay tuned as we dive deeper into variations, serving suggestions, and more tips to make your choc ripple cake the star of the show!
Excited? You should be! You’re just a few simple steps away from creating a sweet masterpiece that will dazzle your family and friends. Let’s get those aprons on and let the ripple effect take over your kitchen!
So, gather your little helpers, your ingredients, and your sweet tooth—it’s time to create some unforgettable moments, one chocolaty layer at a time.

Five Things Parents Should Know in Preparing Choc Ripple Cake
1. Create a Kid-Friendly Environment
Before starting, ensure the kitchen is a safe space for little ones to help out. Clear countertops, keep sharp objects out of reach, and be ready for a bit of mess. Remember, it’s all about the fun and memories!
2. Plan Around Nap Times or High Energy Periods
Pick the best time to bake when the kids are either bursting with energy or after they’ve had their nap. You want them at their best when they’re lending their little hands to create this sweet treat!
3. Prep Can Be a Teaching Moment
Use the measuring and mixing steps to teach your children about counting, measuring, and following instructions. It’s a delicious lesson they won’t forget.
4. Embrace Creativity and Personalization
Let the kids choose some of the toppings or how to arrange the fruit. This autonomy makes the cake even more special to them, and who knows, they might just surprise you with their inventiveness!
5. Be Patient with the Process
Baking with kids might take longer than doing it solo, but those extra giggles and flour-covered faces are worth it. Plus, it teaches patience and the joy of working together towards a yummy goal.
Decadent Variations of Your Choc Ripple Cake
Once you have the basic recipe down, why not venture into new realms of flavor? Here are some quick twists:
- For a minty twist, add a few drops of peppermint extract to your whipped cream.
- Drizzle caramel sauce or sprinkle chopped nuts over the top for added indulgence.
- Layer slices of banana between the cookies for a delightful banana chocolate combo.
- Infuse your whipped cream with a berry coulis for a fruity undertone.
Remember, there’s no right or wrong way to personalize your choc ripple cake. It’s all about what makes you and your family happy!
Presentation and Serving Tips
Once your cake is chilled and ready to impress, here are a few tips to make serving a breeze:
- Use a serrated knife for cleaner cuts through the cookie layers.
- Offset the chocolatey richness with a side of vanilla ice cream or a dollop of fresh whipped cream.
- Give it an elegant touch by dusting some cocoa powder over the whipped cream before serving.
- Store any leftovers in the fridge, covered, to keep it firm and delicious.
Unleash the beauty of the choc ripple cake by slicing diagonally, and watch as the cross-section of creamy and crunchy layers tempts everyone at the table. Your work of art isn’t just a cake; it’s a statement of love and fun family times.
With these tips and tricks up your sleeve, you’re all set to introduce the wonders of choc ripple cake to your family’s dessert repertoire. Gathering in the kitchen to put together this no-bake wonder will soon become a cherished tradition, much to the delight of all involved. So, what are you waiting for? Let the chocolate ripple adventures begin!
For more great articles please see here. For more information see here
Disclaimer
The articles available via our website provide general information only and we strongly urge readers to exercise caution and conduct their own thorough research and fact-checking. The information presented should not be taken as absolute truth, and, to the maximum extent permitted by law, we will not be held liable for any inaccuracies or errors in the content. It is essential for individuals to independently verify and validate the information before making any decisions or taking any actions based on the articles.


