
Baking a Colorful Creation: Your Ultimate Guide to Making the Perfect Rainbow Cake
Welcome, all wonderful parents who are eager to bring a splash of color and joy into your baking adventures with your children! Are you ready to create a whimsical treat that is as delightful to look at as it is to eat? Then, you are in the right place because we are embarking on a magical journey to create the most vibrant and cheerful Rainbow Cake!
Why Rainbow Cake?
Rainbow cake isn’t just another dessert; it’s a symbol of celebration, happiness, and the perfect way to add a burst of color to any day. Whether you’re celebrating a birthday, a milestone, or just looking for a fun activity to share with your kids, a rainbow cake can make an ordinary day extraordinary. Plus, it’s a marvelous way to teach your children about colors and the joy of creating something from scratch!
Getting Started: What You’ll Need
- Ingredients: A list of the simple ingredients you need will follow, including flour, sugar, butter, and not forgetting food coloring to achieve those vibrant hues that make a rainbow cake so special.
- Supplies: From mixing bowls to cake pans, we’ll cover the essential tools that you’ll need to make your baking process both fun and efficient.
- Preparations: I’ll provide tips on how to get your kitchen ready for a smooth baking experience, including preheating your oven and prepping your cake pans.
Mixing the Rainbow Batter
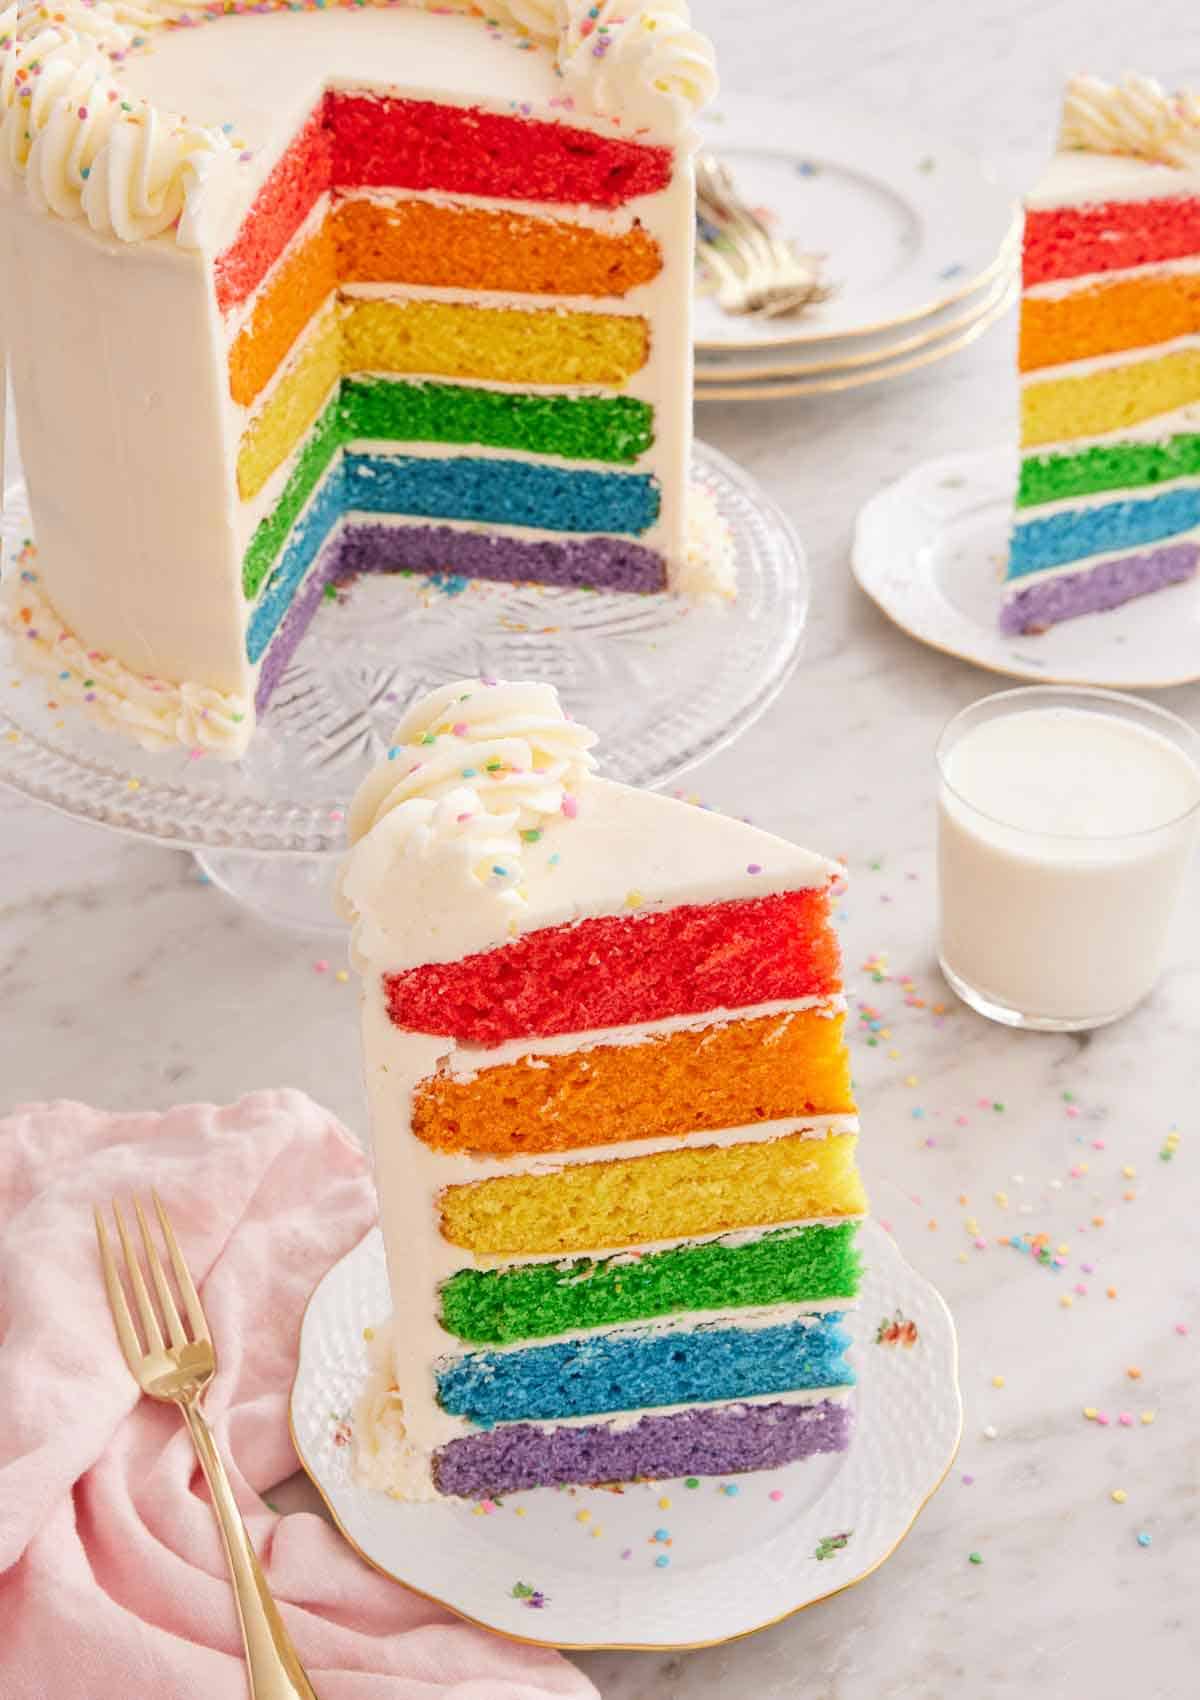
The heart of every great cake is the batter, and the secret to a perfect rainbow cake is in how you mix and color it. I’ll guide you through making a classic vanilla cake batter that will serve as a canvas for our rainbow colors. We’ll divide the batter into equal parts and tint each one with food coloring for those stunning rainbow layers.
Creating the Layers
Making the layers is both a science and an art. You’ll learn how to pour the batter into cake pans to ensure evenly baked layers that will stack perfectly. And if you’re worried about baking several layers at once, don’t be! I’ll share some clever tricks to help you bake multiple layers simultaneously or work with the oven space you have.
Assembling the Rainbow Masterpiece
Once our colorful cakes are baked and cooled, it’s time for the exciting part – building the rainbow! I’ll walk you through each step, from layering and frosting with a smooth crumb coat to adding the final touches of frosting for a clean, professional look. You’ll gain confidence in assembling a cake that not only looks fantastic but is structurally sound.
Decorating with Delight
A rainbow cake wouldn’t be complete without some whimsical decorations to complement its vivid layers. Whether you prefer sprinkles, edible glitter, or custom decorations, we’ll delve into the fun world of cake garnishing. I’ll share some child-friendly decoration ideas that will keep the little ones engaged and excited.
There’s nothing like watching your child’s face light up when they see a slice of rainbow cake reveal its colorful secret. Baking a rainbow cake is more than just making a dessert; it’s about creating memories, experiencing the joy of baking together, and enjoying a slice of happiness. So, tie up your apron, gather your little helpers, and let’s dive into a world of colors and flavors!
Are you ready to get this baking fiesta started? Keep reading to uncover every step of making a show-stopping rainbow cake that will have your family and friends in awe!
So before we whisk our way into the baking process, let’s ensure you’ve got everything on our Rainbow Cake grocery list:
- All-purpose flour
- Granulated sugar
- Unsalted butter (at room temperature)
- Large eggs
- Milk
- Vanilla extract
- Baking powder
- Salt
- Food coloring (preferably gel for more intense colors)
Now that you’re equipped with all the knowledge and ingredients, the next step is to don that apron and start creating a cake as unique and joyful as a rainbow itself!
5 Things Parents Should Know in Preparing for Rainbow Cake
Before we jump into the baking process, here are five essential things to keep in mind:
1. Plan Your Time Accordingly
Creating a rainbow cake is a joyous but time-consuming activity. Each layer needs care and attention, so be sure to start early or even consider baking the layers on one day and assembling the cake on the next. This way, you’re not rushing through the fun parts and you have plenty of time for unexpected baking adventures with your kids!
2. Embrace the Mess
Baking with children can be messy, and when you’re dealing with various colors of batter, things can get even more colorful. Arm yourself with plenty of aprons and don’t stress about splatters. Remember, it’s all part of the experience. Use washable covers for your workspace, and maybe have a ‘mess competition’ with your children to keep things light-hearted.
3. Color Mixing Can Be Educational
Use the color mixing as a learning opportunity. Explain primary, secondary, and tertiary colors to your children. Show them how blue and yellow make green or how red and blue create purple. This baking day can turn into a fun, impromptu art class!
4. Layer Evenness is Key
For the best visual effect, you’ll want your cake layers to be as even as possible. Weighing the batter for each layer is the surest way to achieve this. If you don’t have a kitchen scale, use a measuring cup to ensure equal distribution of batter into your pans.
5. Don’t Skip the Crumb Coat
When it comes to frosting, a crumb coat is a thin layer of frosting that helps to contain any loose crumbs. This step is vital for a rainbow cake—it will ensure that the outer layer of your frosting is crumb-free and super smooth. Make sure the crumb coat has chilled in the fridge before applying the final layer of frosting.
Now, let’s get to the actual baking process to bring this rainbow cake to life!
Step-by-Step Baking Process
Preparing the Cake Batter
Start by creaming together your room-temperature butter and sugar until the mixture is light and fluffy. When making the cake with kids, let them see how these two ingredients transform with a bit of mixing. Next, add in the eggs, one at a time, mixing well after each addition. Then, mix in the vanilla extract, which gives our cake that classic, sweet flavor. In a separate bowl, whisk together the dry ingredients: flour, baking powder, and salt. Gradually add the dry ingredients and milk to the butter mixture, starting and ending with the dry ingredients to ensure a smooth batter.
Coloring the Batter
Divide the batter evenly into separate bowls, one for each color of the rainbow you’re planning to create. A little goes a long way with gel colors, so use toothpicks to add color and mix thoroughly to achieve the brightness your children crave. Each colored batter should be vibrant and smooth.
Baking the Layers
When pouring the batter into the pans, use the back of a spoon or an offset spatula to spread it evenly. This prevents any doming, which might need trimming later. The layers will take less time to bake since they’re thinner, so watch them closely. When each layer is done, a toothpick inserted into the center should come out clean.
Assembling with Care
It’s assembly time! Place your first layer on a cake stand or plate and spread a layer of frosting evenly on top. Continue this with each layer, following the order of rainbow colors. Once your layers are stacked, remember our friend, the crumb coat. After chilling, cover the cake with the final layer of frosting, and let your kids swirl, peak, and smooth the frosting to their heart’s content.
Final Decorations
Finally, let your kids’ creativity run wild as they garnish their colorful creation. Offer a variety of sprinkles, sugar pearls, and edible glitters and let them design the finishing touches.
And voilà! You’ve now created not just a stunning rainbow cake, but also a cherished memory with your children. The process itself is a remarkable blend of lessons in patience, art, and effortless fun. This guide, filled with helpful tips and educational moments, will ensure your rainbow cake is as much a joy to make as it is to eat. Happy baking!
For more great articles please see here. For more information see here
Disclaimer
The articles available via our website provide general information only and we strongly urge readers to exercise caution and conduct their own thorough research and fact-checking. The information presented should not be taken as absolute truth, and, to the maximum extent permitted by law, we will not be held liable for any inaccuracies or errors in the content. It is essential for individuals to independently verify and validate the information before making any decisions or taking any actions based on the articles.


