
Create the Perfect Day: A Step-by-Step Guide to Making a Kite with Your Kids
Hello, awesome parents! Are you looking for a fun and creative activity to share with your children? Look no further! Kite making is not only an enjoyable crafts project but also an excellent opportunity for family bonding, learning about aerodynamics, and experiencing the sheer joy of watching something you’ve made touch the sky. I promise, with a bit of patience and some simple materials, you and your littles will be mastering the breeze in no time!
Why Kite Making is a Great Choice for Your Family
Before we dive into the nitty-gritty of crafting kites, let’s flutter through a few of the reasons why this activity is fantastic for families:
- It Sparks Creativity: Designing and building a kite allows children and adults alike to express their creativity. There are endless possibilities for colors, shapes, and tails!
- It’s Educational: Kite making includes lessons in science (aerodynamics and physics) and art (design and color theory).
- It Encourages Outdoor Play: Once the kite is ready, it’s time to head outdoors. That means fresh air, exercise, and vitamin D!
- It’s Inexpensive: You can make kites with materials you probably have around the house, making this a budget-friendly activity.
- It Teaches Perseverance: Flying a kite isn’t always easy! Kids learn the art of patience and persistence in getting their kite to soar.
Let’s Get Started: Gathering Your Materials
Before we begin, we need to gather some basic materials. You may find that you have most of these items already, which makes this adventure even easier to start:
- Two sturdy wooden dowels or bamboo sticks – one about 24 inches in length and the other 20 inches. These will form the frame of your kite.
- A roll of string or kite line – this will be used to both tie your frame together and fly your kite.
- A large sheet of paper or plastic – for the kite’s sail. Think about using recycled materials here!
- Scissors and a craft knife – to cut materials safely and accurately.
- A ruler or tape measure – to measure and cut the dowels and material for the kite sail.
- Markers, paint, or crayons – to decorate your kite with vibrant colors and designs.
- Tape or glue – to secure the sail to the frame.
- Ribbons or bows for the tail – to add stability and style.
Now that we have our basic materials, it’s time to set up your crafting area. Find a space with a flat surface where your materials can be spread out, making it easy for everyone to reach what they need.
Building Your Kite: The Frame
First things first, let’s build the framework of the kite which gives it structure and shape. Here’s how:
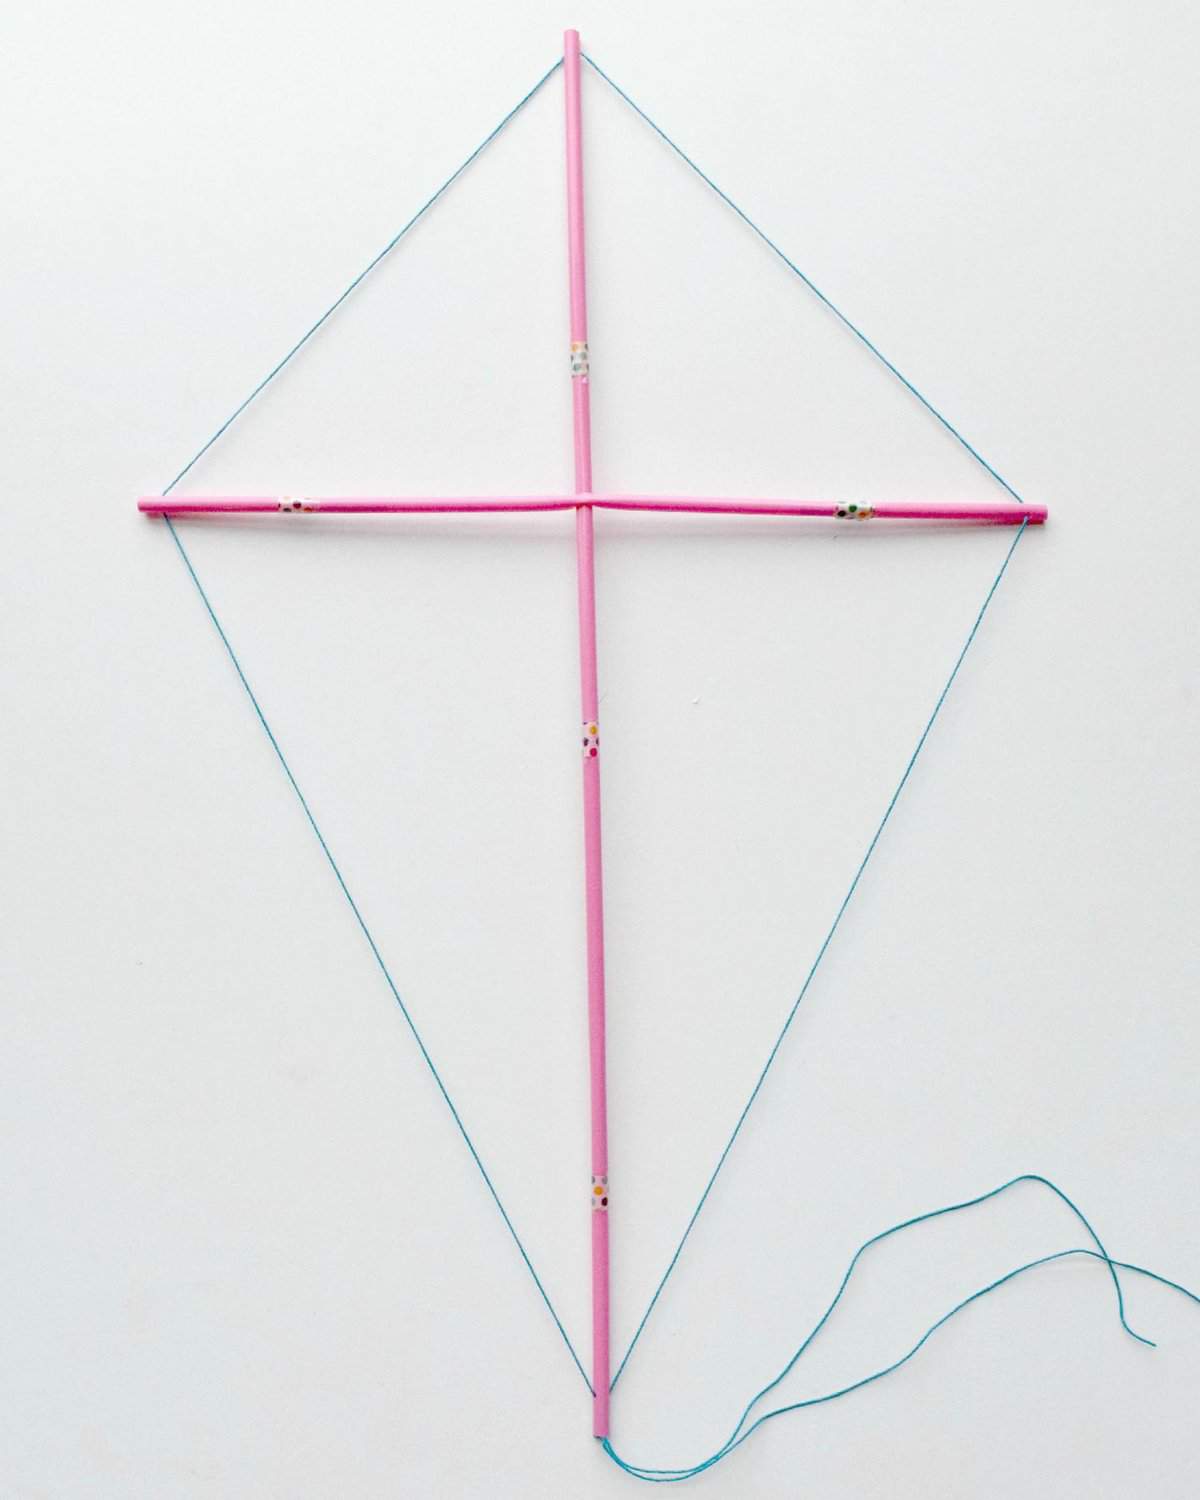
- Take the longer wooden dowel and mark the center point. This dowel will be the vertical spine of your kite frame.
- Next, measure and mark a point on the shorter dowel 6 inches from one end – this will form the horizontal spar.
- Now, lay the shorter dowel across the longer one, aligning the marks you’ve made, to form a lowercase letter ‘t’ shape.
- Secure the dowels together using string or a rubber band. Make sure they’re tied tightly so they won’t shift when flying.
With the frame constructed, you can already start imagining your kite taking shape. It’s a thing of beauty, but let’s not stop there – it’s time to give your kite the wings it deserves! But first, let’s ensure our craft will stand out from the flock with some wonderful designs and colors.
To ensure your kite creation experience is as light as the breeze itself, stay tuned for the next steps where we’ll cover adding the sail, decorating your kite, and attaching the line and tail. With our guide, you and your family will be set for an unforgettable day full of smiles and high-flying fun. Let’s keep the excitement soaring!
Five Things Parents Should Know Before Making a Kite
Every successful kite-making session starts with a little prep-work. To make sure your spirits (and your kites!) stay high, here are five things to consider:
- Understand the Basics: A rudimentary understanding of kite aerodynamics can go a long way. Explain to your kids how kites fly and why the shape matters. This will make the building process more meaningful and the eventual flight more exciting.
- Check the Weather: The ideal weather for flying kites is a clear, breezy day. Too much wind and your kite could be overwhelmed; too little and it may struggle to take off. Aim for wind speeds around 5-25 mph for optimal results.
- Choose the Right Space: Whether this is your backyard or the local park, find a clear, open space away from trees and power lines, where your kite can soar without any obstructions. Safety first!
- Prepare for Mishaps: Kite flying can be unpredictable. Pack a repair kit with extra string, tape, and any other quick fixes you might need. It’s also a teachable moment to show your kids that setbacks can be overcome with a positive attitude and a little ingenuity!
- Patience is Key: Not every kite will fly perfectly on the first try, and that’s okay! Keep the atmosphere positive and encouraging. It’s about the journey, not just the destination.
Attaching the Sail: Making it Fly
Now, let’s transform your kite frame into a soaring masterpiece:
- Lay the frame onto your sail material, tracing around with a marker, leaving an inch around the border for a margin.
- Cut out the sail along the lines you just drew.
- Use tape or glue to attach the sail to the frame, reinforcing the border securely.
This step is where your kite really begins to take on its identity, the sail being the canvas for your creativity. So have fun, and let your family’s imagination guide you!
Decorating Your Kite: Unleash the Creativity
It’s time for everyone to unleash their inner artist:
- Paint a Story: Use paint for broad, striking designs. You can depict scenes from nature, fantasies, or vivid patterns.
- Markers and Stickers: For more detail or if you want a less messy option, markers and stickers are perfect for personalizing your kite.
Remember, the kite’s decoration is not just for aesthetics; bright and contrasting colors help make it visible against the sky for that wow factor!
Finishing Touches: Attaching the Line and Tail
The line and tail are crucial for the function and stability of the kite:
- Secure the kite line to the intersection of the frame. If you’re feeling adventurous, create a bridle and adjust its length for different wind conditions.
- Cut a long ribbon or fabric strip for the tail. Attach it to the bottom of the kite frame, ensuring it’s long enough to stabilize the kite but not so heavy it weighs it down.
- Make sure the tension in the string and tail is balanced. The kite should angle slightly upwards when lying flat.
With your line and tail secured, your kite is almost ready to take flight. Give it a gentle toss into the wind and let out more line as it climbs. Watch as your family’s handcrafted kite dances in the sky, an embodiment of creativity and teamwork.
Your kite-making journey is a priceless opportunity to create lasting memories. Remember that the real magic isn’t just in the kites themselves, but in the shared laughter, teamwork, and the sense of accomplishment as you watch your collaborative creation climb up, up, and away!
See more great Things to Do with Kids in New Zealand here. For more information see here
Disclaimer
The articles available via our website provide general information only and we strongly urge readers to exercise caution and conduct their own thorough research and fact-checking. The information presented should not be taken as absolute truth, and, to the maximum extent permitted by law, we will not be held liable for any inaccuracies or errors in the content. It is essential for individuals to independently verify and validate the information before making any decisions or taking any actions based on the articles.


:max_bytes(150000):strip_icc()/paper-kite-frame-0415_vert-bce10674519943a1bfec3c741d3a4876.jpg)