Create an Erupting Paper Mache Volcano: A How-To Guide for Parents and Kids!
Hello there, crafty moms and dads! Are you ready to roll up your sleeves and dive into a project that’s sure to rock your child’s world? In this delightful guide, I’ll walk you through the joyful process of making a paper mache volcano that not only looks awesome but also “erupts”—much to the delight of your little scientists!
Why Make a Paper Mache Volcano?
Before we start mixing and molding, let’s chat about why this is such a fantastic activity for you and your kiddos. A paper mache volcano combines the wonders of science with arts and crafts to provide a multi-sensory learning experience. It’s a thrilling way to discuss the explosive power of volcanoes and chemical reactions in a safe environment, all while encouraging creativity and fine motor skills.
What You’ll Need:
- Old newspaper, cut into strips
- Flour and water (for the paper mache paste)
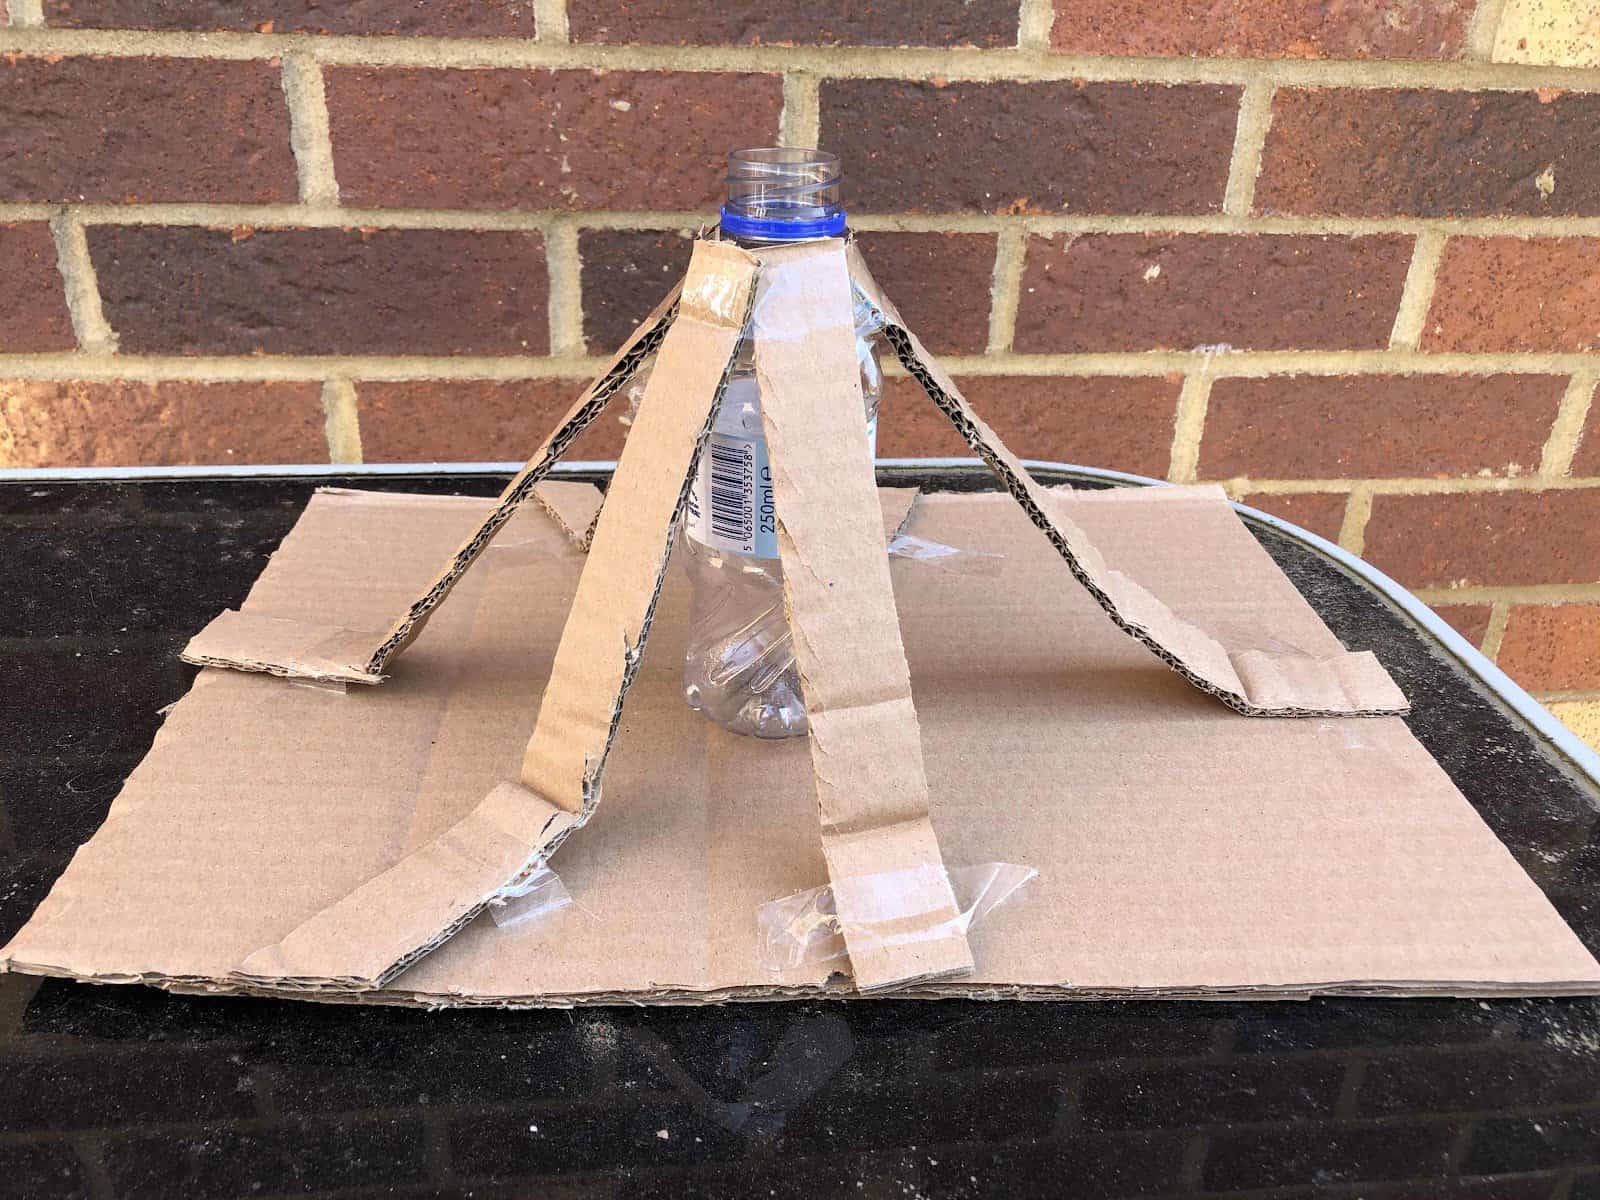
- A plastic bottle (like a soda bottle as the volcano structure)
- Masking tape
- Cardboard (for the base)
- Paints (browns, greens, reds, and oranges for realism)
- Baking soda and vinegar (for the eruption)
- Food coloring (optional, for lava effect)
- Paintbrushes and mixing tools
Step 1: Prepping Your Work Area
Before we begin, it’s important to cover your workspace with newspapers or a plastic tablecloth. Paper mache can get a touch messy (which, let’s be honest, is part of the fun), and we want to make sure cleanup is a breeze.
Step 2: Crafting the Base
Start by cutting a piece of cardboard to serve as the base of your volcano. It should be large enough to hold the volcano and catch any “lava” that might overflow. Place the plastic bottle in the center and secure it with masking tape.
Step 3: Making the Paper Mache Paste
In a large mixing bowl, whisk together one part flour to two parts water to create a smooth paste similar in consistency to pancake batter. You’re aiming for a mixture that’s thick enough to hold the paper strips but thin enough to spread easily. If you prefer, you can also use a ready-made glue solution for convenience.
Step 4: Building Your Volcano
Now the real fun begins! Dip the newspaper strips into the paper mache paste, making sure each piece is well coated. Remove the excess paste by sliding the strip between your fingers, then apply it to the bottle, starting at the base and working upwards in overlapping layers. Remember, volcanoes aren’t perfect cones, so don’t worry if it looks a bit lumpy—that adds to the authenticity!
Once your volcano has at least two to three layers (and once you’re pleased with the shape), leave it to dry completely. This could take up to 24 hours, but it’s necessary for a sturdy creation.
Stay tuned for the next steps where we will talk about painting your volcano, adding the final touches and, of course, making it erupt! Crafting a paper mache volcano is not just a hands-on educational experience—it’s a blast of fun waiting to happen. So, let’s make your mantlepiece or school project the talk of the town with a little bit of science and a lot of creativity!

5 Essential Preparation Tips for Parents Making a Paper Mache Volcano
Tip 1: Ensure Adequate Preparation Time
Parents, it’s important to note that making a paper mache volcano isn’t an instant gratification project. It’s best to plan this activity over a few days. Day one could be for building and drying, and day two can be for painting and erupting. This allows enough drying time for the paper mache and paint, so schedule wisely!
Tip 2: Embrace the Mess
Crafting can get messy, especially with a project as hands-on as paper mache. Prepare yourself and your kids for this by wearing old clothes and keep towels or wipes nearby for quick cleanups. Remember, the mess is part of the memory-making, so don’t let it deter you from the fun!
Tip 3: Supervision is Key
While it’s a kid-friendly project, adult supervision is imperative, especially during the eruption phase where baking soda and vinegar are used. Make sure you guide your children through the process appropriately to ensure their safety and the best outcome.
Tip 4: Customize and Get Creative
Encourage your kids to use their imagination by adding personal touches to their volcanoes. They can paint, add toy figures, or even real plants to make the scene more realistic. This is a chance to make the volcano unique to their vision!
Tip 5: Integrate Learning
Don’t miss the educational opportunity here. Use this project to delve into lessons about geology, chemistry, and even history if you’re up for it. Talk about how real volcanoes work and why they erupt. This will not only make for a fun project but an informative one as well!
Step 5: Painting Your Volcano
Once your structure is bone dry, it’s time to bring it to life with paint! Start with a base coat of brown or grey on the volcano and green for the base, to represent grass or foliage. Once it dries, add more layers to create texture and detail. Kids can get creative by adding “magma flows” with reds, oranges, and yellows. Let the imagination run wild! Allow enough time for the paint to dry out completely.
Step 6: The Grand Finale – Making the Volcano Erupt!
The moment has arrived—it’s time to make your volcano erupt! First, move the volcano to an area that can get a little messy. Then, place a few spoonfuls of baking soda inside the bottle. If you want an extra colorful eruption, mix some food coloring with the baking soda beforehand. When you’re ready for the eruption, pour in the vinegar and stand back to watch the bubbly, fizzy lava flow! It’s an explosive end to a fantastic project and a wonderful way to see chemistry in action.
Creating a paper mache volcano with your kids is a perfect blend of creative expression and scientific exploration. This project not only forges lasting memories with your kids but also ignites their interest in learning. Every step offers a new fun opportunity, may it be crafting with your hands, painting, or witnessing a spectacular eruption.
With this comprehensive guide, you and your kids are set to have an explosive time making and learning about volcanoes. Have a blast and enjoy every moment, you awesome parent, you!
See more great Things to Do with Kids in New Zealand here. For more information see here
Disclaimer
The articles available via our website provide general information only and we strongly urge readers to exercise caution and conduct their own thorough research and fact-checking. The information presented should not be taken as absolute truth, and, to the maximum extent permitted by law, we will not be held liable for any inaccuracies or errors in the content. It is essential for individuals to independently verify and validate the information before making any decisions or taking any actions based on the articles.


