
Craft Your Way to Calm: How to Make Stress Balls at Home
Hello, creative parents and little helpers! ? Are you on the lookout for a fun activity that not only brings your family together but also helps in waving goodbye to those pesky stress gremlins? You’ve clicked the right link because today, we’re diving into the colorful world of DIY stress balls! A perfect craft for any day, these little bundles of joy are not only therapeutic to squeeze but also a blast to make. So, roll up your sleeves, and let’s embark on this squishy adventure together!
Why Make Your Own Stress Balls?
Before we get our hands sticky (quite literally!), let’s chat about why creating your own stress balls can be such a fantastic activity:
- Stress Relief: The primary purpose of a stress ball is right in its name. Squeezing these soft and pliable objects can help reduce stress and anxiety. Plus, the act of making them can be equally stress-relieving!
- Sensory Play: They’re excellent for sensory play, which is vital for children’s development. The textures, squishiness, and the process of creation engage their senses and motor skills in a playful manner.
- Customization: One of the best parts of DIY stress balls is the endless creativity. You can make them in all colors of the rainbow, add glitter, or even make them themed around holidays or favorite characters!
- Family Bonding Time: This is a splendid activity for family bonding. Working on a project together strengthens relationships and creates lasting memories.
Materials You’ll Need
Alright, let’s get into what you’ll need to make your delightful stress balls. Fortunately, you might already have most of these items at home, and if not, they’re easily accessible at your local craft store or online.
- Balloons (12-inch balloons are a good size)
- Flour, rice, or fine sand (your filling of choice)
- A funnel or a DIY paper funnel
- A spoon or something similar to help push the filling through the funnel
- Empty plastic water bottles (to hold the filling and make it easier to pour)
- Scissors
- Permanent markers, stickers, or other decorative items (optional)
Simple Steps to Squeeze-Worthy Success
Now that we have our materials, it’s time to jump into the step-by-step process of creating your stress-relief masterpiece!
Step 1: Prep Your Balloon
First things first, stretch out your balloons a little bit. This makes them easier to fill. You can do this by inflating them once and then letting the air out.
Step 2: Choose Your Filling
What’s going inside your stress ball? Flour makes for a softer feel, whereas rice provides a more textured experience. Fine sand can give you a heavier and more moldable stress ball.
Step 3: Fill ‘er Up
Attach your balloon to the funnel’s narrow end (if you don’t have a funnel, roll up a piece of paper into a cone and snip the end off). Then, pour your chosen filling into the balloon until it’s the size you desire. Remember not to overfill it, as we want to avoid any bursting accidents ?.
With These Tips, You’re Well on Your Way…
You’re doing great! Let’s keep going as we’re halfway through crafting our stress balls. Keep following along as we next dive into sealing them up, decorating, and most importantly, ensuring they’re ready for all the squeezing to come. With a hint of creativity and a sprinkle of love, your DIY stress ball is shaping up to be the perfect handheld stress buster!
Stay tuned for the next steps where we’ll detail how to properly fill, seal, and customize your stress ball for maximum fun and durability. We can’t wait to see what designs and ideas you bring to life in this squishy stress-relief quest!

Step 4: Secure the Opening
Once your balloon is filled to the right size, it’s time to remove it from the funnel carefully. Gently release any excess air without letting any filling escape, and then tie a knot as close to the filling as possible to keep it snug and secure. For added insurance, you can snip the neck of another balloon and stretch it around the first one to double up.
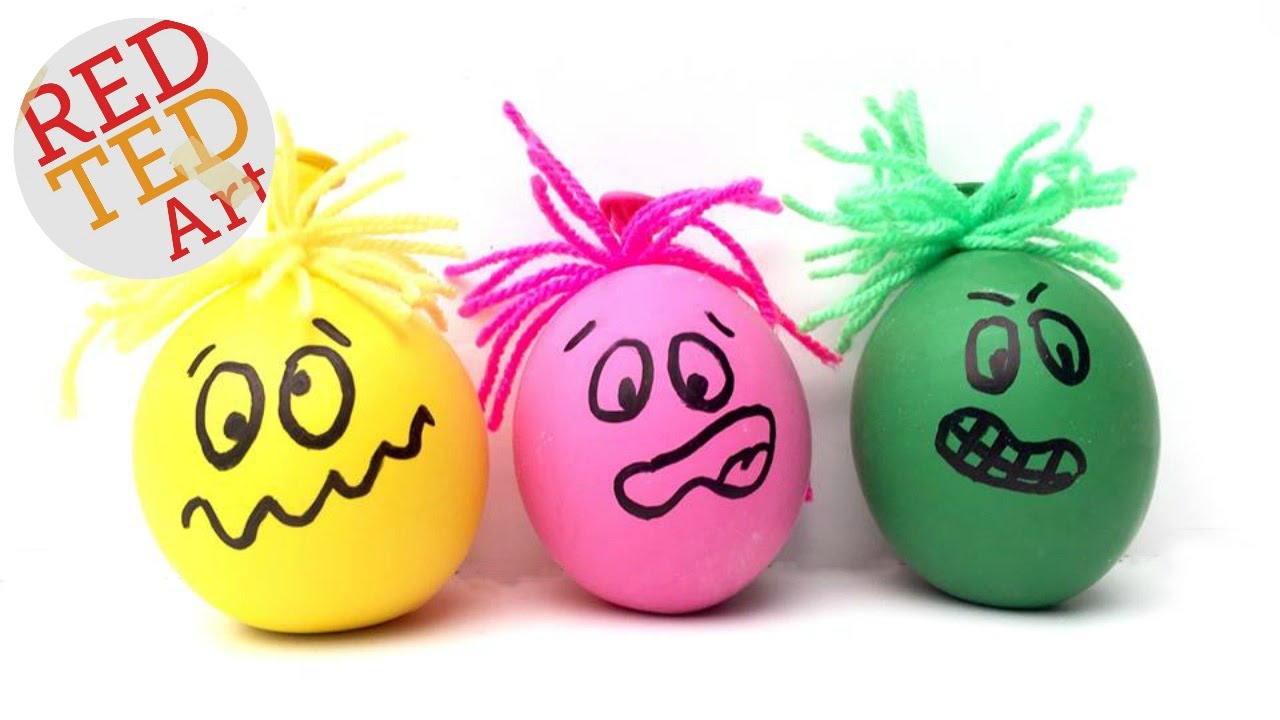
Step 5: Bring Your Stress Ball to Life
Now, the real fun begins! It’s time to transform these simple balloons into vibrant stress-relievers. Use permanent markers to draw faces or patterns, stick on cute stickers, or glue on googly eyes. You can even slip your stress ball into a knitted or crocheted cover for a cozy feel. Just remember to let any adhesive or ink dry completely before handling.
5 Things Parents Should Know When Preparing for Stress Ball Crafting
Here are five essential tips for parents to ensure a successful and enjoyable stress ball making session:
- Pre-Setup is Key: Have all materials ready and set up a designated crafting area. This will help the process go smoothly and keep inevitable messes contained. Lay down newspaper or a plastic tablecloth for easy cleanup!
- Supervise Filling Steps: The filling stage can be tricky, so it’s important to supervise children, especially younger ones. Ensure that they’re not overfilling the balloons and help tie knots if necessary.
- Predict the Mess, Plan to Address: Things might get a little messy – that’s part of the fun! But having a vacuum or broom on hand for cleanup, particularly if you’re using rice or sand, will save you stress later.
- Stay Calm and Craft On: If accidents happen, like a balloon popping, stay cheerful! Keep extra materials on hand and encourage the kiddos that trial and error is all part of the crafting journey.
- Get Creative with Themes: Engage kids further by suggesting themes for their stress balls. Whether it’s seasonal decorations, their favorite animals, or even an emotion spectrum, it can be an opportunity to discuss feelings and mindfulness.
These ideas will help make your stress ball crafting session as delightful as possible, ensuring that the end result is not just the stress balls themselves, but also a happy memory made together. Enjoy twisting, squishing, and squeezing these homemade stress busters!
And remember, this crafting activity is more than just creating something tangible. It’s about the laughter shared while covered in flour, the teamwork when passing the funnel, and the shared sense of achievement when admiring your completed stress balls. Together, you’re not just crafting – you’re building love, patience, and joyful moments. So take a deep breath, gather your crafting troops, and let the stress ball bonanza begin!
Happy crafting, and may all your days be squishy and stress-free!
See more great Things to Do with Kids in New Zealand here. For more information see here
Disclaimer
The articles available via our website provide general information only and we strongly urge readers to exercise caution and conduct their own thorough research and fact-checking. The information presented should not be taken as absolute truth, and, to the maximum extent permitted by law, we will not be held liable for any inaccuracies or errors in the content. It is essential for individuals to independently verify and validate the information before making any decisions or taking any actions based on the articles.


