
How to Make Toffee: A Sweet Adventure in Your Kitchen!
Welcome, sweet-toothed parents and enfants gourmands! If you are looking to whip up a buttery, rich treat that’s sure to bring smiles to your family’s faces, you’ve landed on the right page. Making toffee at home can be a delightful bonding activity that’s not only fun but also incredibly rewarding. So, put on your chef’s hats, and let’s embark on a sugary journey to create the perfect toffee!
Why Make Toffee at Home?
Before we dive into the cauldron of caramel goodness, let’s talk about why making toffee at home is a fantastic idea. Homemade toffee is not just fresher; it’s free of preservatives and can be customized to your family’s taste preferences. Not to mention, the process of making toffee can be educational for kids, teaching them about temperatures, precision, and patience—sweet life skills all rolled into one delicious experience!
Gathering the Ingredients
The magical thing about toffee is its simplicity. Here’s what you’ll need:
- 1 cup (2 sticks) of unsalted butter
- 1 cup of granulated sugar
- 1/4 cup of water
- A pinch of salt
- 1/2 teaspoon of vanilla extract (optional, for flavor)
- Optional toppings: chopped nuts, chocolate chips, sprinkles, or sea salt
Equipment Checklist
Make sure you have the following tools to make your toffee-making process smooth:
- Heavy-bottomed saucepan
- Candy thermometer
- Wooden spoon or heat-resistant spatula
- Baking sheet or a shallow pan
- Parchment paper or a silicone baking mat
- Brush for brushing down sugar crystals (optional)
Preparing Your Workspace
Clean countertops, readied equipment, and organized ingredients lead to cooking success and safety. Lay out the parchment paper or silicone mat on the baking sheet, as you’ll need to pour the hot toffee onto this surface later. And keep the little ones at a safe distance once the heat is on, as we wouldn’t want any candy burns!
The Toffee-Making Process
Every step in the toffee-making process is crucial. Here’s the breakdown:
1. Melting the Butter
Begin by melting the butter in the saucepan over medium heat. It’s important to use medium heat to avoid burning. Stir gently, allowing the butter to melt completely.
2. Addition of Sugar and Water
Once the butter is melted, add the granulated sugar, water, and salt. Stir the mixture continuously to ensure the sugar dissolves and ingredients combine smoothly. This is the point where patience is key: keep stirring to prevent the sugar from sticking to the bottom of the pan and burning.
3. Cooking to Perfection
Here comes the science part! Insert the candy thermometer into the mixture without it touching the bottom of the pan. You’re aiming for the toffee to reach the hard-crack stage, which is between 300°F to 310°F (149°C to 154°C). If you don’t have a candy thermometer, you can drop a little of the mixture into cold water; if it forms hard, brittle threads that snap easily, it’s ready.
4. Pouring and Cooling
Once your toffee reaches that sweet spot of 300°F to 310°F, remove the pan from the heat. If you’re using vanilla or any other flavorings, now is the time to stir them in. Pour the hot toffee onto the prepared baking sheet and spread it to your desired thickness. Work quickly and carefully—the toffee will start to set as it cools.
Now, wasn’t that a fun start to our toffee-making adventure? The next steps will be all about adding toppings, letting your toffee cool, and sharing some pro tips to ensure your homemade toffee turns out flawless. But for now, give yourselves a pat on the back for getting the toffee to this stage. Great job, chefs!
Stick around for the next portion of the guide where we’ll reveal the secrets to the perfect toffee finish, how to store your toffee, and creative ways to use your toffee in other desserts. Because the journey of toffee-making is just as sweet as the end result!

5 Important Tips for Parents Preparing Toffee at Home
Before you don your aprons and start melting butter, take a peek at these important tidbits to ensure your toffee adventure is both fun and successful!
1. Safety First
When cooking with high temperatures, safety should be your top priority. Ensure that children are supervised at all times, especially during the boiling phase. It’s advisable to handle the saucepan and pouring steps yourself, and let the kiddos help with measuring and adding toppings once the toffee is safely on the tray.
2. Temperature Precision
Investing in a good quality candy thermometer can make a world of difference. The temperature of your toffee mix is the deciding factor between perfect toffee and a crystallized or burnt mess. Keep a steady eye on the thermometer, and don’t let the excitement cause you to rush the process!
3. Consistent Stirring
Never underestimate the power of consistent stirring. It helps to prevent the sugar from crystallizing and burning. It’s a great way to get the kids involved — assign them as the chief stirrers (with caution, of course)!
4. Right Equipment
Using a heavy-bottomed saucepan is vital as it distributes the heat more evenly and prevents hot spots that could burn the sugar. Also, ensure your baking sheet is properly lined to avoid the toffee sticking and becoming hard to remove.
5. Patience Pays Off
Toffee making is not a race; it’s a marathon of precision and patience. The sugar mixture needs to change color gradually to a deep amber; pulling it off the stove too early or too late could result in toffee that’s too soft or too hard. Also, allow ample cool-down time for the toffee to set and harden before breaking it into pieces.
With these nuggets of wisdom in your chef’s pocket, you’re nearly ready to tackle the art of toffeecraft. Next up, let’s jump into toppings for your glistening gold toffee sheets and pro tips for storage and indulging. Keep those stirring spoons at the ready!
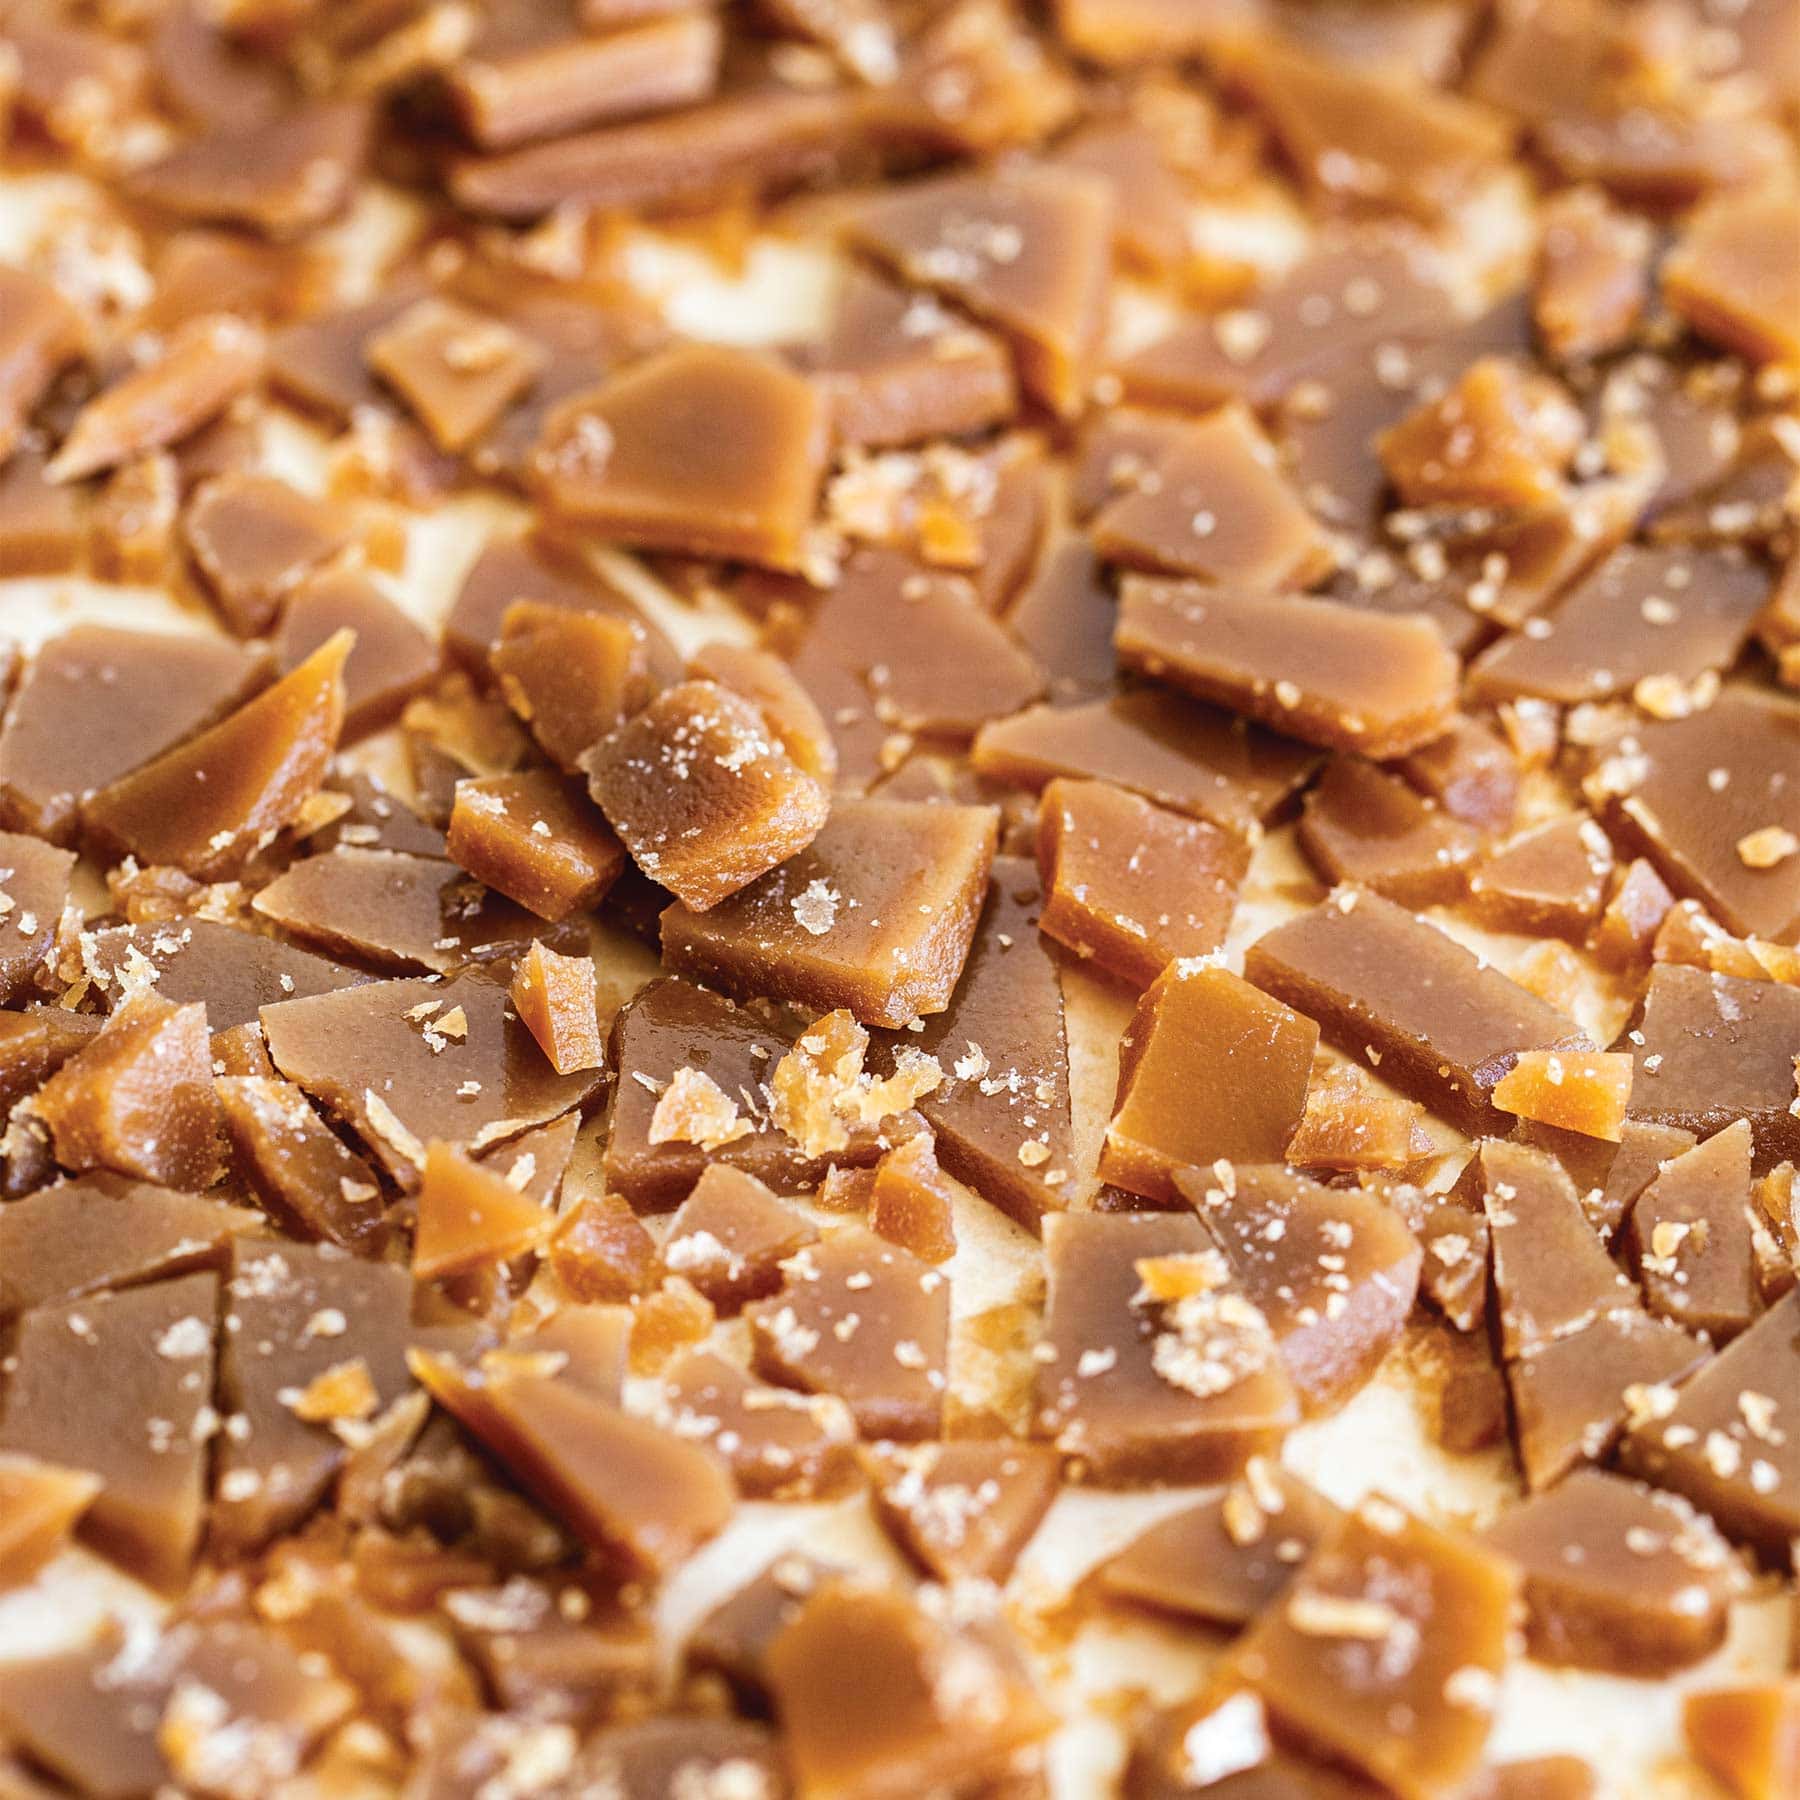
Adding Toppings and Finishing Touches
While the toffee is still warm and just beginning to set, sprinkle your choice of toppings over the top. Chopped nuts, sea salt, or chocolate chips can create a fabulous texture and taste contrast. Press lightly to embed them into the toffee’s surface. As it cools, these delights will become part of the toffee’s irresistible charm.
Storing Your Toffee
Once your toffee has completely cooled, break it into pieces and store in an airtight container. Toffee can last up to two weeks if kept at room temperature and away from moisture — that’s if your family can resist not gobbling it all up in one day! Pro tip: lay parchment paper between layers of toffee to prevent sticking.
Getting Creative with Your Toffee
Your homemade toffee can be more than just a standalone treat. Crush it into bits and sprinkle over ice cream, blend into milkshakes for a caramel crunch, or use it to decorate cakes and cupcakes. Toffee bits can add a delightful twist to holiday cookies or be gifted in lovely jars with ribbons for that personal touch.
Now that you’re armed with all the know-how, it’s time to channel your inner confectioner and turn your kitchen into a toffee wonderland. Embrace the process, share laughs and learning moments, and soon you’ll marvel at your own homemade toffee — a testament to your family’s teamwork and culinary zest.
Remember, the beauty of toffee is in its simplicity and the shared joy it brings. There’s a special kind of magic that happens when families create together. So gather your ingredients, rally the troops, and let the sweet journey commence!
For more great articles please see here. For more information see here
Disclaimer
The articles available via our website provide general information only and we strongly urge readers to exercise caution and conduct their own thorough research and fact-checking. The information presented should not be taken as absolute truth, and, to the maximum extent permitted by law, we will not be held liable for any inaccuracies or errors in the content. It is essential for individuals to independently verify and validate the information before making any decisions or taking any actions based on the articles.


