
Craft Your Own Adorable Bunny Ears with the Kids!
Hey there, creative moms and dads! Are you looking to hop into some fun and crafty activities with your little ones? Well, you’re in luck because today we’re discussing how to make bunny ears that are perfect for dress-up, storytelling, or the upcoming Easter festivities! Let’s get ready to add some fluffy fun to your family time.
Materials You’ll Need:
- Headband (plain works best)
- Construction paper or felt sheets (white and pink)
- Scissors
- Glue or hot glue gun (with adult supervision)
- Cotton balls or fluffy fabric for extra fluffiness (optional)
- Wire (for posable ears, if desired)
- Measuring tape or ruler
- Marker or pen
Before we dive into the fluffy world of bunny ear creation, remember that this activity is not just about making a cute costume prop. It’s an incredible opportunity for you and your children to bond, practice fine motor skills, and unleash your creativity!
Step 1: Preparing Your Headband
Start by selecting a comfortable headband that fits your child’s head well. Plain headbands are fantastic because they allow your bunny ears to really stand out. If you’re feeling extra creative, feel free to choose a color that matches the intended outfit or occasion. A little tip: choosing a fabric-covered headband can make gluing things on just a bit easier!
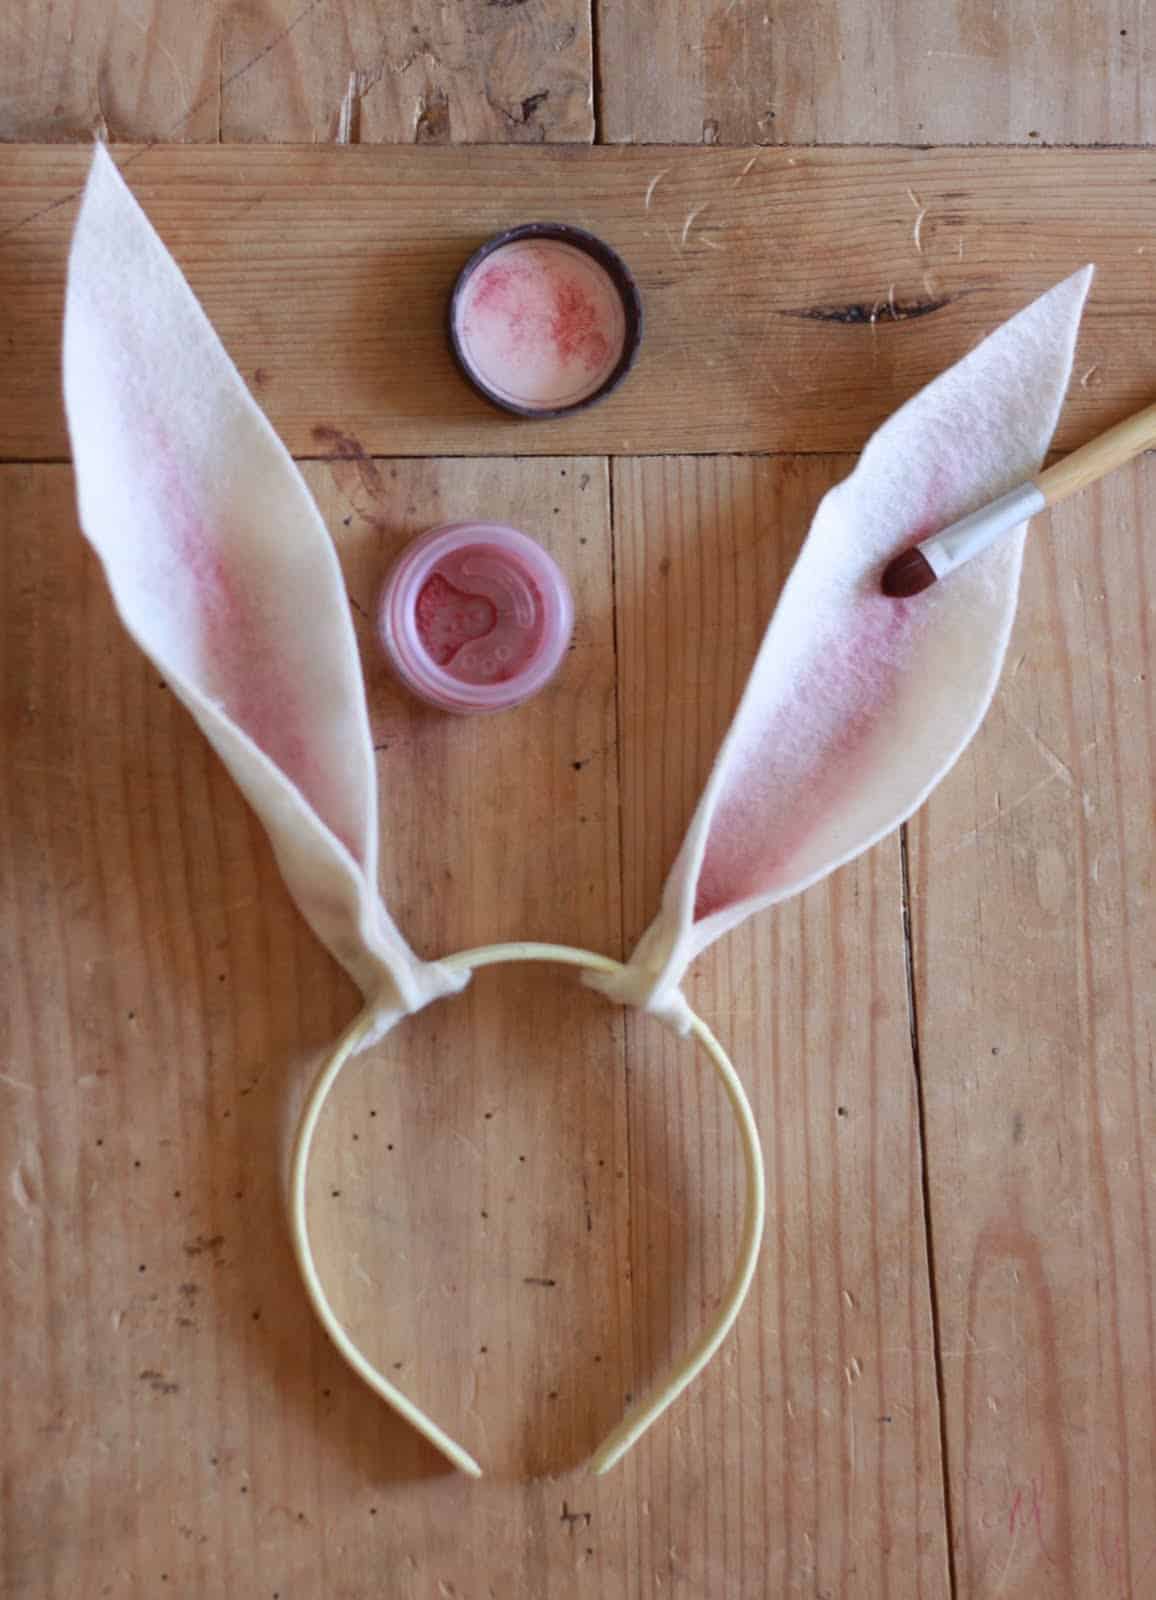
Step 2: Cutting Out the Ears
Using the construction paper or felt, trace out two long ear shapes for the outer part of the ears. Bunny ears come in all shapes and sizes, so this is where you can tailor your craft to your child’s preference: do you want long and loppy ears or short and perky ones? Go ahead, customize those bunny ears to your heart’s content! After tracing, cut out the ears with scissors.
Next, trace and cut smaller pieces out of pink paper or felt to represent the inner ear. These should be slightly smaller than the white shapes you’ve already cut, as they will be layered on top.
Step 3: Adding Structure to the Ears (Optional)
If posable ears are on your wishlist, this step is for you. Cut wire pieces a little shorter than the length of the ears. Then, bend the wire to match the shape of the ears and carefully glue them along the edge of the white ear pieces, leaving a small margin. This will allow your child to bend the ears to their liking and adds an adorable, realistic touch!
Step 4: Bringing Your Bunny Ears to Life
Start by gluing the pink pieces onto the white ones to create that iconic bunny ear look. Then, attach the entire ear to the headband. If you’re using the wire, make sure it is sandwiched between the headband and the paper or felt. For extra security and durability, especially if your kiddos are going to be hopping around a lot, you may want to reinforce the attachment with more glue or even a few discreet stitches.
If you’ve opted for the fluffy touch, glue some cotton balls or a piece of fluffy fabric to the bottom of the ears where they meet the headband. It adds a cute and cozy dimension to your handmade bunny ears!
Your bunny ears are nearly finished! At this point, you can add extra decorations if you wish – think sparkles, sequins, or anything that makes your child’s heart twinkle with joy. Remember, the most essential ingredient in this craft is the fun you have while creating it.
By following these steps, you’ll have an adorable pair of bunny ears ready for playtime storytelling, an Easter celebration, or even just a fun afternoon of dress-up. Crafting with your kiddos is about the smiles, the laughter, and the memories made along the way. And, who knows, your fluffy bunny ears might just become a beloved accessory in their costume box!
Stay tuned for more creative ideas and crafting delights. Your journey into the land of imagination and family bonding is just beginning, and we’re here to guide you every hop of the way!
Five Things Parents Should Know in Preparing for How to Make Bunny Ears
- Safety First: When embarking on this crafty adventure, safety should always be your top priority. Ensure that scissors, wire cutters, and hot glue guns are used with close adult supervision. Child-safe scissors and non-toxic glue are great alternatives to keep the little ones safe during crafting time.
- Quality Time Over Perfect Ears: Remember, the objective is to have fun and bond with your kids. The final look of the bunny ears is secondary to the experience shared. Allow your children to take charge where possible, and don’t fret over crooked cuts or uneven glue lines—these imperfections add character!
- Preparation is Key: Before starting, make sure you have all your supplies ready and accessible. Pre-cutting materials or having everything laid out on a crafting table can streamline the process and keep potential messes to a minimum.
- Customization Encouraged: Let your child’s imagination run wild! Encourage them to think of ways they can personalize their bunny ears. Would they like to add stickers, use different colors, or perhaps even combine materials? This is a fantastic way to nurture their creativity.
- Reusable Resources: After the craft is done, don’t throw away scraps or unused materials. Store them properly as they can be used for future crafts. Not only does this teach resourcefulness, but it also encourages eco-friendly practices.
With these tips in mind, you’re now equipped to create not just bunny ears, but lasting memories with your children. So, let’s hop to it and start crafting!
Finalizing Your Bunny Ears and Creative Ideas for Use
Once your bunny ears are completed, take the time to make sure everything is secure and ready for wear. If you’ve used a hot glue gun, check for any rough spots where the glue may have dried and use scissors to carefully trim these away to ensure comfort during wear.
Now, your child’s new bunny ears aren’t just for Easter. They can be a wonderful addition for various playful occasions:
- Integrate them into storytime as a prop for books about rabbits or Easter.
- Wear them on a family fun day or during family photos for a burst of cuteness and giggles.
- Use them as a learning tool to educate about animals and the importance of being kind to our furry friends.
- Incorporate the ears into a costume for a play or a school event.
- Simply put them on for an imaginative playtime session within the comfort of your home.
With your newly crafted bunny ears, the possibilities for creative fun are endless. Give your children the gift of imaginative play while also teaching them valuable skills and the joy of creating something with their own hands. Keep hopping along the trail of creativity—your next family crafting project awaits!
See more great Things to Do with Kids in New Zealand here. For more information see here
Disclaimer
The articles available via our website provide general information only and we strongly urge readers to exercise caution and conduct their own thorough research and fact-checking. The information presented should not be taken as absolute truth, and, to the maximum extent permitted by law, we will not be held liable for any inaccuracies or errors in the content. It is essential for individuals to independently verify and validate the information before making any decisions or taking any actions based on the articles.


