
How to Make Concrete Pots and Planters: A DIY Guide for Green-Thumbed Parents
Hey there, super parents! Are you looking for an exciting project that combines your love for crafting with your affection for greenery? Well, buckle up, because we’re about to dive into the wonderful world of making concrete pots and planters! This is more than just an activity; it’s an experience to share with your little ones, nurturing their creativity and your home garden at the same time. Let’s get our hands a little dirty and create some unique, sturdy homes for your beloved plants. ??
Why Concrete Pots?
Before we roll up our sleeves, let’s talk about why concrete is the perfect material for your botanical buddies. Concrete planters are not just trendy; they are durable, customizable, and oh-so-chic! These pots can withstand the elements, making them ideal for both indoor oases and outdoor retreats. With a dash of imagination and a sprinkle of patience, you can create one-of-a-kind designs that reflect your family’s personality. ?
Gather Your Supplies
First things first – you’ll need to get your supplies. Here’s a checklist to get you started:
- Portland cement: This will be the primary ingredient in your concrete mixture.
- Sand: It helps to strengthen your cement and gives a smoother finish to the pots.
- Aggregate: For larger planters, gravel or perlite can be added to the mix for more stability.
- Water: Essential for binding the dry ingredients together – but be sure to add it gradually!
- Molds: You’ll need two for each pot – one larger for the outside and a smaller one to shape the inside cavity. Get creative with items like old containers, buckets, or boxes!
- Cooking oil or non-stick spray: This is to coat your molds and ensure your concrete doesn’t stick.
- Mixing tools: A bucket for mixing and a trowel or a sturdy stick will do the trick.
- Safety gear: Concrete can be harsh on skin and harmful if inhaled, so use rubber gloves, a dust mask, and protective eyewear.
- Embellishments: One of the joys of DIY is making things your own – consider pebbles, tiles, or even colored pigments to decorate your pots and planters.
With your arsenal ready, you’re on the path to becoming a concrete pot connoisseur!
Designing Your Pots
Decide on the size and shape before you begin. The only limit is your imagination and the molds you choose. Cylinders, cubes, or even more complex geometric shapes—it’s completely up to you! Remember that when considering size, you need to account for the thickness of the concrete walls. Typically, around an inch or two will do, but this can vary depending on the overall size of your pot.
Mixing Your Concrete
It’s time to mix! Combine the Portland cement, sand, and aggregate (if using) in your bucket. Start with a ratio of 1 part cement to 2 parts sand for a basic mix, adjusting as necessary for size and strength. Add your water slowly and mix until you reach a smooth, peanut-butter-like consistency. If it’s too thick, it will be hard to work; too thin, and it won’t hold its shape.
Pro tip: Mix a little at a time to ensure you don’t waste materials or your mixture doesn’t dry out before you use it.
And there you have it, super parents – the beginning steps of creating your very own concrete pots and planters! Stick with me, and soon you’ll be filling your home and garden with your handcrafted containers. Coming up next, we’re diving into the casting process, where you’ll learn how to shape and customize your creations. Remember: This is not just about the end product, it’s about the fun you have making something beautiful with your hands. ?????????
Stay tuned, because we’re just getting started on this crafty adventure—up next, casting and curing your DIY marvels!
Five Things Parents Should Know When Preparing to Make Concrete Pots and Planters
1. Plan Ahead for Mess and Safety
Concrete crafting is messy but super fun! Before starting, ensure you have a workspace that can handle the splatter and spills, like a garage floor or an outdoor area. Lay down plastic sheets or a tarp to protect surfaces, and always keep your trusty cleanup kit at the ready. Safety is paramount when crafting with kids, so establish clear rules, such as no touching of the face while handling concrete, and always supervise closely.
2. It’s a Time-Sensitive Activity
Keep in mind that concrete begins to set relatively quickly. You’ll want to have everything prepped ahead of time to avoid a mid-project scramble. Timing is especially crucial once you start mixing. Make sure that the kids are ready to participate and are finished with any last-minute bathroom breaks or snack time!
3. Be Patient During the Curing Process
Concrete takes time to dry and cure fully, so patience is a virtue in this project. Explain to the kiddos that it may take a couple of days before they can see their finished creations. While waiting, you can plan for the next steps, like painting or planting, which can be equally exciting for the little ones. Marking the reveal day on the calendar can build anticipation and make it a special event for the whole family!
4. Customization Is Key
Part of the joy in making concrete pots is the ability to customize them. From choosing the shape and size to adding color and texture, get creative! Involve the kids in choosing embellishments or textures they’d like to see in the final product. This not only adds a personal touch but also gives them a sense of pride in creating something unique.
5. Embrace Imperfections
DIY projects come with their own set of imperfections, which are part of the charm! Don’t stress over the small cracks or uneven edges, as they add character to your pots. Teaching kids that it’s okay if everything isn’t perfect fosters a healthy mindset and encourages them to love the process, not just the outcome.
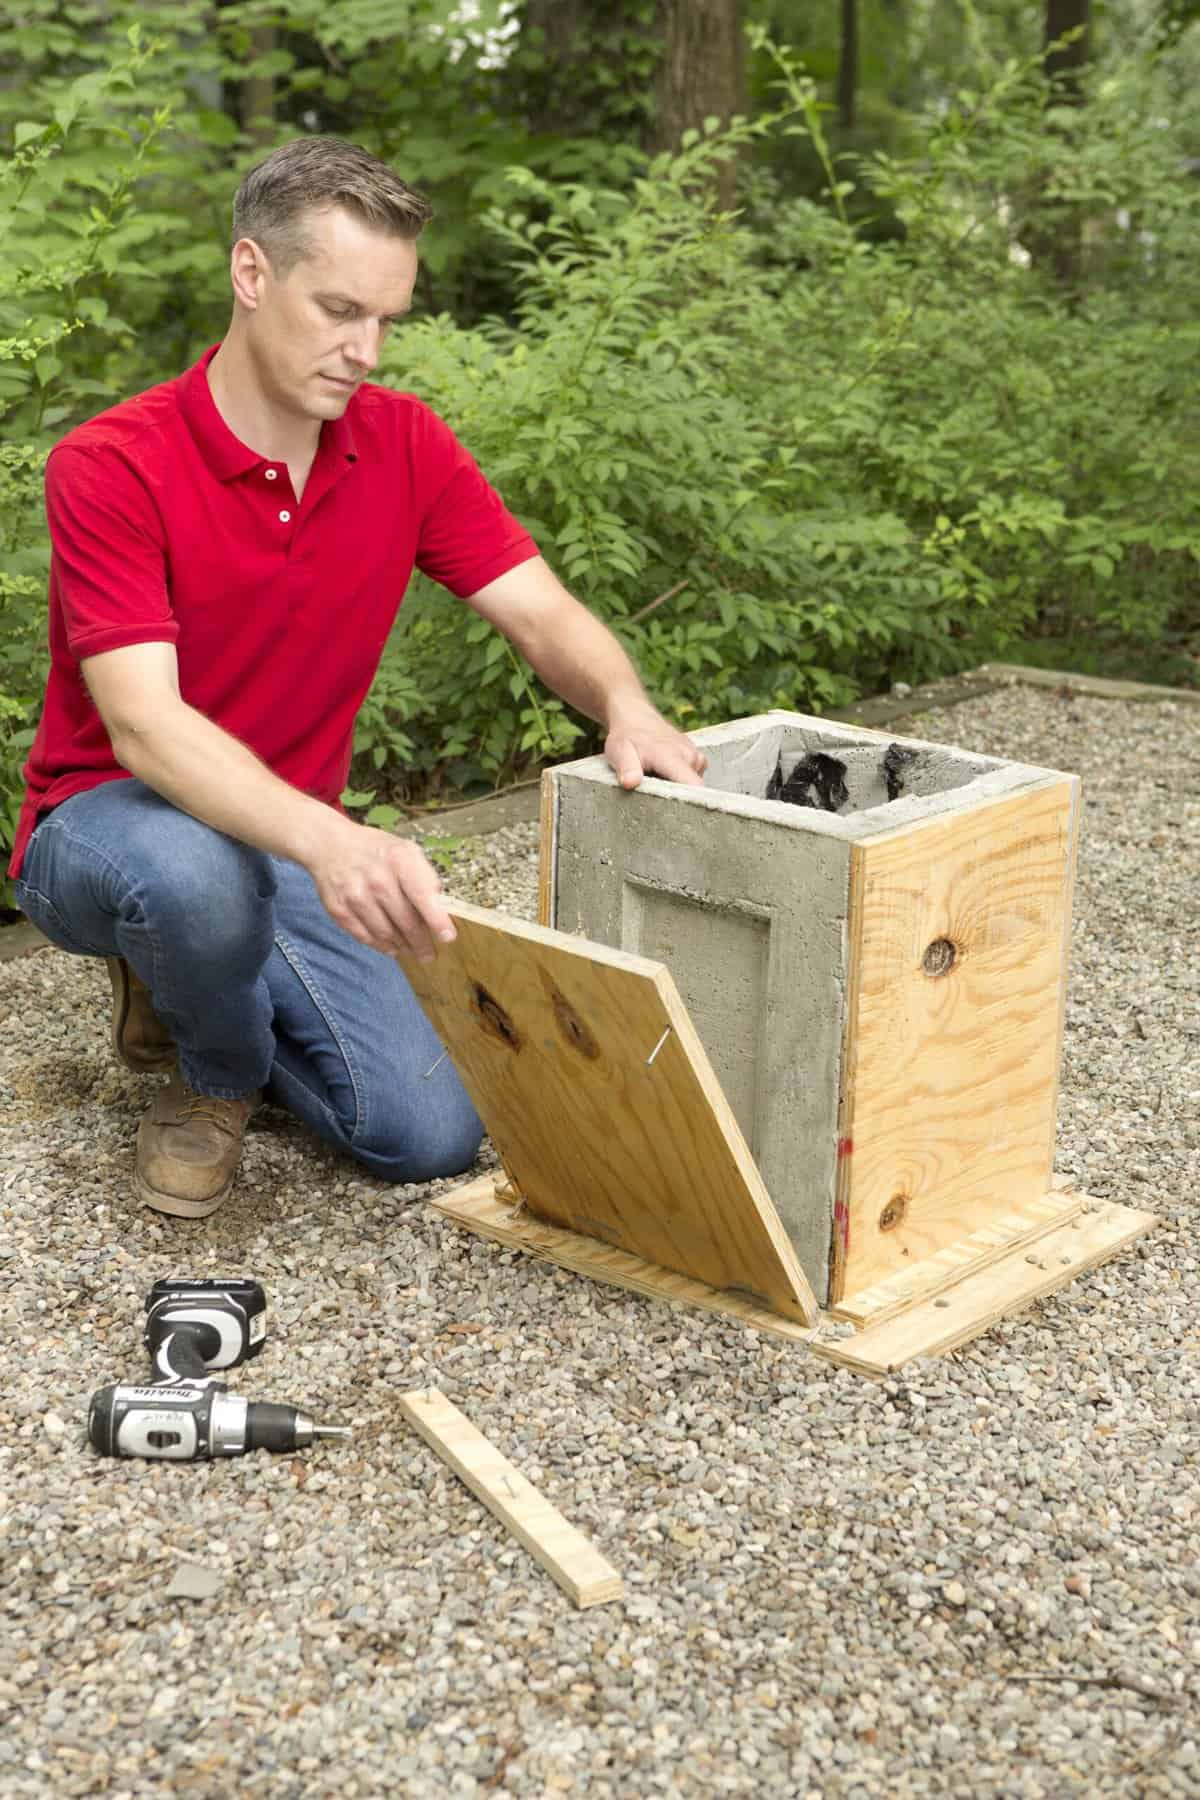
Casting Your Concrete Pots
Once your concrete mix is ready, it’s showtime! Grease your molds with cooking oil or non-stick spray. Carefully pour the concrete into the larger mold until it’s about halfway full. Then, press the smaller mold inside, maintaining an even gap around the edges. You can add weights to the inner mold to keep it from floating up. Tap the sides gently to remove any air bubbles and create a smooth finish.
Finishing Touches
After the concrete sets, usually taking 24 to 48 hours, gently remove the molds. Smooth any rough edges with sandpaper, and allow the planters to cure further. If you want to add color, now is the time for you and your little artists to pick up the paintbrushes. Use outdoor or acrylic paints for a durable finish. Don’t forget to drill drainage holes in the bottom to keep your plants happy and healthy!
Populating your concrete creations with plants is the final exciting step of the journey. Choose a mix of succulents, herbs, or flowers, and involve the kids in planting them. This moment of seeing a seed bloom in a pot made with love is magical for both you and your children. Happy planting, and enjoy the lush life you’ve crafted by hand!
See more great Things to Do with Kids in New Zealand here. For more information see here
Disclaimer
The articles available via our website provide general information only and we strongly urge readers to exercise caution and conduct their own thorough research and fact-checking. The information presented should not be taken as absolute truth, and, to the maximum extent permitted by law, we will not be held liable for any inaccuracies or errors in the content. It is essential for individuals to independently verify and validate the information before making any decisions or taking any actions based on the articles.


