
A Delightfully Easy Guide for Parents: Making a Milo Cake in the Microwave
Hello to all fabulous and hardworking parents out there! Welcome to a simple yet drool-worthy guide where you will learn about making delicious Milo cake in the microwave. Yes, you read it right! No need for elaborate baking methods or expensive ingredients. Just a few simple steps and voila, you have yourself a scrumptiously moist and chocolatey Milo cake, ready to enjoy.
Why Choose a Microwave Milo Cake?
Before we dive into those mouth-watering steps, let’s talk about why a Microwave Milo Cake is the perfect choice for you.
Firstly, it’s super simple to make! With this recipe, you don’t have to worry about time-consuming preparation or cleaning up a load of greasy baking utensils. A microwave works just perfectly! Secondly, it’s beyond delicious and will undoubtedly satisfy you and your kid’s sweet cravings. Last but not least, the ingredients required are likely to be found in any parent’s pantry. That’s right; no extravagant shopping trips needed – it’s efficient and budget-friendly!
Gather The Ingredients
The first thing you want to kick start your microwave Milo cake journey is to gather the right ingredients. The good news is that most of these are probably already sitting on your kitchen shelves!
Easy-to-Follow Cooking Instructions
Once you have all the required ingredients, let’s get started with our easy-peasy steps. This section of the guide will walk you through each step required to make your microwave Milo cake. It’s equitable to build a delicious Lego tower, each layer adding onto the last with a result that is absolutely delightful!
Stick with us and get excited to treat yourself and your little ones to a delicious dessert. Enjoy the joy of making something beautiful out of every day, simple ingredients, and fill your homes with the mouth-watering aroma of baked Milo cake. Let’s get started on this decadently delicious journey together!
The Magic Ingredients
You’ll only need a handful of simple ingredients for this recipe:
1. 4 heaped tablespoons of Milo
2. 4 tablespoons of self-rising flour (If you don’t have self-rising flour, mix 1 cup all-purpose flour, 1.5 teaspoons of baking powder, and 0.5 teaspoon of salt)
3. 4 tablespoons of sugar
4. 1 egg
5. 3 tablespoons of milk
6. 3 tablespoons of oil
Step-By-Step Instructions for Making Your Milo Cake
Step 1: Mix it up!
Combine your Milo, flour, and sugar in a microwave-safe cup or mug. Make sure they are well mixed with no lumps, to ensure a smooth cake.
Step 2: Break in the Egg
Next, crack in your egg into the Milo mixture. This will help give your cake a fluffy texture.
Step 3: Pour in the Milk and Oil
Add your milk and oil to the mix. These two simple ingredients will help keep your cake moist and rich in flavor.
Step 4: Whisk it, Whisk it real good!
Using a small whisk or fork, mix everything until you get a smooth cake batter. Yes, it’s as simple as that!
Step 5: The Micro-Magic!
Once your muffin batter is ready, put it in the microwave. Cook the cake on high for 1 minute and 30 seconds. Be sure to keep a close eye on your cake to avoid any mess.
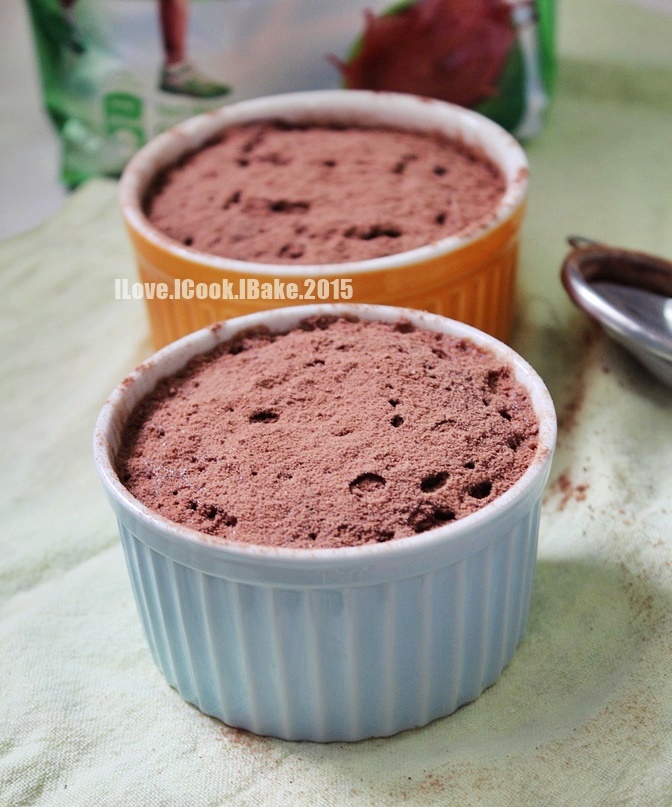
Step 6: Let it Cool and Enjoy!
Take your cup or mug out of the microwave very carefully, it will be hot! Let it cool for a minute or two before digging in. And voila, your Milo cake is ready to be enjoyed!
Conclusion
Here you have it, an easy, delicious, and child-friendly microwave Milo cake. The next time you’re looking for a dessert solution that is quick yet satisfying, remember this little gem. Enjoy your cooking journey and let your home be filled with the warmth and aroma of this delightful treat. Happy baking!
5 Essential Things Parents Should Know When Preparing Milo Cake in a Microwave
Milo Cake is a fun and easy-to-prepare dessert beloved by children. As such, it holds an ideal opportunity for bonding. Here are five pointers for parents during this delightful experience:
1. Ingredients Preparation
To make a Milo Cake in a microwave, you’ll need basics like flour, sugar, eggs, milo (or any malted milk powder) along with baking powder and milk. Having all your ingredients ready before starting will make the process efficient and enjoyable.
2. Microwave Settings
Microwaves vary in power. For perfect Milo Cake, you’ll need to adjust the cooking times according to your microwave’s wattage. Generally, a medium to high setting would be suitable, but it’s advisable to start low and increase gradually to avoid overcooking.
3. Safety Measures
Microwaves can heat unevenly, thus make sure that the batter is evenly spread in the microwave-safe dish. Also, explain to your kids about the safety measures when using a microwave. Always use microwave-safe dishes and avoid the use of metallic materials as it can cause electrical sparks.
4. Let the Cake Rest
Once the Milo Cake is done in the microwave, let it cool for a few minutes before removing it. This ensures the cake firms up for easy removal without crumbling.
5. Decorate Together
The final, and possibly most exciting step, is decorating! This allows your child to add their favorite toppings, like whipped cream, fresh fruits, and more Milo powder.
In summary, preparing a Milo Cake in a Microwave is a quick and enjoyable activity that offers a chance for parents and children to bond. By following these convenient tips, you’re on your way to creating delightful memories and delicious Milo Cake!
For more great articles please see here. For more information see here
Disclaimer
The articles available via our website provide general information only and we strongly urge readers to exercise caution and conduct their own thorough research and fact-checking. The information presented should not be taken as absolute truth, and, to the maximum extent permitted by law, we will not be held liable for any inaccuracies or errors in the content. It is essential for individuals to independently verify and validate the information before making any decisions or taking any actions based on the articles.


