
The Ultimate Guide to Making the Perfect Slime: Fun Tips for Parents
Welcome to the enchanting world of slime, where creativity and sensory play come together to create hours of fun for kids! As parents, you might be familiar with the immense joy that this gooey substance brings into your children’s lives. But, are you ready to become the ultimate slime master? Look no further! Our comprehensive guide is designed to walk you through the exciting journey of making perfect slime, guaranteeing a smile on your little ones’ faces. So grab your aprons, roll up your sleeves, and let’s dive into the magical world of slime-making!
What You Need to Know Before Making Slime
Making slime is not just fun; it’s also a great learning experience for your kids. It introduces them to basic concepts of chemistry, enhances their fine motor skills, and fuels their creativity. But before you start, there are a few things you need to consider:
- Choose the Right Recipe: Depending on your preference for texture and ingredients on hand, there are various recipes to try. We’ll cover some of the most popular ones.
- Safety First: Always use safe, non-toxic ingredients and supervise younger children during the process.
- Preparation is Key: Make sure you have all the ingredients and tools ready before you begin to make the process smooth and enjoyable.
Gathering Your Materials
For most basic slime recipes, you’ll need the following items:
- Glue (white or clear PVA works best)
- Borax powder or liquid starch
- Water
- Food coloring (optional)
- Glitter or confetti (optional)
- A mixing bowl
- A mixing spoon or spatula
- Measuring cups and spoons
- Airtight containers for storage
Once you’ve gathered your materials, you’re all set to begin the slime-making adventure!
Basic Slime Recipe: Easy and Fun
The classic slime recipe is simple and perfect for beginners. Here’s how you can make it:
- In a mixing bowl, pour 4 oz of glue.
- Add a few drops of food coloring if desired, and stir until the color is evenly distributed.
- If you want to add glitter or confetti, now’s the time to sprinkle it in and mix well.
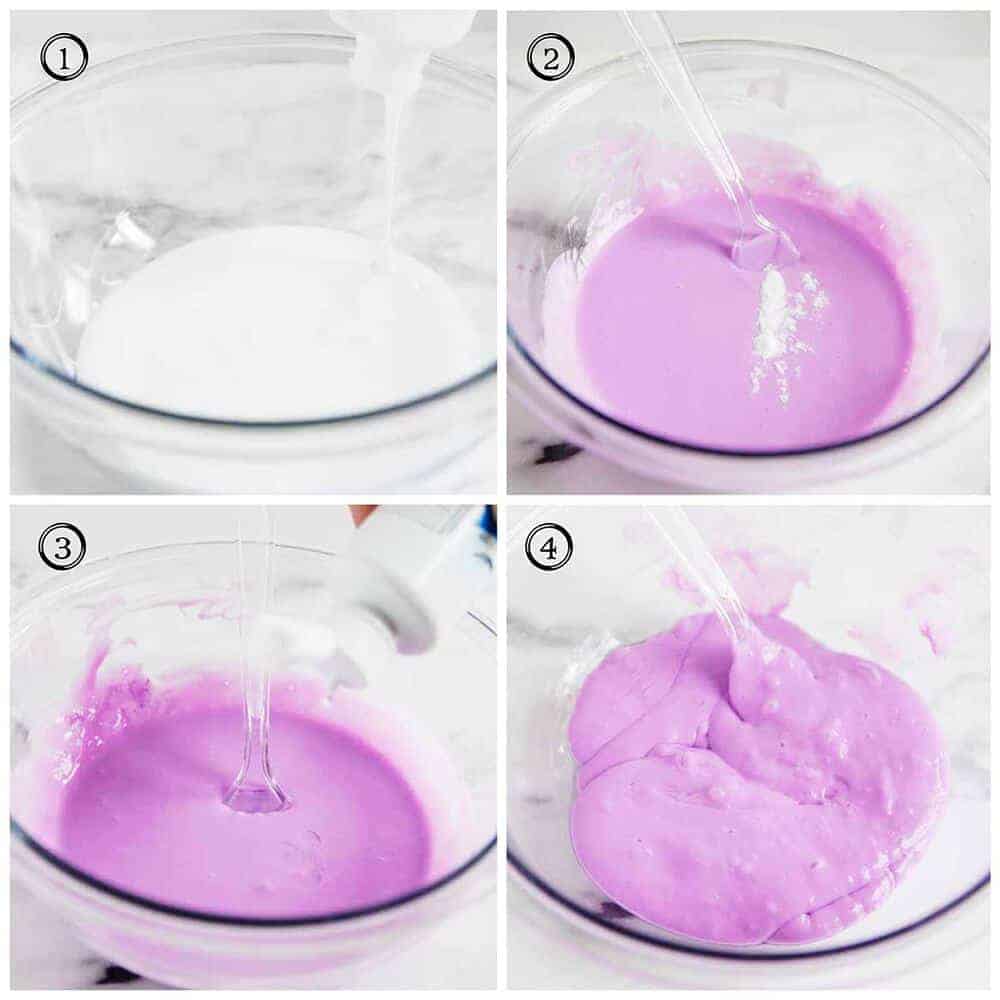
- In a separate container, mix 1/2 teaspoon of Borax powder with 1 cup of warm water and stir until fully dissolved to create your slime activator.
- Slowly add the Borax solution to the glue mixture, stirring constantly. You’ll notice the slime beginning to form right before your eyes!
- Keep mixing until the slime pulls away from the sides of the bowl and starts to clump together.
- Knead the slime with your hands for a few minutes to achieve the ideal consistency.
- Voila! Your basic slime is ready for playtime.
Remember, making slime is all about experimenting and having fun. Don’t worry if your first batch isn’t perfect; with a little practice, you’ll be whipping up the best slime in town! Store your slime in an airtight container to keep it fresh for the next play session.
Tips for Slime Success
- To prevent the slime from sticking to hands, make sure to knead it well before playing.
- If the slime is too sticky, add a little bit more of the Borax solution. If it’s too stiff, add a bit more glue.
- For sensory play, consider adding different textures like foam beads or small plastic toys.
- Slime is a wonderful tool for stress relief and can also be used by adults to relax!
- Always have your little ones wash their hands after playing with slime to avoid any possible skin irritation.
There you have it, parents! You’re now equipped with the essential knowledge and tips to begin your slime-making journey with confidence. Remember, the key to making good slime is patience, practice, and a pinch of creativity. So go ahead, experiment with different colors, textures, and ingredients, and most importantly, have fun with your children as you explore the endless possibilities of slime! With this guide, we hope to spark joy and creativity in both you and your kiddos, making those moments together even more special. And hey, who knows? You might just find yourself enjoying the slime just as much as they do!

Five Things Parents Should Know in Preparing for How to Make Good Slime
- Variations for Different Consistencies: Understanding the science of slime can help you achieve the consistency your child loves. The amount of activator you add changes the viscosity. Play with ratios to discover everything from stretchy to fluffy slime.
- Quality Ingredients Matter: Invest in good quality PVA glue as the base of your slime. This ensures the slime comes together well and lasts longer. Similarly, opt for reputable brands of activators to avoid any unwanted reactions or weak slime.
- Protective Measures: Slime-making can be messy, so cover surfaces with newspaper or a plastic tablecloth. Wearing old clothes or aprons can also protect against stains. Non-latex gloves are helpful for those with sensitive skin or allergies.
- Embrace the Mess: Sometimes, the process can become chaotic, but that’s part of the fun and learning experience. Allow your kids to get their hands dirty, and don’t stress about the mess—it can all be cleaned up later!
- Learning Opportunities: Turn slime making into a fun science lesson. Talk about the properties of liquids and solids, and how certain ingredients cause a chemical reaction that creates a new substance. It’s a great opportunity to spark a love for science!
Advanced Slime Variations
Once you and your kids have mastered the basic slime recipe, why not explore some advanced variations? Here are a few ideas to get your creativity flowing:
- Fluffy Slime: Add shaving cream to your basic slime recipe for a delightfully fluffy texture.
- Butter Slime: Incorporate soft clay into your slime to make it spreadable, just like butter!
- Cosmic Slime: Use black food coloring and loads of glitter to create a slime that’s out of this world.
- Edible Slime: For younger kids who might try a taste, make slime from edible ingredients like cornstarch and marshmallows.
- Themed Slime: Tie in your child’s interests with themed slimes, such as dinosaur slime with tiny toy dinosaurs or ocean slime with blue coloring and sea creature confetti.
Exploring these variations not only adds to the fun but also helps kids express their individuality through their slime creations!
Organizing a Slime-Making Party
Imagine the excitement of partnering with your child to host a slime-making party! Here’s how:
- Set up different stations with various slime recipes and decorations.
- Provide aprons or smocks for each little guest to protect their clothing.
- Have containers ready so each child can take their unique slime home.
- Include a photo booth area where kids can show off their slime creations.
- Remember to ask about allergies and have a hand-washing station for clean-up.
Hosting a slime party can help children bond over shared interests and build lasting memories, all while nurturing their creative spirits.
With these ideas, variations, and practical tips, you’re now ready to master the art of slime-making. Engage all senses as you and your children mix, match, and mold your creations into existence. The most important takeaway is to enjoy each moment of this sticky, squishy journey—you’re not only making slime, you’re also making joyous memories that will stick just like your fantastic homemade slime!
See more great Things to Do with Kids in New Zealand here. For more information see here
Disclaimer
The articles available via our website provide general information only and we strongly urge readers to exercise caution and conduct their own thorough research and fact-checking. The information presented should not be taken as absolute truth, and, to the maximum extent permitted by law, we will not be held liable for any inaccuracies or errors in the content. It is essential for individuals to independently verify and validate the information before making any decisions or taking any actions based on the articles.


