
Jelly Making Joy: A Fun and Easy Guide for Parents
Hello, fabulous parents! Are you ready to add a sprinkle of fun into your kitchen activities with the kids? Today, we’re talking about a classic favorite that will have your little ones giggling with excitement: Homemade Jelly! Not only is making jelly a blast, but it’s also a sneaky way to teach them a bit about science and patience, all while creating delicious treats together.
Now, some might think of jelly making as a complicated chore. Fear not, dear friends! We’re here to guide you through the process of making this timeless dessert that’s as easy as 1, 2, 3. All you need is a bit of preparation, the right ingredients, and your trusted kitchen sidekicks (the kids, of course!) to whip up something truly special. Let’s jiggle our way through the jelly-making adventure!
What You’ll Need for the Perfect Jelly
- Gelatin or Jelly Powder: This is the magic ingredient that transforms your liquid concoction into the wibbly-wobbly dessert everyone loves.
- Sugar: Sweeten the deal with some sugar. The amount can vary depending on the flavors and personal preferences.
- Water or Fruit Juice: This liquid base will carry your flavors and gelatin. You can experiment with different juices for fruity fun.
- Flavoring and Coloring: Choose your favorite flavors! Whether it’s classic strawberry or a tangy lemon, you can’t go wrong. Food coloring can enhance the visual appeal.
- Pots and Molds: You’ll need a pot to heat your mixture and molds to shape your jellies. Get creative! Use silicone molds for easy removal.
Once you’ve gathered all your jelly necessities, it’s time to move on to the exciting part, the preparation! And remember, kiddos, safety first – always have an adult present when handling heat and kitchen appliances.
Step-by-Step Guide to Making Mouth-Watering Jelly
Preparing jelly is a wonderful opportunity to bond with your kids and ignite their curiosity about cooking. So roll up those sleeves, wash those hands, and let’s get jiggling!
Step 1: Mixing the Gelatin
Take your gelatin or jelly powder and mix it with the recommended amount of hot water. Make sure it’s fully dissolved to avoid any lumps. If using sheet gelatin, soak it in cold water first to soften it up, then dissolve in hot liquid.
Step 2: Adding Flavor and Sweetness
Now for the yummy part! Add your sugar and flavoring to the dissolved gelatin mixture. Give it a good stir to ensure everything is combined smoothly. If you’re using fruit juice, make sure it’s at room temperature to keep the gelatin happy.
Step 3: Pour Into Molds
Carefully pour your jelly mixture into molds. You can use anything from traditional molds to fun shapes that will tickle the kids’ fancy. Just make sure they’re safe for hot liquids.
Keep reading to uncover more tips and tricks for the flawless jelly that will have your family asking for seconds. With our guide, the journey to perfecting your homemade jelly is filled with joy, learning, and, of course, a little bit of mess – but that’s all part of the fun!
Ready to let the jelly rest? But we’re not resting just yet! There’s more to discover in the world of jelly making. Stay tuned for the rest of our guide, where we’ll cover the setting process, tips for an impeccable wobble, and creative ideas to serve up your jellies with style!
In the meantime, let your mixture sit and chat about your favorite flavors or the science behind gelatin with your curious kiddos. This time is as much about the experience as it is about the delicious result. Enjoy the moments of anticipation as you await the transformation from liquid to wobbly joy!
The excitement in the kitchen is just beginning! The smiles and the stories that come with making jelly are what we cherish the most. And who knows, this could be the beginning of a new family tradition, with shared laughter and a sweet treat to look forward to – a perfect blend of happiness, one wobbly step at a time.
Five Things Parents Should Know When Preparing to Make Jelly
1. Choosing the Right Ingredients for Success
Quality matters when it comes to the ingredients for your jelly. Opt for high-quality gelatin or jelly powder to ensure that your jelly sets correctly. If using fruit juice, pick ones without preservatives, as they can interfere with the setting process. Natural, organic ingredients not only taste better but are also a healthier choice for your family.
2. Understanding the Setting Process
Jelly making is a science, and the setting requires patience. Explain to the kids that jelly needs to cool down slowly at room temperature and then chill in the refrigerator. Rushing the cooling process by placing hot jelly into the fridge can result in uneven setting, so allow it to cool on the counter before transferring it to chill.
3. Embracing Creativity with Molds and Decorations
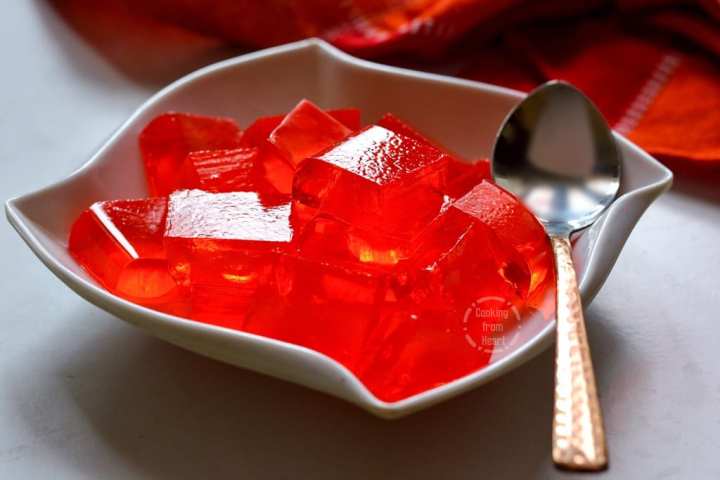
Using a variety of molds can turn jelly making into an art project. From simple cubes to elaborate shapes, the molds you use can make this kitchen activity extra special. Encourage kids to choose their favorites and consider adding fruits or edible flowers before the mixture sets for an artistic touch.
4. Safety Is a Priority
Always supervise children in the kitchen, especially when working with hot substances. Use pots with heat-resistant handles and ensure kids are at a safe distance when pouring hot liquid into molds. It’s an excellent opportunity to teach children about kitchen safety while having fun.
5. Flexibility and Fun Over Perfection
Your first jelly attempt might not be perfect, and that’s okay! Emphasize the fun of creating rather than the outcome. Jelly that doesn’t set can be reused or turned into a sauce, and mishaps can be memorable learning experiences. Celebrate the effort and creativity, and enjoy the laughter along the way.
Jelly Set, Go: The Setting Process and Beyond
Now that you’ve poured your jelly into molds, the hardest part begins – the wait! Jelly needs time to set, typically several hours or overnight. Here’s where the science kicks in. Explain to the kids how the cooling process allows the gelatin to form a solid structure, turning the liquid into a semi-solid, bouncy delight. While waiting, you can plan your next steps, like how you will unmold and present your jiggly creations.
Making that Perfect Wobble: Tips for Impeccable Jelly
Everyone loves a jelly with the perfect wobble! To achieve this:
- Ensure you’ve measured your ingredients accurately – too much water can lead to a floppy jelly, while too little can make it too firm.
- Once set, carefully run a knife around the edge of the mold or dip the mold briefly in warm water to loosen the jelly without melting it. Patience is key!
- When plating, give the jelly a gentle shake. The ideal wobble is firm yet jiggly, holding its shape but dancing with every nudge.
Getting Creative: Serving Up Your Jellies with Style
Creativity doesn’t stop once the jelly is made. Now it’s time to turn your wobbly wonders into a visual feast. Present your jellies on a bed of whipped cream, sprinkle with edible glitter for added sparkle, or pair with other desserts for a colorful display. You can even make mini jelly cups as individual treats. Getting children involved in the presentation nurtures their artistic talents and gives them a sense of accomplishment.
Remember, jelly making is more than just a culinary activity. It’s a chance to create long-lasting memories with your children and instill in them skills and passions that they may cherish forever. So, embrace the sweet journey of jelly making, and let’s create something as unique and lovable as your family!
. For more information see here
Disclaimer
The articles available via our website provide general information only and we strongly urge readers to exercise caution and conduct their own thorough research and fact-checking. The information presented should not be taken as absolute truth, and, to the maximum extent permitted by law, we will not be held liable for any inaccuracies or errors in the content. It is essential for individuals to independently verify and validate the information before making any decisions or taking any actions based on the articles.


