
Whip Up Some Minion Magic: The Ultimate Guide for Parents Making Minion Cakes
Welcome, dear parents and cake enthusiasts! Are you ready to dive into the fun and delightful world of baking? And what could bring more joy to your little ones than creating your very own Minion cakes? Minions, those adorable little yellow creatures from the Despicable Me franchise, have captured the hearts of kids and adults alike. And now, it’s time to bring them to life in your kitchen! Let’s start this fabulous cake-adventure, shall we?
Whether it’s for a birthday party, a themed gathering, or just a fun weekend project, making a Minion cake is sure to unleash your inner pastry chef while making unforgettable memories with your family. Get ready to impress not only the kiddos but also the adult guests with your baking prowess!
Preparation Steps to Create Your Minion Masterpiece
Before we get our hands floury, let’s go through some essential preparation steps to ensure your Minion cake is as perfect as it can be:
- Choose Your Design: Decide whether you’ll be creating a 3D Minion cake or a simpler, 2D version. In this guide, we’ll cover both, so you can pick one that best matches your time and skill level.
- Gather Your Supplies: You’ll need specific tools for cake baking and decorating. Make sure you have round cake pans, fondant icing in different colors, a rolling pin, cookie cutters, and edible markers or gel.
- Create a Shopping List: Write down all the ingredients for both the cake and the icing. From basic butter, flour, and eggs, to food coloring and decoration materials, you don’t want to miss anything while you’re in the zone.
- Set Aside Plenty of Time: Making a Minion cake isn’t a rush job; ensure you have ample time to bake, cool, and decorate without feeling stressed. It’s about the journey as well as the tasty destination!
Note: If you’re short on time, you can always start with a ready-made cake mix or a pre-baked plain cake and jump straight into the decorating fun!
Picking the Perfect Minion Flavor for Your Cake
The next step is to pick a cake flavor. Since Minions are known for their love of bananas, a banana cake could be a delightful nod to the characters. However, feel free to choose any flavor that you or the birthday kid love the most, whether it’s vanilla, chocolate, or even red velvet. The secret ingredient here is joy, so as long as you’re having fun, you’re on the right track!
Laying the Fondant Foundation: Creating Your Minion’s Skin
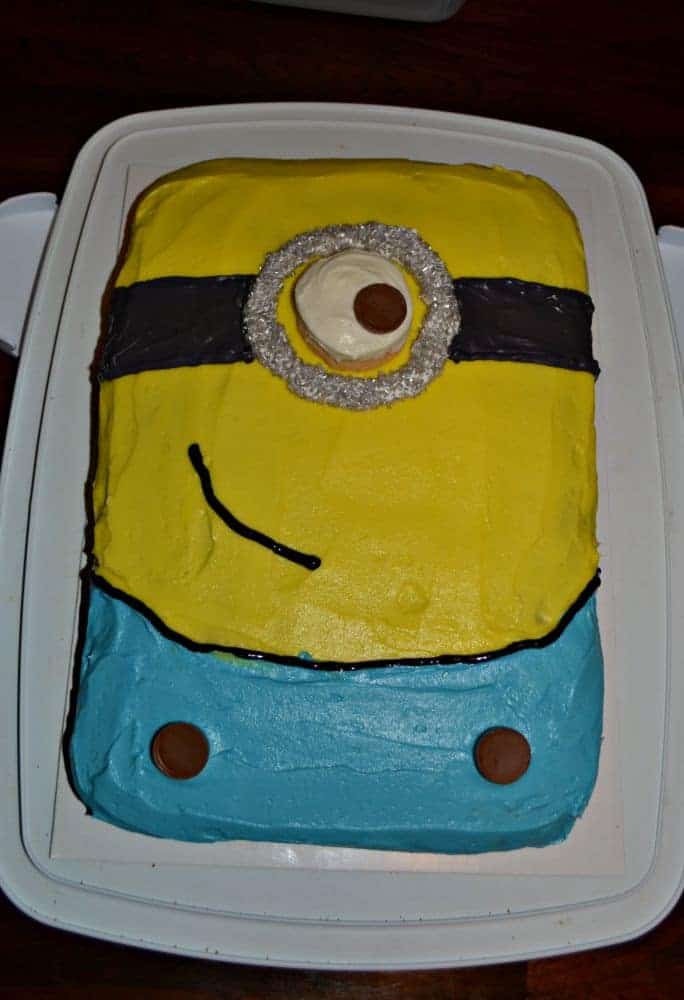
Once your cake is baked and cooled (or if you’re starting with a pre-made base), it’s time to cover it with fondant. Yellow fondant will act as your Minion’s skin, and you’ll need blue for their overalls. We’ll guide you step-by-step on how to roll out your fondant, cover the cake smoothly, and add the iconic Minion details.
From here, we’re going to get into the nitty-gritty of crafting your cake into a cute Minion character. Whether it’s making those signature goggles, the friendly smile, or even the individual strands of hair, each detail will bring your Minion to life. The joy in your child’s eyes when they see the final cake is what this is all about!
So, don your aprons and get those mixers ready! It’s time to embark on a sugary, laugh-filled journey to making the most amazing Minion cakes. Follow along as we break down each step to making a cake that’s sure to be the highlight of any party!
Stay tuned, because in our next section, we’ll dive into the baking process, sharing a delicious and simple cake recipe that serves as the perfect canvas for your Minion creation. After all, a Minion cake isn’t just about looks; it has to taste incredible too! So put on your chef’s hat, because we’re about to whip up some Minion magic in the kitchen!
Five Must-Know Tips for Parents Preparing Minion Cakes
Let’s make sure you’re fully prepared for this yummy project. Here are 5 essential tips every parent should know before making a Minion cake:
- Practice Makes Perfect: If you’re new to cake decorating, consider doing a trial run before the big day. Practice rolling out fondant, coloring it, and shaping small details like the Minion’s eyes and mouth.
- Picture Perfect: Have a few images of Minions as a reference. It will help you with the colors, proportions, and small details which can really make your cake pop!
- Time Management: Estimate time for each part of the process. Baking and cooling can take a few hours, and you don’t want to be decorating in a hurry. Remember, fondant decorations can be made in advance!
- Food Safety: When purchasing ingredients, especially perishables, ensure they’re fresh and safe for consumption. Also, if your cake design requires supports or non-edible components, make sure they are food-safe and secure.
- Kid Participation: If your child wants to help, choose safe and simple tasks they can handle, like rolling balls for the Minion’s shoes or using cookie cutters. It’s a wonderful way to bond and introduce them to baking!
The Foundation: Baking Your Base Cake
No matter the design, every Minion cake starts with a delicious base, so let’s get baking! Preheat your oven, grease your cake pans, and prepare your batter. For a superbly moist banana cake, whisk together ripe mashed bananas with your typical cake ingredients. Fill your pans and bake until a toothpick comes out clean.
Remember to let your cakes cool completely before trimming any dome-shaped tops to ensure even layers. Once it’s cool, if you’re not decorating right away, wrap your cakes in plastic wrap and keep them in the fridge to maintain their freshness.
Decorating Your Cake with Minion Finesse
Decorating is where the magic happens! Start by applying a thin layer of buttercream icing to your cake; this will help your fondant stick. Then, roll out your yellow fondant to an even thickness and gently drape it over the cake, smoothing the sides as you go.
For the Minion details, blue fondant creates darling denim overalls, while white and black fondant can be used for eyes and goggles. Use a little water or edible glue to adhere these pieces to your cake. Don’t forget to roll little black fondant balls for the Minion’s shoes and to create their signature gloves!
Adding texture can make all the difference, so consider using a stitching tool or toothpick to add details to the Minion’s clothing. For the hair, you can either use black fondant or licorice strings—kids especially love this part!
Lastly, with an edible marker or a tiny brush dipped in food-safe paint, you can draw on the Minion’s playful expressions—be it a wide smile, a cheeky grin, or even a tongue sticking out.
As you progress through each decorating step, remember to take breaks, have fun, and keep envisioning that bright smile on your child’s face when they see the finished cake. It’s not just a Minion cake; it’s a labor of love and the centerpiece of a joyful celebration!
Ready for more? Stick around! Our next segment will jump into hosting a Minion-themed party, complete with games, decor, and more tips to set up a truly despicably fun time for your little one and their friends. Happy baking!
See more great Things to Do with Kids in New Zealand here. For more information see here
Disclaimer
The articles available via our website provide general information only and we strongly urge readers to exercise caution and conduct their own thorough research and fact-checking. The information presented should not be taken as absolute truth, and, to the maximum extent permitted by law, we will not be held liable for any inaccuracies or errors in the content. It is essential for individuals to independently verify and validate the information before making any decisions or taking any actions based on the articles.


