
DIY Play Dough Magic: A Parent’s Guide to Creative Fun!
Welcome, crafty parents and fun-loving families! Are you ready to dive into the whimsical world of homemade play dough? You’ve landed in the perfect spot! Making your very own play dough is not only a fantastic way to engage your little ones in hours of creative play, but it’s also a wonderful opportunity for sensory exploration and development. Let’s embark on this delightful journey together, where we’ll turn everyday kitchen ingredients into a playground for imagination!
Why Make Your Own Play Dough?
- Economical: Crafting play dough at home can save you a pretty penny compared to store-bought options.
- Non-toxic: Peace of mind comes easy knowing exactly what’s in your child’s play materials.
- Customizable: Experiment with colors, scents, and textures to create a truly personalized play experience.
- Family Activity: Making play dough can become a bonding activity, where every family member can contribute.
Your Essential Play Dough Making Toolkit
Before we start, it’s important to have all your tools and ingredients at the ready. Here’s a quick list of what you’ll need:
- A large mixing bowl
- Measuring cups and spoons
- A spatula or wooden spoon for mixing
- Cooking pot (for cooked play dough versions)
- Food coloring or natural dyes (like beet juice or turmeric)
- Optional: Essential oils for scent or glitter for sparkle
Now, gather up those ingredients because we’re about to mix up some fun!
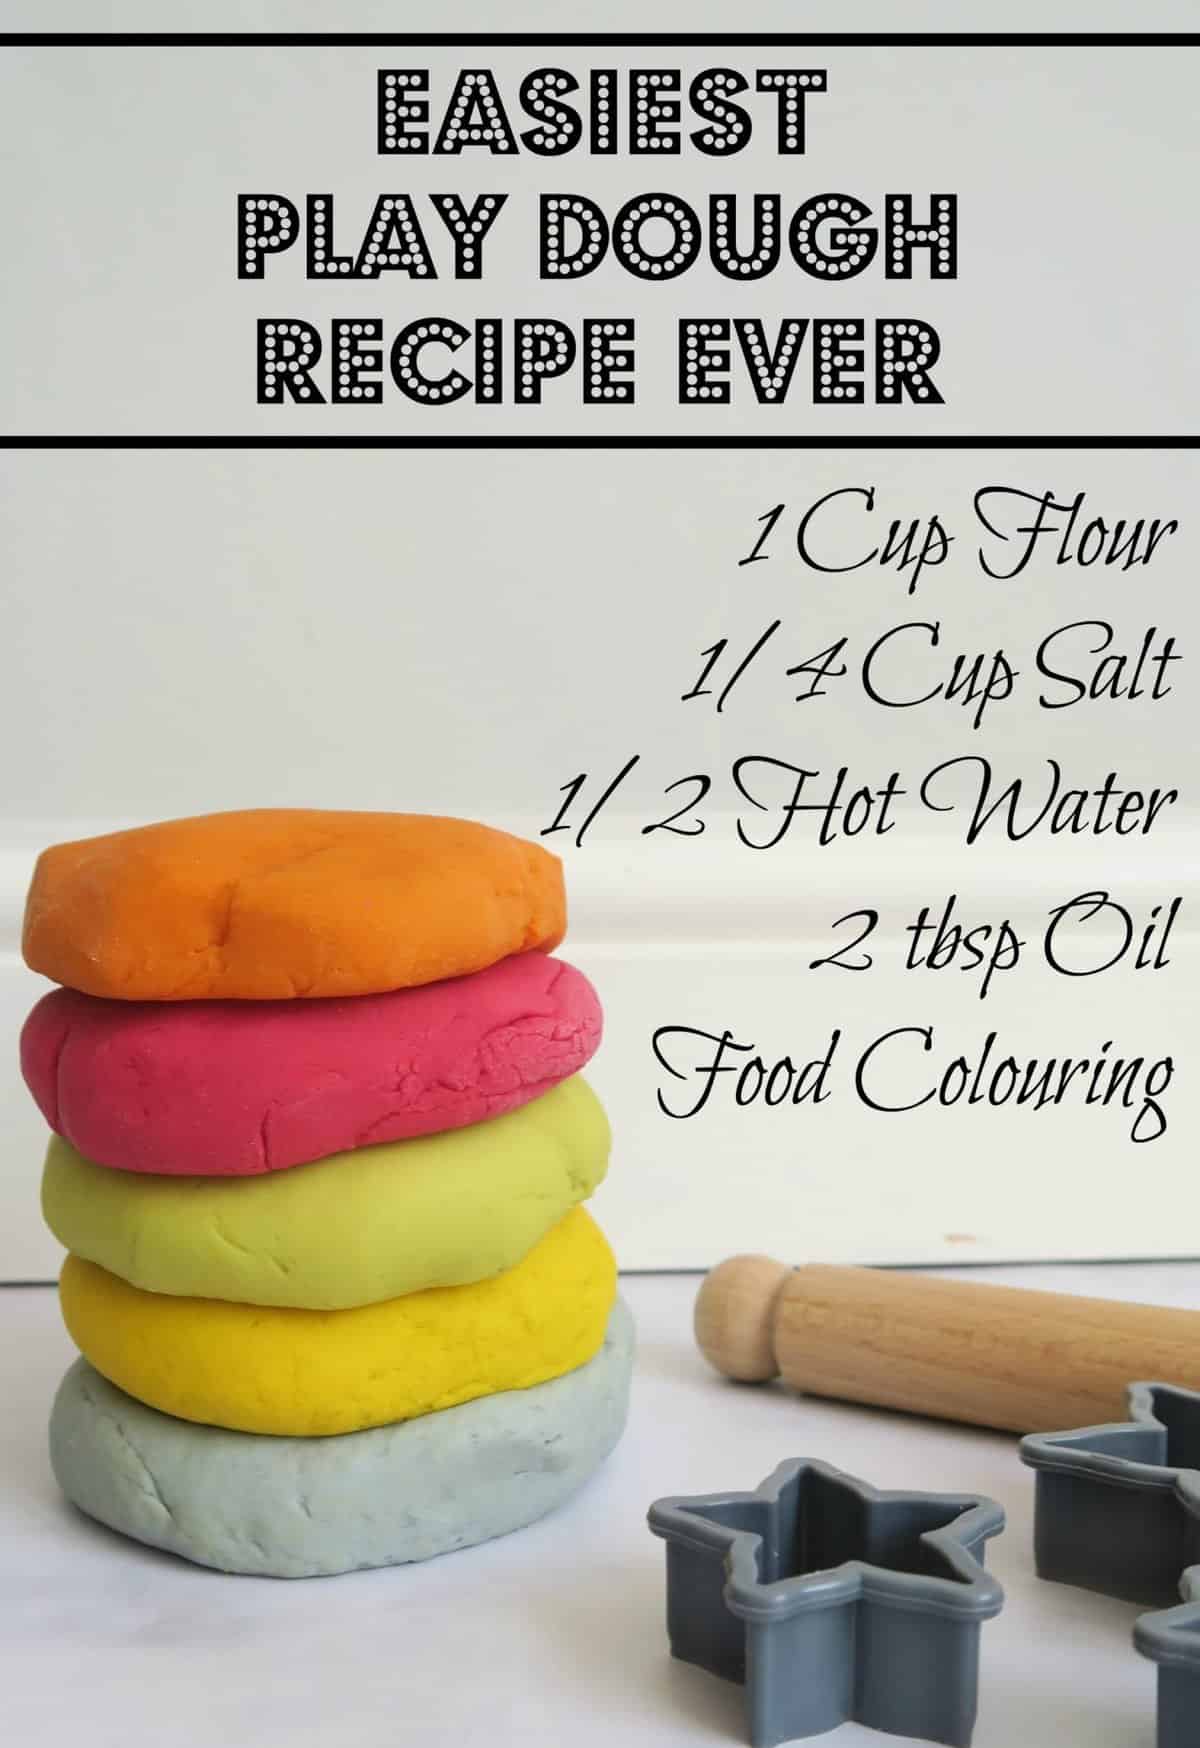
Simple Uncooked Play Dough Recipe
Let’s start with a no-cook recipe that’s perfect for when you’re short on time or if you’re involving younger kids who want instant play payoff!
Ingredients:
- 2 cups all-purpose flour
- 3/4 cup salt
- 4 teaspoons cream of tartar (for elasticity)
- 2 cups lukewarm water
- 2 tablespoons vegetable oil
- Food coloring (as desired)
- Optional: Few drops of essential oils for scent
Instructions:
- Mix the dry ingredients in the bowl. That’s your flour, salt, and cream of tartar.
- Add in the water and oil to the mixture, stirring continuously until well combined.
- If you want to add color to your play dough, now is the time! Divide the dough into sections and knead in the food coloring.
- For added fun, mix in some essential oils to give your play dough a fresh, calming scent.
- Voila! Your play dough is ready to go. Time to play and create!
Tips for the Best Play Dough Experience
- Color Mixing: Teach your kids about color theory by combining primary colors to make secondary ones.
- Texture Play: For extra fun, mix in some rice or sand to create a different sensory experience.
- Storage: Keep your play dough fresh by storing it in an airtight container or a zip-top bag when not in use.
Playing with homemade play dough isn’t just a blast; it’s also an educational opportunity. Through this simple activity, children can develop fine motor skills, practice hand-eye coordination, and unleash their inner artists. Not to mention, the sensory aspect of play dough can be incredibly calming, making it an excellent tool for winding down after a day packed with adventures.
Stay tuned, because shortly we’ll explore how to make a classic cooked play dough recipe that lasts even longer and has an even smoother texture. The fun is just beginning, and the world of homemade play dough holds so many possibilities for you and your little ones to discover!
5 Things Parents Should Know Before Making Play Dough
- Quality of Ingredients: Always opt for food-grade ingredients, even though the play dough isn’t meant to be eaten. Young children often explore with their mouths, so using kitchen ingredients ensures the safety of your little ones.
- Consistency Matters: Finding the right balance in your play dough consistency can make all the difference. Too much liquid and your dough will be sticky; too much flour, and it will crumble. Be prepared to adjust the amounts slightly for that perfect pliable texture.
- Color Transfer: Food coloring is fabulous for vibrant play dough, but keep in mind it can transfer to hands and surfaces. Use a mat or parchment paper for play and have wipes on hand for quick clean-up. Consider wearing gloves when kneading color into your dough if you want to avoid stained fingers.
- Expect a Mess: Making play dough can be a messy affair, especially with enthusiastic little helpers. Embrace the chaos! Lay down some newspaper or plastic sheets to catch spills and make clean-up a breeze. Remember, it’s all part of the fun and learning process.
- Innovative Tools: You don’t need fancy play dough tools to have a great time. Look around your home for cookie cutters, plastic knives, rolling pins, or even natural items like sticks and stones to use for imprints and shaping. These everyday objects enhance the play dough experience by sparking creativity and resourcefulness.
Cooked Play Dough Recipe for Long-Lasting Fun
Moving on to a classic cooked play dough version, this recipe takes a bit more time but yields a super-smooth, long-lasting dough that’s well worth the effort.
Ingredients:
- 1 cup all-purpose flour
- 1/2 cup salt
- 2 teaspoons cream of tartar
- 1 cup water
- 1 tablespoon vegetable oil
- Food coloring
- Optional: Few drops of essential oils or flavored extracts for scent
Instructions:
- In your cooking pot, whisk together flour, salt, and cream of tartar.
- Mix water, oil, and food coloring together, then pour into the dry ingredients. Stir until a thick batter forms.
- Cook over low heat, continuously stirring as the dough starts to thicken and congeal. Remove the play dough from the pot when it forms a ball and is no longer sticky.
- Place the dough on wax paper or a silicone mat to cool down a little.
- Once cool enough to touch, knead the dough until smooth. If you’re adding scents, knead them in at this stage.
- Store the cooled dough in an airtight container, and it’s ready for your kids to enjoy!
Wrap Up and Care
- Homemade vs. Store-bought: While homemade play dough is fantastic, remember that it won’t last as long as the commercial variety. Be prepared to whip up a fresh batch when needed—fortunately, now you know how easy and enjoyable it is!
- Allergen-Free Options: For children with sensitivities or allergies, consider using alternatives like gluten-free flour and dye-free color options.
- Engage All Senses: Use play dough making as an opportunity to engage all your child’s senses. This not only enhances their play experience but also supports their cognitive development.
- Learning Opportunities: Incorporate educational themes into play dough time! Cut out shapes for geometry lessons, count and sort colors for math, or even practice letters and spelling.
- Keeping It Fresh: Regularly check your stored play dough for signs of drying out or mold. If it’s past its prime, don’t fuss—making more is just another chance for shared experiences and learning!
Whether you choose the no-cook or cooked version, homemade play dough offers an ocean of possibilities for creativity and learning. It’s proof that the best toys don’t come from a store but from the heart and hands of those who care. So roll up your sleeves, gather your supplies, and get ready to make memories and masterpieces with the simplest of ingredients!
See more great Things to Do with Kids in New Zealand here. For more information see here
Disclaimer
The articles available via our website provide general information only and we strongly urge readers to exercise caution and conduct their own thorough research and fact-checking. The information presented should not be taken as absolute truth, and, to the maximum extent permitted by law, we will not be held liable for any inaccuracies or errors in the content. It is essential for individuals to independently verify and validate the information before making any decisions or taking any actions based on the articles.


