
Homemade Play Dough: A Fun, Easy Recipe for Endless Hours of Playtime!
Hello, super parents and guardians! Are you ready to dive into the whimsical world of play dough with your little ones? Not only is making play dough together a great bonding activity, but it also sparks creativity and provides endless entertainment. The best part? You don’t need to be a kitchen whiz to whip up this fun mixture–just a sprinkle of enthusiasm and a handful of common household ingredients. Let’s roll up sleeves and get our hands doughy!
Why Choose Homemade Play Dough?
Before we get our hands dirty, let’s chat about the benefits of making your own play dough. Store-bought options are convenient, but homemade play dough is cost-effective, customizable, and free of preservatives. You know exactly what’s going into it, which means it’s safer for your kiddos, especially if they are in the stage of exploring the world by taste. Plus, it’s incredibly satisfying to see your little ones play with something crafted by your own hands!
Ingredients You Will Need
For the Classic Play Dough:
- 2 cups all-purpose flour
- 3/4 cup salt
- 4 teaspoons cream of tartar
- 2 tablespoons vegetable oil
- 2 cups water
- Food coloring (optional)
- Your choice of fragrance (like vanilla or almond extract, optional)
That’s right, you’re moments away from making homemade play dough with ingredients you likely already have in your home. No special trips to the craft store needed!
Let’s Get Mixing: Step-by-Step Guide
Making the play dough is as easy as 1, 2, 3 and perfect for getting the kids involved! Here’s how:
Step 1: Combine the Dry Ingredients
Start by getting out a large mixing bowl. Combine the flour, salt, and cream of tartar, then give the contents a good whisk. This mix is the base of your play dough, so ensure everything is well blended.
Step 2: Add Wet Ingredients
In a separate container, mix together water and vegetable oil. If you’ve decided to add food coloring or fragrance, now is the moment! A few drops of your chosen color can be mixed into the water beforehand to ensure an even hue. Pour this mix into the dry ingredients.
Step 3: Cook the Dough
Transfer your dough mixture into a large pot and place it over medium heat. Stir continuously until the dough begins to solidify and form into a ball. This part requires patience and a little bit of arm strength, but the playful result is absolutely worth it!
The consistency should be smooth and not sticky when it’s ready to leave the pot. Be attentive to ensure that the dough doesn’t get overcooked, as this can make it dry. Once you have a cohesive ball of dough, remove from heat and allow it to cool slightly before handling.
There you go, dear parents, you’re halfway through our guide on concocting the perfect homemade play dough. Stay tuned for the second part, where we’ll dive into kneading the dough, adding colors, and storing your playful creation.
Remember, whether you opt for rainbows of colors or the simplicity of the classic dough, it’s all about the smiles and memories you create together. Get ready to unleash your inner child and watch your little ones sculpt their imaginations into reality!
Next up, we’ll cover how to create an array of colors in your dough, some fun play dough games, and tips to keep your homemade play dough fresh for months. Stay with us for the hands-on fun continues! Keep those sleeves rolled up; more dough-tastic adventures await you right around the corner.

Five Things Parents Should Know Before Making Play Dough
1. Prepare Your Workspace and Materials
First things first, clear a space in your kitchen where you and your kids can get messy and creative. Ensure all ingredients and tools are within reach to maintain a smooth flow during the process. You’ll need a mixing bowl, measuring cups and spoons, a cooking pot, and a stirring spoon or spatula.
2. Safety Measures
While your homemade play dough will be non-toxic, it’s important to supervise your children at all times, particularly during cooking. Additionally, remember that the play dough should not be consumed, so keep an eye out if you have very little ones who might be tempted to taste it.
3. Customization is Key
Think about what colors and scents will delight your children. Gathering a variety of food coloring options and kid-friendly scents can make the experience even more enjoyable. Letting your children choose their favorite colors or mixing to create new ones can be a fun prelude to the play dough activity.
4. Play Dough Consistency
Achieving the right consistency might take a little trial and error. If your dough is too sticky, add a little more flour during the kneading process. If it’s too dry, work in a few drops of water or oil. Finding the perfect balance will result in a smooth, pliable play dough that holds its shape well.
5. Storage Solutions
To make the play dough last, have an airtight storage plan ready. Ziplock bags or airtight containers work well to keep the play dough fresh. Explain to your kids the importance of storing their play dough properly to prolong its life and ensure countless hours of future fun.
Additional Play Dough Tips and Tricks
Color It Up!
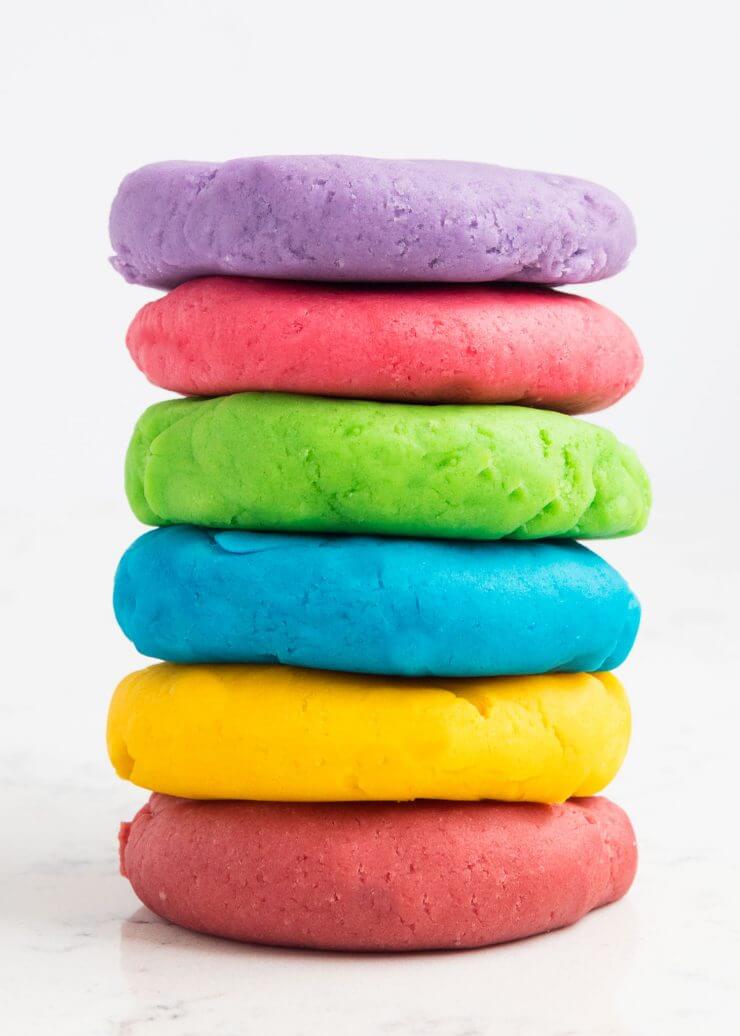
Once the play dough has cooled down enough to handle, it’s time for some colorful fun! You can knead in food coloring by making a well in the center of your dough ball, adding a few drops of dye, and folding the dough over the color. Knead until the hue is evenly distributed; this can also be a great hand-strengthening exercise for kids!
Play Dough Games to Spark Imagination
Create play dough mats or use cookie cutters for themed play sessions. Incorporate learning by shaping letters, numbers, or animals. You can also set challenges, like who can build the tallest play dough tower or craft the most creative monster.
Keep It Fresh
After playtime, ensure the play dough is stored correctly. Some parents like to wrap the dough in plastic wrap before placing it in the container to add an extra layer of protection against air. If you notice the dough has become a little crusty or dry, you can knead in a bit more water before the next play session.
And that’s a wrap on our dough-making guide! With these handy tips and a simple recipe, you’re all set to create days filled with squishy, colorful fun. So, what are you waiting for? Channel your inner artist, don your apron, and get ready for some serious play dough action!
For more great fun click here. For more information see here
Disclaimer
The articles available via our website provide general information only and we strongly urge readers to exercise caution and conduct their own thorough research and fact-checking. The information presented should not be taken as absolute truth, and, to the maximum extent permitted by law, we will not be held liable for any inaccuracies or errors in the content. It is essential for individuals to independently verify and validate the information before making any decisions or taking any actions based on the articles.


