
Create Some Hoppin’ Good Fun with Homemade Rabbit Ears: A DIY Guide for Parents
Hello, crafty parents and bunny enthusiasts! Are you looking to add a touch of whimsy to your little one’s playtime or perhaps crafting the perfect accessory for that Easter celebration? Well, you’re in luck because today we’re diving straight down the rabbit hole to explore the wonderful world of DIY rabbit ears! Not only is this project fun and easy to hop into, but it’s also perfect for encouraging creativity and making lasting memories with your kids.
So, gather your crafting supplies and get ready to create something truly ear-resistible!
Why Make Your Own Rabbit Ears?
Making your own rabbit ears is a fantastic way to bond with your children, fuel their imagination, and save a little money in the process. It’s a project that sparks creativity and can be tailored to fit any age group. Plus, handmade accessories have that personal touch that store-bought ones just can’t match. Whether it’s for a thematic school event, a playful dress-up game, or just because, DIY bunny ears are sure to become a beloved addition to your child’s costume collection.
Supplies You’ll Need to Begin Your Bunny Ear Crafting Journey
- Headband: A simple headband will serve as the base for your rabbit ears. You can choose from plastic, metal, or fabric-covered, depending on your preference and what feels most comfortable.
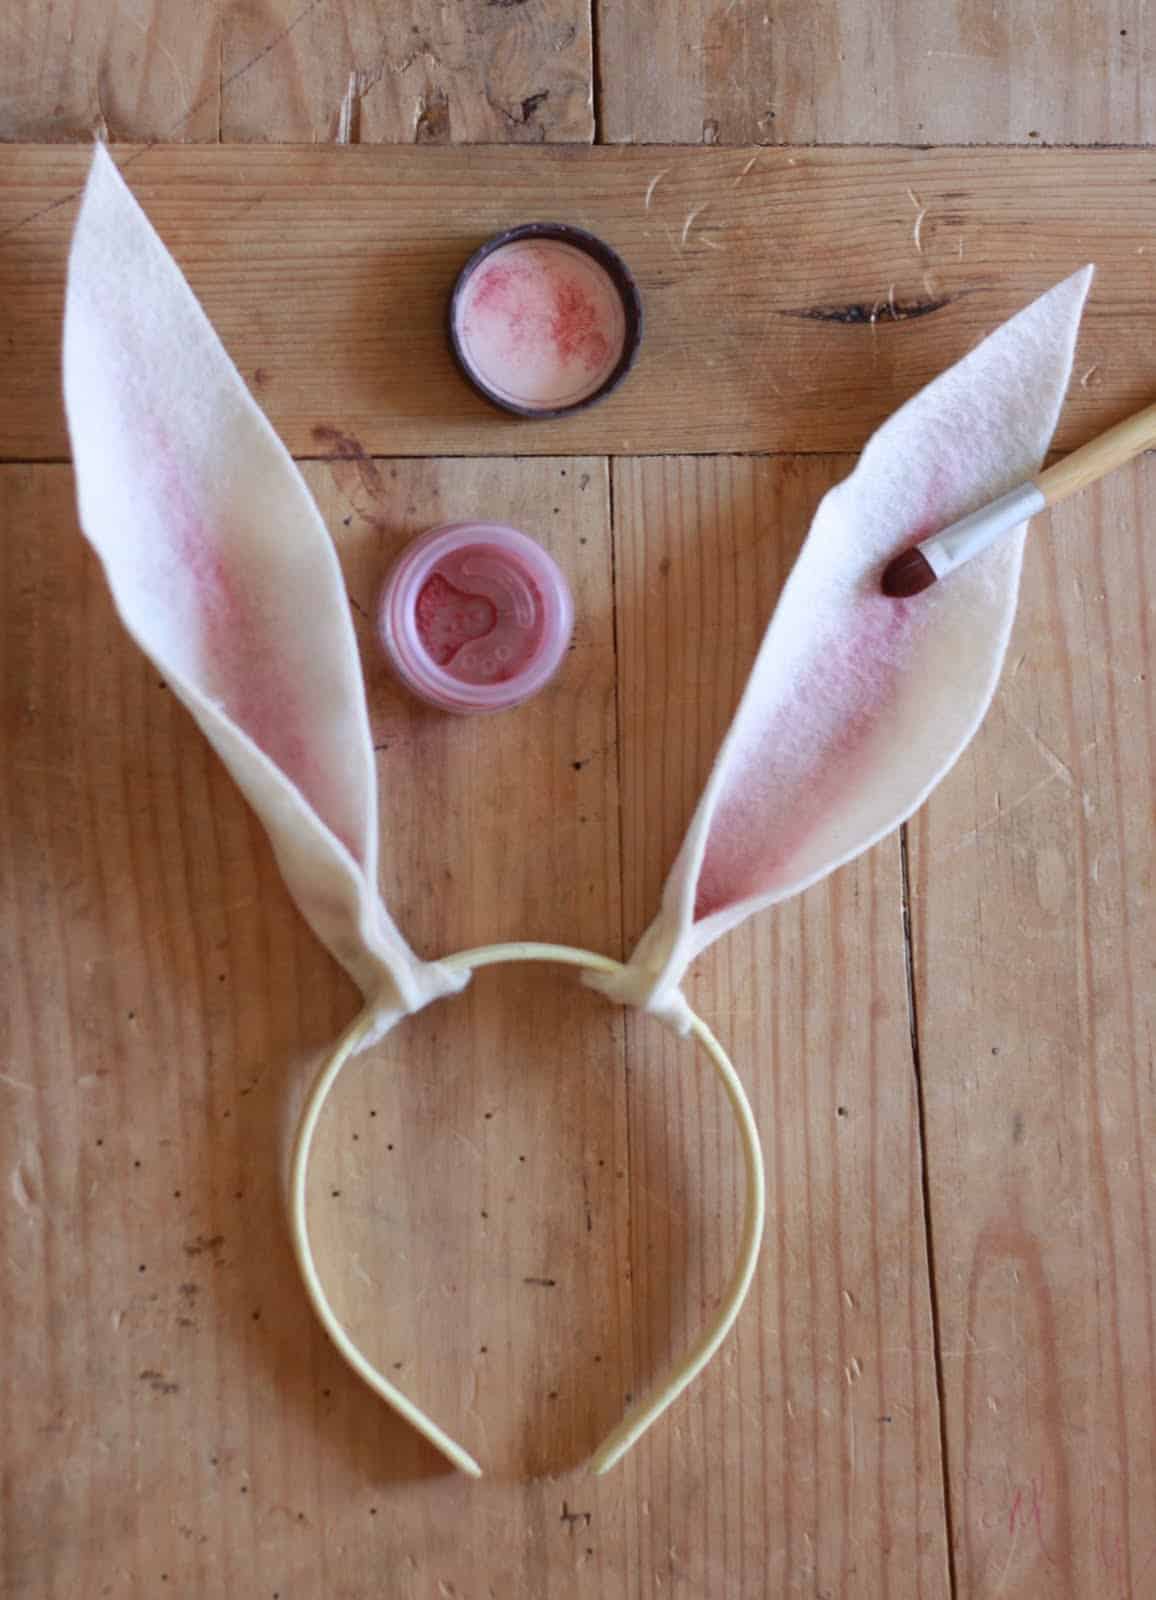
- Felt or Fabric: Pick out soft felt or fabric in your favorite colors. Classic white is always a hit for that authentic bunny look, but don’t be afraid to get creative with patterns or bright hues!
- Wire: Some flexible yet sturdy wire will help your rabbit ears hold their shape. This is especially helpful if you want them to stand up or have a specific pose.
- Scissors: You’ll need a good pair of scissors to cut your fabric and wire. If you’re working with children, make sure to supervise or use safety scissors.
- Glue or Sewing Supplies: Depending on your preference, you can use fabric glue, hot glue, or sewing supplies to assemble your bunny ears. Choose what works best for your skill level and available tools.
- Optional Decorations: To give your rabbit ears a personal touch, consider adding decorations like sequins, glitter, ribbons, or even artificial flowers.
Step 1: Shaping Your Bunny Ears
Before you start cutting and gluing, it’s important to decide on the size and shape of your rabbit ears. Do you want them tall and pointy? Short and floppy? It’s all up to you! Once you’ve settled on a design, sketch the outline of your bunny ears onto your felt or fabric. Remember to make them a bit larger than the final size, as you’ll need extra material to wrap around the wire and attach them to the headband.
Next, cut two pieces of wire that are slightly longer than your fabric ears. This will allow you to bend the ends to secure them onto the headband. With your wire pieces cut, carefully shape them to follow the outline of your ear design.
Now, it’s time to bring your fabric or felt ears to life! Place one wire ear onto your fabric and use it as a guide to cut out two pieces of fabric for each ear (you’ll need a front and back piece).
Step 2: Assembling Your Ears
Once you have your fabric pieces cut out, it’s time to attach the wire. Gently sandwich the wire between the two fabric pieces for each ear, ensuring the wire doesn’t peek out. You can then glue or sew around the perimeter, leaving the bottom open for attaching to the headband. If you’re using glue, allow ample time for it to dry, or if sewing, make sure your stitches are tight and secure.
Now that your ears are assembled, let’s talk about the fun part—decorations! Decorating your bunny ears can be as simple or elaborate as you like. If you’re making ears for Easter, consider pastel colors and spring-themed embellishments. For a year-round fun accessory, let your child’s imagination reign supreme, using whatever sparkles, stickers, or colors they adore.
With such a bounty of creativity at your fingertips, there’s just no telling what kinds of delightful rabbit ears you and your children will conjure up together. Keep these tips in mind, roll up your sleeves, and make some magic happen!
Of course, this is only the beginning of our bunny-ear crafting adventure. Stay tuned for the detailed next steps where we’ll dive into attaching your ears to the headband, perfecting their bunny-esque floppiness (or perkiness!), and ensuring that they fit snugly and comfortably for all-day wear. Let’s hop to it and continue creating memories and masterpieces with our very own, homemade rabbit ears!
5 Essential Tips for Parents Preparing to Make Rabbit Ears
Before you start with the crafting process, there are a few essential tips to keep in mind for a smooth and joyful experience:
- Planning is Key: Go through the crafting steps with your children beforehand and explain what you’ll be doing. This is a great opportunity to spark their interest and gather any ideas they might have for their custom ears. It can also help in managing time and expectations.
- Safe Crafting: Ensure that all the materials used are safe and age-appropriate. For instance, if working with younger children, choose non-toxic glues and swap out sharp scissors for safety scissors. Safety first, fun always!
- Workspace Setup: Create a designated crafting area that’s okay to get a bit messy. Cover your table with newspapers or a plastic sheet, and keep your supplies organized. This makes for easy cleanup and prevents any misplaced or lost pieces in the midst of creativity!
- Customization Options: Remember, the rabbit ears reflect your child’s personality, so encourage them to choose their favorite colors, fabrics, and decorations. Let them become the designers of their playtime crafting project. This not only makes the ears unique but also gives your children a great sense of ownership over the creative process.
- Patient and Flexible Approach: DIY crafts are a learning process and not everything may go as planned. If the ears don’t turn out perfect on the first try, that’s okay! Use this as a teaching moment about the value of practice and the joy of creation over the need for perfection.
Step 3: Attaching the Ears to the Headband
Now comes the part where your bunny ears start taking shape! Take the bottom of each ear, which you’ve left open, and wrap it around the headband. Position them evenly apart to balance the look of the ears. Once they’re in the spot you like, glue or sew the base of the ears onto the headband securely. This will require a steady hand, so if you’re including young children, they can assist by telling you where to place them or holding them steady as the glue dries or as you sew.
Step 4: The Floppiness or Perkiness Adjustment
Whether your bunny ears are standing tall or flopping over, you’ll want them to have just the right amount of personality. Bend and adjust the wire within your ears until they have the character you’re aiming for. Let your kids test out how the ears flop as they move around to see if it’s just right or needs a bit more tweaking.
Step 5: Ensuring a Snug, Comfortable Fit
The last thing any parent wants is for their child to be uncomfortable in their adorable new accessory. Try the headband on and make sure it sits comfortably on your child’s head. If you find the headband is a little loose, you can glue in some felt on the inner side for a tighter fit. On the other hand, if it’s too tight, wrapping a bit of fabric around the ends can provide some extra cushioning.
By keeping these tips in mind, you can create a successful crafting experience that’s both enjoyable and hassle-free. Hoppy crafting, everyone!
See more great Things to Do with Kids in New Zealand here. For more information see here
Disclaimer
The articles available via our website provide general information only and we strongly urge readers to exercise caution and conduct their own thorough research and fact-checking. The information presented should not be taken as absolute truth, and, to the maximum extent permitted by law, we will not be held liable for any inaccuracies or errors in the content. It is essential for individuals to independently verify and validate the information before making any decisions or taking any actions based on the articles.


