
How to Make Slime at Home: A Beginner’s Guide for Parents
Greetings, crafty parents! Are you looking for a fun and engaging activity to share with your little ones? Look no further, because making slime at home has never been easier or more delightful! Not only is it a perfect way to spend quality time with your kids, but it’s also a fantastic opportunity to teach them about science and creativity. And don’t worry, you can create this gooey sensation with just a few simple ingredients and minimal mess. Ready to jump into the world of slime-making? Let’s get started!
Benefits of Making Slime with Your Kids
Before we dive into the how-to, let’s explore the benefits, shall we?
- Stimulates Creativity: Making slime allows kids (and adults alike!) to express themselves through color and texture choices.
- Enhances Fine Motor Skills: The act of kneading and molding slime can improve hand-eye coordination and dexterity.
- Scientific Learning: Understanding the chemical reactions between slime ingredients is a fun introduction to basic chemistry concepts.
- Stress Relief: For many, squishing and stretching slime is a form of tactile sensory play that can reduce anxiety and promote mindfulness.
What You’ll Need to Make Basic Slime
Now, let’s ensure you have everything you need:
- 1 cup of glue (white or clear PVA)
- 1 teaspoon of baking soda
- 2 to 3 tablespoons of contact lens solution (must contain boric acid and sodium borate)
- Coloring or glitter (optional for that extra pizzazz)
Step-by-Step Slime Making Process
1. Prepare Your Workspace
Begin by covering your workspace with newspaper or a plastic sheet. This keeps everything clean and makes your slime adventure stress-free.
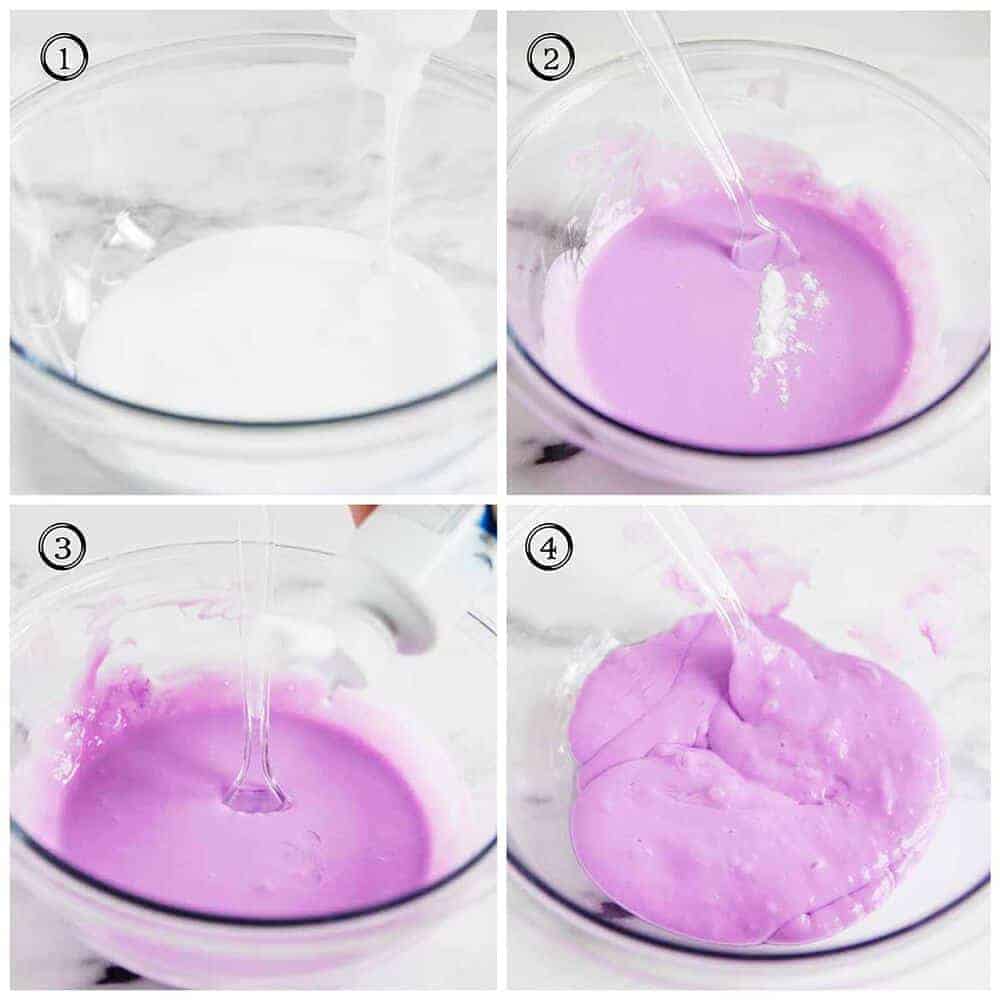
2. Mixing Your Ingredients
In a bowl, pour in the glue, the bedrock of your homemade slime. Next, stir in the baking soda. This will help thicken your concoction. If you’re in the mood for some color, now is the time to add a few drops of food coloring or sprinkle in some glitter.
3. Getting the Texture Just Right
Add the contact lens solution to your mixture slowly, stirring continuously. This solution acts as an activator, turning your liquid ingredients into the satisfyingly stretchy slime we all love. Watch as the mixture begins to form, and keep adding the solution until the slime starts to pull away from the sides of the bowl.
4. Kneading Your Creation
It’s time to use those hands! Take your slime out of the bowl and knead it gently on your protected surface. If it’s still a bit sticky, add a tiny bit more contact lens solution to the mix. You’ll feel the slime becoming firmer and less tacky with each knead.
Voila! You’ve got homemade slime that’s ready for play. Twist it, squish it, stretch it, roll it – the possibilities for fun are endless!
Remember, the simplest version of slime is just the beginning! Don’t hesitate to experiment with different add-ins like foam beads, scents, or even glow-in-the-dark paint for extra excitement. Making slime at home is not just about following a recipe; it’s about creating a fun learning experience and lasting memories with your family.
For those parents who want to add even more sparkle to their children’s eyes, stay tuned for our next section where we will explore a range of different slime recipes, including fluffy slime, glow-in-the-dark slime, and even edible slime! There’s an entire universe of slime out there, and we can’t wait to help you and your kids discover it all.
But I’m getting ahead of myself. Stick with the basics for now, tweak the recipe to your liking, and know that once you’ve mastered the basic slime, there’s a whole new world of slimy possibilities waiting for you. Let’s embrace the joy and messiness of slime-making, and revel in the smiles it brings to our children’s faces. Happy sliming, everyone!
5 Essential Tips for Parents Preparing to Make Slime at Home
Welcome to the squishy, stretchy world of slime! Before embarking on this gooey journey, here are five essential things every parent should know:
1. Choose the Right Glue
While there are many recipes out there, choosing the right glue is crucial. White or clear PVA glue is typically the best choice for creating slime that’s easy to work with and lasts. Avoid using glue that says “washable” on the label as this type may not produce the desired slime consistency.
2. Safety First
Although making slime is relatively safe, it’s important to ensure that all slime ingredients are handled correctly. Keep slime supplies out of reach of small children and pets, and make sure kids are supervised during the slime-making process, especially when working with chemicals like borax or laundry detergent.
3. Manage the Mess
Slime making can get messy, but it doesn’t have to be a chore to clean up! Prep your area with a plastic table cover or a disposable tablecloth. Have wet wipes and a roll of paper towels handy for quick cleanups. Also, keep airtight containers or ziplock bags ready to store the slime once it’s made to avoid getting it stuck on fabrics and surfaces.
4. Allergic Reactions and Sensitivities
Be aware of any allergies your kids might have. Craft supplies like glue and borax can cause skin irritation or allergic reactions for some children. If your child has sensitive skin, consider wearing gloves or look for hypoallergenic slime recipes that use gentler ingredients like cornstarch and conditioner.
5. Embrace the Experiment
Slime making is not just an activity; it’s a science experiment! It’s the perfect opportunity to teach kids about measurements, chemical reactions, and consistency. Encourage them to adjust the recipe to see how it changes the slime’s texture and elasticity. Experimentation adds an educational twist to the fun!
Is It Slime Time Yet?
Now that you’re armed with the key tips and a basic slime recipe, it’s time to roll up your sleeves, gather your ingredients, and create some magic. Remember, there’s no one-size-fits-all method to making the perfect slime. It’s about enjoying the process, learning from the experience, and of course, having a blast with your children!
Keep the Fun Going: More Slime Variations!
When your family has mastered the basic slime recipe, don’t hesitate to venture into new textures and effects. You could explore fluffy slime by adding shaving cream into the mix, or get spooky with glow-in-the-dark slime, perfect for Halloween fun!
And let’s not forget, some kids have dietary restrictions or oral sensory needs. That’s where edible slime comes in! You can make a simple edible slime using ingredients like cornstarch, sugar, and food-grade colors. This way, even if the slime ends up in little mouths, it’s perfectly safe.
As you continue on your slime-making adventure, you might find that some recipes work better than others. It all depends on the ingredients you choose and the proportions you use. So be prepared to adapt and change things up as you go. Every batch of slime is a new experience!
Pro Tip: Record your slime recipes in a notebook – documenting your slime experiments with notes on texture, stretchiness, and kid satisfaction can help you recreate your successes and learn from the less-than-perfect attempts.
Making slime is about more than just the end product; it’s about the laughs, the “ewws” and “ahhs,” and the hands-on fun. As your kitchen transforms into a mini science lab, watch the wonder unfold in your children’s eyes. And through the spills and thrills, you’re not just making slime; you’re making memories. So, embrace the mess, enjoy the process, and get ready for some hands-on fun with your little ones!
See more great Things to Do with Kids in New Zealand here. For more information see here
Disclaimer
The articles available via our website provide general information only and we strongly urge readers to exercise caution and conduct their own thorough research and fact-checking. The information presented should not be taken as absolute truth, and, to the maximum extent permitted by law, we will not be held liable for any inaccuracies or errors in the content. It is essential for individuals to independently verify and validate the information before making any decisions or taking any actions based on the articles.


