
The Ultimate Guide to Making Slime at Home with Your Kids!
Hey there, awesome parents! Are you ready to dive into the squishy, stretchy, and sensational world of homemade slime? Making slime at home is not just a fantastic way to have some fun with your kids, but it’s also a perfect opportunity for a hands-on science experiment right at your kitchen table! Let’s get gooey!
Why Making Slime at Home is a Must-Try!
Making slime at home is the ultimate activity that blends creativity, education, and sensory play into one delightful experience. Plus, it’s a fabulous way to bond with your little ones while fostering their curiosity and love for learning new things. So, get ready for giggles and a bit of mess as we jump into the world of homemade slime!
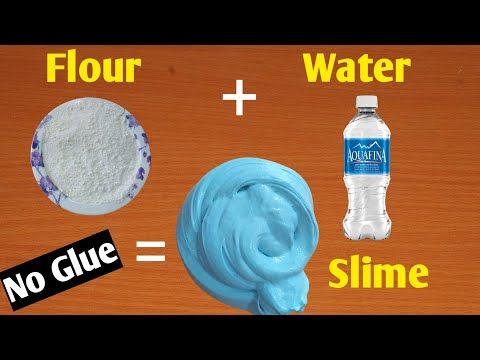
What You Will Need to Make Slime
- Basic Slime Ingredients: You will need white school glue, water, and your choice of slime activator (which we’ll discuss further below).
- Slime Activators: Common activators include borax solution, contact lens solution (containing boric acid), and liquid starch. Choose one based on your preference and availability!
- Coloring: Food coloring, paint, or glitter will add that pizzazz to your slime.
- Mixing Bowls: Have one or more bowls on hand depending on how many batches you want to make.
- Mixing Utensils: A spatula or a sturdy spoon will be essential for mixing your slime to perfection.
- Measuring Cups: Precision is key in slime making, so be ready to measure your ingredients.
- Storage Containers: Ziplock bags or airtight containers will keep your slime fresh for continuous fun.
Step-by-Step Instructions to Make the Perfect Slime
Now that we have all our ingredients ready, it’s time to create some slime-tastic magic!
1. Prepare Your Workspace
Lay down newspapers or a plastic tablecloth to protect your surfaces. Slime making can be a little messy, but that’s part of the fun, right?
2. Mix the Glue and Water
In your mixing bowl, combine equal parts of glue and water. For a basic batch, 1/2 cup of each should do the trick. Mix well until the glue and water are fully combined.
3. Add Color and Sparkle
It’s time to jazz up your slime! Add a few drops of food coloring, paint, or a dash of glitter to the mix. Stir until the color is evenly distributed throughout the slime mixture.
4. Slime Activation Time!
Gently stir in your slime activator—this is where the science happens! If you’re using a borax solution, mix 1 teaspoon of borax powder with 1 cup of warm water to create your activator. Start by adding just a few teaspoons of your activator to the glue mixture, stirring constantly. Add more as needed until the slime begins to form and pull away from the sides of the bowl. The texture should be sticky but not wet.
Remember, making slime is an adventure, and it’s okay if you don’t get it perfect on the first try. Experiment with different amounts of activator until you find the right consistency. If the slime is too sticky, add a bit more activator. If it’s too stiff, add a little bit of water or glue to soften it up.
5. Kneading Your Slime
Once your slime starts to clump together, it’s time to get your hands dirty! Remove the slime from the bowl and start kneading it on your protected workspace. Knead for about 5 minutes until your slime reaches the desired consistency and elasticity.
There you have it! You’ve just made your very own batch of homemade slime! But wait, there’s more! Continue onto the next section for tips on how to store your slime, fun variations, and safety precautions to ensure the best slime experience possible.
Finally, always remember the rule of thumb when making slime at home: the key ingredient is fun!.ExecuteNonQuery
5 Things Every Parent Should Know Before Making Slime at Home
Before we roll up our sleeves and get into the nitty-gritty of slime production, let’s talk about a few things every parent should know to ensure a successful and fun slime-making experience!
1. Understanding the Science of Slime
Slime isn’t just fun; it’s a science lesson in disguise! It’s a non-Newtonian fluid, which means it can behave like both a solid and a liquid depending on the pressure applied. This is due to polymers in the glue linking together when met with the activator. Explaining this to your kids can turn a simple activity into a teachable moment. Plus, it’s always more fascinating when you know the ‘why’ behind the ‘what’.
2. Allergy and Safety Precautions
Safety first! Always use non-toxic glue for your slime. While borax is a common activator, it can be irritating if not handled properly. Ensure you and your kids handle all ingredients with care and wash your hands thoroughly after playing with the slime. If anyone has sensitive skin, consider using a different activator such as contact lens solution which contains boric acid but is often less irritating. Additionally, keep young children who may put slime in their mouths supervised or consider an edible slime recipe.
3. The Importance of Ratios
Like any great recipe, slime making is all about having the right ratios. Too much activator and your slime will be stiff, too little, and it won’t form. Stick to the recommended amounts and add in small increments. It’s easier to add more activator than to correct slime that’s already become too hard.
4. The Cleanup Can Be Messy
While making slime is heaps of fun, it can get messy. Prepping your workspace with newspapers or a vinyl tablecloth can save you from a headache later. If some slime does get on your furniture or clothing, vinegar can help dissolve it—just make sure to test a small area first to ensure it doesn’t damage the surface.
5. Experiment and Get Creative!
Once you’ve mastered the basic recipe, don’t be afraid to get creative! There are countless ways to enhance your slime with different textures and colors. Add-ins like foam beads, scents, or thermochromic pigment (that changes color with temperature) can bring a whole new level of excitement to slime time!
Now, let’s talk about some additional fun variations you can try with your homemade slime!
Variations of Slime to Keep the Fun Going
Your basic slime is just the beginning! Here are a few delightful variations that you can try at home:
- Fluffy Slime: For a lighter, more airy slime, add shaving cream to your glue mixture before the activator. The result? A wonderfully fluffy texture that’s irresistible to squish!
- Butter Slime: Want a spreadable slime that has a unique texture? Mix in some soft clay with your finished slime to make butter slime. It holds its shape better and feels like butter—minus the mess!
- Glitter Slime: For a sparkling, mesmerizing effect, mix fine glitter into your slime. Watching it catch the light is utterly captivating!
- Crunchy Slime: Add small plastic beads or crushed styrofoam to create a satisfying crunchy texture that adds an audible element to the slime experience.
- Edible Slime: There are safe recipes that use ingredients like marshmallows and cornstarch to create a slime that’s safe to eat, although it may not have the same texture as traditional slime.
And let’s not forget about the importance of storing your slime to ensure it stays fresh for as long as possible. Once the fun is done, make sure to place your slime in an airtight container or ziplock bag. This will prevent it from drying out and means your slime is always ready for the next play session!
Slime making at home offers a wonderful blend of creativity, learning, and fun. As you embark on this gooey journey with your children, you’re sure to make memories that stick (quite literally!) for a lifetime. Enjoy the process, improvise, and make the most of this amazing homemade slime adventure!
Lastly, let the kids lead the way! You’ll be surprised at how their imagination can turn a simple slime recipe into hours of entertainment. Happy slime making, everyone!
. For more information see here
Disclaimer
The articles available via our website provide general information only and we strongly urge readers to exercise caution and conduct their own thorough research and fact-checking. The information presented should not be taken as absolute truth, and, to the maximum extent permitted by law, we will not be held liable for any inaccuracies or errors in the content. It is essential for individuals to independently verify and validate the information before making any decisions or taking any actions based on the articles.


