
Make Slime at Home: A Fun-filled Activity for Kids and Parents Alike!
Hey there, awesome parents! Are your little ones fascinated by all things squishy and colorful? If so, it’s slime time! Making slime at home is not just a fantastic way to keep those busy hands occupied, but it’s also an excellent opportunity for some incognito learning. Plus, it’s honestly just so much fun! So, let’s get ready to dive into the sticky, gooey world of homemade slime, where creativity meets science, and laughter is guaranteed. ?
Why Making Slime at Home Rocks!
Making slime isn’t just another way to pass the time, it’s loaded with benefits:
- Creativity Booster: Encourage your kids to mix and match colors, add-ins, and textures to create their unique slime.
- Science in Action: Explore basic chemistry concepts as you mix different ingredients and observe their reactions.
- Sensory Play: Slime is perfect for tactile stimulation, which is essential for kids’ sensory development.
- Stress Relief: Who knew slime could be so calming? Both you and your kiddos can squish stress away!
- Eco-Friendly Options: Use natural and safe ingredients for an eco-conscious slime-making session.
What You’ll Need to Get Started
Before we get our hands slimy, let’s ensure we have everything we need. Here’s a basic checklist:
- Glue: The foundation of most slime recipes. Clear or white school glue works best.
- Borax Solution: A key activator that transforms glue into slime when mixed in the right proportion. Dissolve 1 teaspoon of borax powder in 1 cup of warm water to make your solution.
- Water: Sometimes a little extra liquid is needed for the perfect slime consistency.
- Coloring: Get creative with food coloring, paint, or even natural dyes for that pop of color.
- Mix-ins: Consider glitter, beads, foam balls, or scents for extra pizzazz and texture.
- Mixing Bowl and Spoon: For combining all your slime components.
- Storage Containers: To keep your slime fresh for future play.
Step-by-Step Slime Making
Ready to get started? Here’s a simple step-by-step to creating your very first batch of homemade slime:
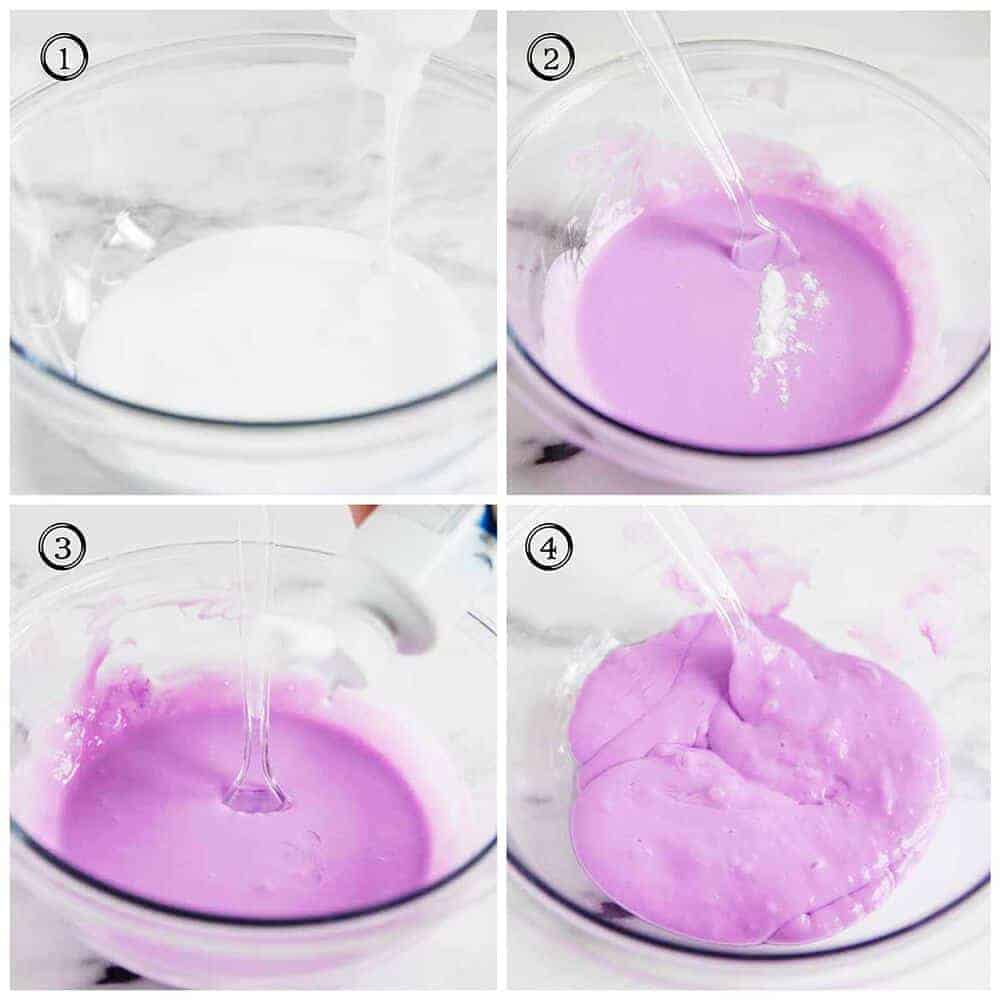
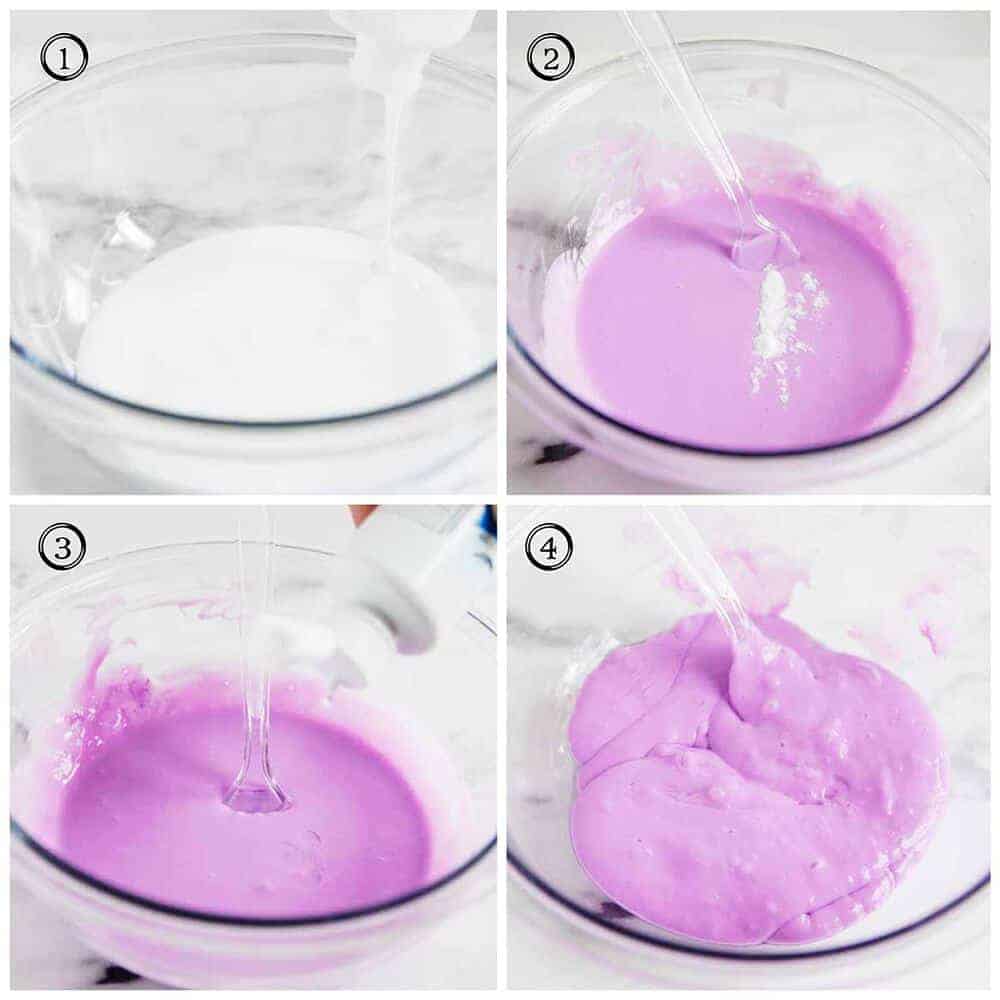
- Start by pouring about 4 ounces of glue into your mixing bowl.
- If you’re using food coloring or paint, add it to the glue before the activator. This way, you get an even color spread. Just a few drops or a squirt of color should be enough, depending on how vibrant you want your slime.
- Now it’s time for the exciting part – adding the borax solution! Begin by mixing in small amounts of the solution into your glue mixture and keep stirring. You’ll see the slime starting to form. Add the activator bit by bit until you’re happy with the texture.
- Once it starts pulling away from the sides and bottom of the bowl and looks pretty slime-like, you can start kneading with your hands. If the slime is too sticky, add a little more activator. But careful, add too much, and your slime may become hard and not very stretchy.
Remember, the key is to have fun and enjoy the process. Your first batch might not be perfect, but that’s totally okay! Every slime session is an adventure in creativity and learning. Plus, you’re making wonderful memories with your kids that you’ll all cherish.
Oh, and don’t worry if you’re still unsure about the steps or want to explore other types of slime—we’ve got you covered. Keep reading for more detailed recipes, safety tips, and ways to make slime even more exciting!
As joyous as slime-making is, it’s crucial to keep safety in mind. Always supervise your little ones during the process, and be mindful of the ingredients used, especially with toddlers who might be tempted to taste their creations. Opt for child-safe, non-toxic materials whenever possible, and wash hands after playtime.
Now that we have the basics down, let’s amp up the fun! In the following sections, we’ll explore variations like fluffy slime, edible slime, and even glow-in-the-dark slime. Ready for more slimy adventures? Let’s keep the excitement oozing!
Five Essential Tips for Parents Preparing to Make Slime at Home
As we gear up to create some spectacularly squishy slime, here are five helpful hints to ensure a brilliant and smooth slime-making experience:
- Prep Your Space: Slime can get a little wild, so it’s smart to set up your crafting area in a space that’s easy to clean. Cover the table with newspaper or a plastic tablecloth, and have some paper towels handy just in case.
- Choose the Right Glue: All glues are not created equal when it comes to slime. Make sure you have PVA (polyvinyl acetate) glue, such as regular white school glue or clear glue, for the best results.
- Activator Know-How: Besides the borax solution, you have other activator options like liquid starch, saline solution, or eye drops containing boric acid. Each activator creates a different slime texture, so feel free to experiment with what works best for you.
- Measure Ingredients: A little precision goes a long way. Use measuring cups and spoons to avoid the too-sticky or too-rigid slime dilemma. Once you get the hang of it, you can start tweaking the amounts to perfect your recipe.
- Safety First: It’s super important to ensure that all your ingredients, especially your activator, are safe for skin contact. Always opt for child-friendly, non-toxic options, and keep a close eye on your little scientists during the slime-making fun.
Slime Variations for Never-Ending Fun
Once you’ve mastered the basic slime recipe, the sky’s the limit! Let’s explore some fantastic variations to keep the excitement fresh:
- Fluffy Slime: Add some shaving cream into the mix for a delightfully fluffy texture that’s soft to the touch.
- Butter Slime: Achieve a spreadable and smooth consistency by adding a bit of modeling clay to your slime recipe.
- Magnetic Slime: Infuse your slime with iron oxide powder and get a slime that reacts to magnets!
- Edible Slime: For our little taste testers, create a safe-to-eat slime with ingredients like cornstarch, marshmallows, or gummy bears.
- Glitter Slime: Mix in some glitter for that mesmerizing sparkle that dazzles during playtime.
The possibilities are truly endless, and each variation offers its own unique sensory experience. Not only will your kids have a blast making and playing with it, but they’ll also learn a thing or two about the science behind these different textures.
Always remember to store your slime creations in air-tight containers to keep them fresh for as long as possible. If you notice the texture changing or the smell becoming off, it’s time to say goodbye and start a new batch. After all, making the slime is half the fun!
Are you eager to transform your kitchen into a mini science lab? Whether it’s for a rainy day activity, a science project, or just a regular Sunday afternoon, making slime at home promises a gooey good time for everyone involved. Let those imaginations run wild, and enjoy every squishy, stretchy moment!
See more great Things to Do with Kids in New Zealand here. For more information see here
Disclaimer
The articles available via our website provide general information only and we strongly urge readers to exercise caution and conduct their own thorough research and fact-checking. The information presented should not be taken as absolute truth, and, to the maximum extent permitted by law, we will not be held liable for any inaccuracies or errors in the content. It is essential for individuals to independently verify and validate the information before making any decisions or taking any actions based on the articles.


