
A Super Simple Slime Recipe for Gooey Fun with Kids!
Welcome to the whimsical world of slime-making where fun and creativity ooze at every turn! Whether it’s for a rainy day adventure or a delightful science experiment, making slime is a spectacular activity that’s loved by kids and parents alike. ??
What You’ll Need to Get Started
Gathering your supplies is as simple as heading to your kitchen or local store! For this easy recipe, you’ll need:
- Glue: Trusty ol’ white PVA glue. About a 4 oz bottle will do.
- Baking soda: Just half a teaspoon.
- Contact lens solution: This acts as our slime activator, but make sure it contains boric acid and sodium borate.
- Food coloring: Totally optional but completely fun – it’ll add that pop of color to your slime!
- Glitter or fun add-ins: Again, not necessary, but who can resist some sparkle or tiny toys nestled in their slime?
With this list, you’re all set to create something that’s guaranteed to bring a smile to everyone’s faces. ?
Step-by-Step Guide to Slime Fun!
Making slime with your kiddos couldn’t be easier! Follow these simple steps and watch as you transform everyday ingredients into playful gooey joy:
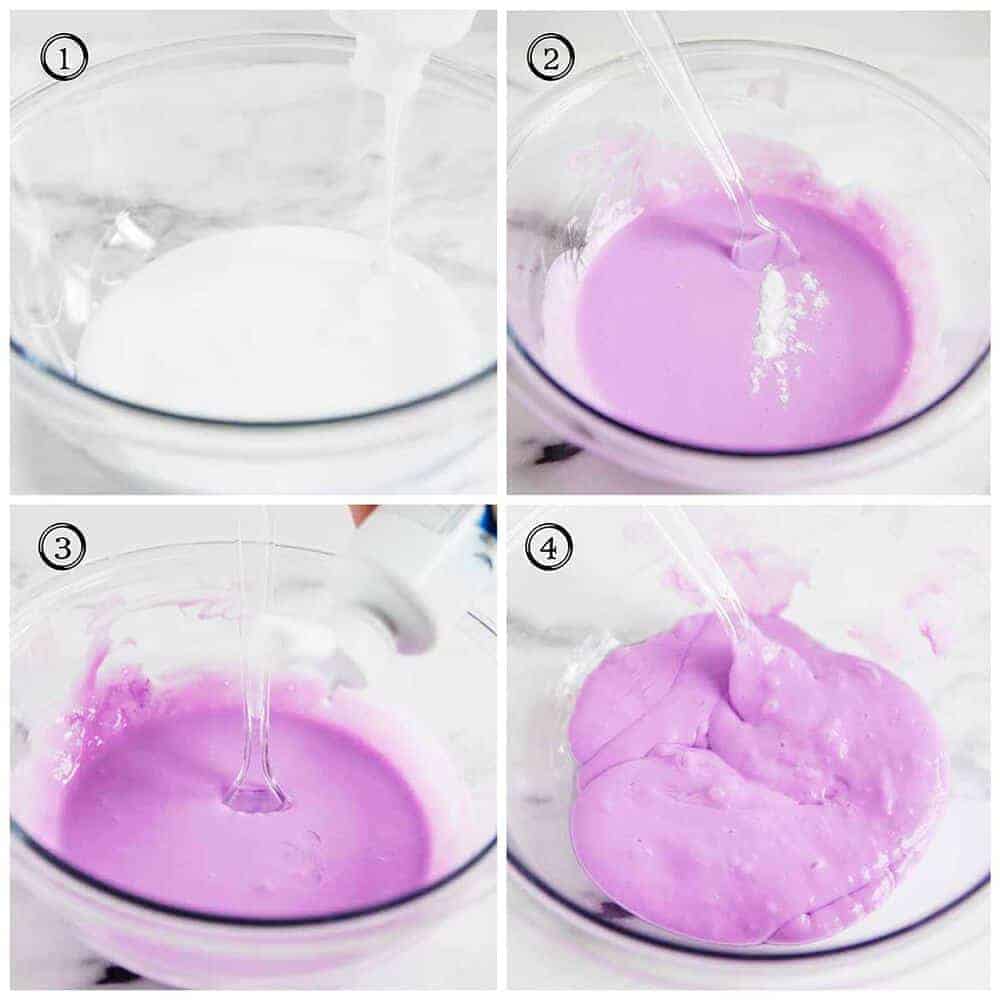
- Start with the Glue: Pour your bottle of glue into a bowl.
- Add Some Color: If using food coloring, add a few drops to your glue and stir. Now’s the time to add glitter or other fun mix-ins as well!
- Baking Soda Time: Sprinkle in your half teaspoon of baking soda and mix thoroughly. You’ll notice the solution thickening slightly.
- Activate the Slime: Add your contact lens solution into the mix bit by bit, stirring well after each addition, until your slime begins to form and pull away from the sides of the bowl. It’s starting to happen!
- Knead It: Once your slime has come together but is still a bit sticky, take it out and begin to knead it with your hands. It might be a tad messy, but that’s part of the fun!
- Slime-tastic: After a few minutes, your slime will become less sticky and more like the slime we know and love. Now you’re ready to play!
If your slime still feels too sticky, you can add a drop or two more of the contact lens solution. Just a little at a time – we don’t want it to become too stiff!
The Ultimate Guide to Homemade Slime: A Fun Activity for Kids!
Prepare for joyous giggles and astonished gasps as we dive into the gooey world of homemade slime! Not only is it a blast for the kiddos, but it’s a superbly educational experience that’s bound to be the highlight of their day. ???????
Before We Start: Five Important Tips for Parents
Before we jump into our slime recipe, let’s cover some valuable tips to make this a sensational and safe experience:
- Choose the Right Space: Slime making can get a bit messy, so pick an area that’s easy to clean. Consider laying down newspaper or a plastic sheet to catch any spills.
- Wear Proper Attire: Let’s face it – slime is sticky. Dress your little scientist in old clothes or an apron, and don’t forget about the clean-up. Wet wipes and paper towels can be real lifesavers!
- Non-Toxic Ingredients Only: Since kids will be hands-on, make sure all your ingredients are non-toxic and safe for skin contact.
- Keep Allergies in Mind: Some kids may be sensitive to certain ingredients like food coloring or glue. Always be aware of allergies and have alternatives on standby if needed.
- Supervise the Fun: Although slime-making is a fantastic way for kids to learn and explore, they should always be supervised to ensure they’re not eating ingredients or making too much of a gooey escape!
Now, with these tips in mind, let’s start our slimy adventure!
Gather Your Slime Ingredients
Here’s what you’ll need for your base slime:
- Glue: Standard white PVA glue will be your slime’s backbone – a single 4 oz bottle is perfect for a batch.
- Baking soda: Half a teaspoon to thicken up the mixture.
- Contact lens solution: Ensure it contains boric acid and sodium borate for slime activation.
- Food coloring: Make your slime vibrant with a few drops of color – a delightful optional step.
- Glitter or beads: Add in some fun elements for texture and sparkle – this part’s a hit with kids!
Slime Making: Step-by-Step Fun
Follow these steps for a wonderful slime experience:
- Glue First: Squeeze the glue into a mixing bowl to start.
- Color Time: Now’s the fun add-in moment! Drop in your food coloring and any glitter or beads.
- Baking Soda Magic: Add the baking soda and mix. Watch the mixture turn a bit creamy.
- Activation Station: Pour in the contact lens solution gradually. Stir until your slime starts to clump and detach from the bowl.
- Kneading Time: Get those hands ready and knead the slime. It’ll be sticky at first, but that’s part of the charm!
- Perfect Slime: With consistent kneading, your slime will hit the right consistency. Now it’s all about playing and having fun!
Remember, if your slime is too sticky, a couple more drops of the activator will do the trick. Mix thoroughly, and voilà!
See more great Things to Do with Kids in New Zealand here. For more information see here
Disclaimer
The articles available via our website provide general information only and we strongly urge readers to exercise caution and conduct their own thorough research and fact-checking. The information presented should not be taken as absolute truth, and, to the maximum extent permitted by law, we will not be held liable for any inaccuracies or errors in the content. It is essential for individuals to independently verify and validate the information before making any decisions or taking any actions based on the articles.


