
Ultimate Guide: How to Make Slime with Glue for Endless Fun!
Welcome to the World of Slime Making!
Hello, creative parents and fun-loving kids! Are you ready to dive into the squishy and stretchy world of slime? Making slime with glue is not just an exciting activity that can lead to hours of entertainment, but it’s also a fantastic way to explore basic chemistry with your little ones. In this ultimate guide, we’ll cover everything you need to make the perfect batch of slime and share some pro tips to ensure your slime-making adventure is a success every time!
Why Making Slime is More Than Just Fun
Before we get our hands sticky, let’s talk a bit about the benefits of slime-making. It’s not only a delightful sensory experience but also enhances fine motor skills, fosters creativity, and introduces kids to scientific concepts like non-Newtonian fluids. Plus, the process encourages following directions and can be a soothing activity for those who need a little sensory input. Ready to get started?
Slime Ingredients
At the heart of any slime recipe is glue, but a few additional household ingredients will transform it into the slime we all love. Here’s what you’ll need:
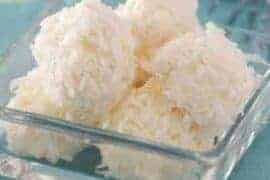
- White or Clear PVA Glue – The base of your slime.
- Baking Soda – Helps thicken the glue into slime.
- Contact Lens Solution – Contains boric acid, which reacts with the baking soda and glue to form slime.
- Water – Depending on the desired consistency, you might add a little bit of water.
- Food Coloring (optional) – For that pop of color!
- Glitter or Beads (optional) – For added texture and sparkle.
Note: Make sure the contact lens solution contains boric acid and sodium borate for the slime to form.
Slime-Making Equipment
Gather your tools to ensure a smooth slime-making experience:
- A large mixing bowl
- A spatula or spoon for stirring
- Measuring spoons
- Airtight containers or plastic bags for storage
Now that we have our ingredients and tools ready, let’s get started!
Step-by-Step Slime Creation
Follow these easy steps to create your first batch of homemade slime:
- Pour PVA glue into your mixing bowl. The amount depends on how much slime you want to make.
- If you’re adding color, now’s the time to drop in your food coloring. Stir until the color is evenly dispersed.
- Add a pinch of baking soda to the mixture – this will help the slime to thicken and bind.
- Mix in any fun add-ins like glitter, beads, or even a few drops of essential oils for scented slime.
- Gradually add contact lens solution and start to mix. You’ll notice the slime begins to form.
- Keep stirring and adding the contact lens solution until the slime pulls away from the bowl and starts to clump around your stirrer.
- Now, get ready to get your hands in there! Knead the slime by hand until it reaches your preferred consistency. If it’s too sticky, add a bit more contact lens solution, but be careful not to add too much, or your slime will become hard.
- Voilà! Your slime is ready for play. If you notice any leftover bits in the bowl, use your slime to pick them up.
And that’s it, folks! You’ve just made your very own batch of slime. Remember, making slime is a bit of an art and a little bit of science, so if your first batch isn’t perfect, don’t worry! It’s all about experimenting and having fun. Keep this handy guide bookmarked for quick reference, and feel free to get creative with different colors, add-ins, and slime types. Happy sliming!

Five Things Every Parent Should Know Before Making Slime
Ready to jump into the gooey joy of slime-making with your kids? Here are five essential tips to prepare for a successful slime experience:
- Safety First: Ensure all ingredients are non-toxic and safe for children’s use. Always supervise your kids during the slime-making process, especially younger ones who might be tempted to taste the slime.
- Prep Your Space: Slime can get messy, so cover surfaces with newspapers or a disposable tablecloth. Keep wet wipes or a cloth nearby to clean sticky fingers easily.
- Understand the Ingredients: Know the purpose of each component in the slime recipe. This knowledge is helpful if you need to adjust the recipe for better consistency or if your child has any allergies.
- Budget-Friendly Options: You don’t need to buy expensive kits to make slime. Common household items can do the trick, which makes slime-making a relatively inexpensive activity.
- Post-Slime Plan: Designate a place for slime play that is easy to clean and decide how you’ll store the slime afterward. Airtight containers will keep the slime fresh longer.
With these tips, you’re well on your way to becoming a slime-making champion alongside your kids.
See more great Things to Do with Kids in New Zealand here. For more information see here
Disclaimer
The articles available via our website provide general information only and we strongly urge readers to exercise caution and conduct their own thorough research and fact-checking. The information presented should not be taken as absolute truth, and, to the maximum extent permitted by law, we will not be held liable for any inaccuracies or errors in the content. It is essential for individuals to independently verify and validate the information before making any decisions or taking any actions based on the articles.

