
How to Make Slime with PVA Glue: A Step-By-Step Guide for Parents
Hey there, awesome parents! Are you ready to dive into the squishy and oozing world of slime-making with your kids? Making slime with PVA glue is not only super fun but it’s a fantastic way to engage your little ones in a creative and sensory activity. Don’t worry if you’re not a science whiz or a craft master – I’m here to walk you through the simple steps to create the perfect slime at home!
Why PVA Glue Slime is the Perfect Choice for Kids
Before we get our hands sticky, let’s talk about why PVA glue (that’s polyvinyl acetate glue for the curious) is the go-to ingredient for slime. PVA glue is a safe and non-toxic adhesive that’s easy to find and affordable. It also makes for a great consistency when turned into slime, ensuring a stretchy and pliable final product that kids love to play with!
Ingredients and Supplies You’ll Need
Time to gear up! Here’s a simple list of what you’ll need:
- PVA Glue: This will be the base of your slime. Any brand will do, as long as it’s PVA!
- Baking Soda: A little bit of this household staple will help thicken your slime.
- Contact Lens Solution: This acts as an activator to turn your glue into slime. Make sure it contains boric acid!
- Food Coloring: Want to jazz up your slime? Add a few drops of food coloring for a pop of color.
- A Bowl: To mix your ingredients in.
- A Spoon or Craft Stick: For stirring everything together.
Step-by-Step Instructions: How to Make Slime with PVA Glue
Now, let’s make some slime magic! Here’s what you’ll do:
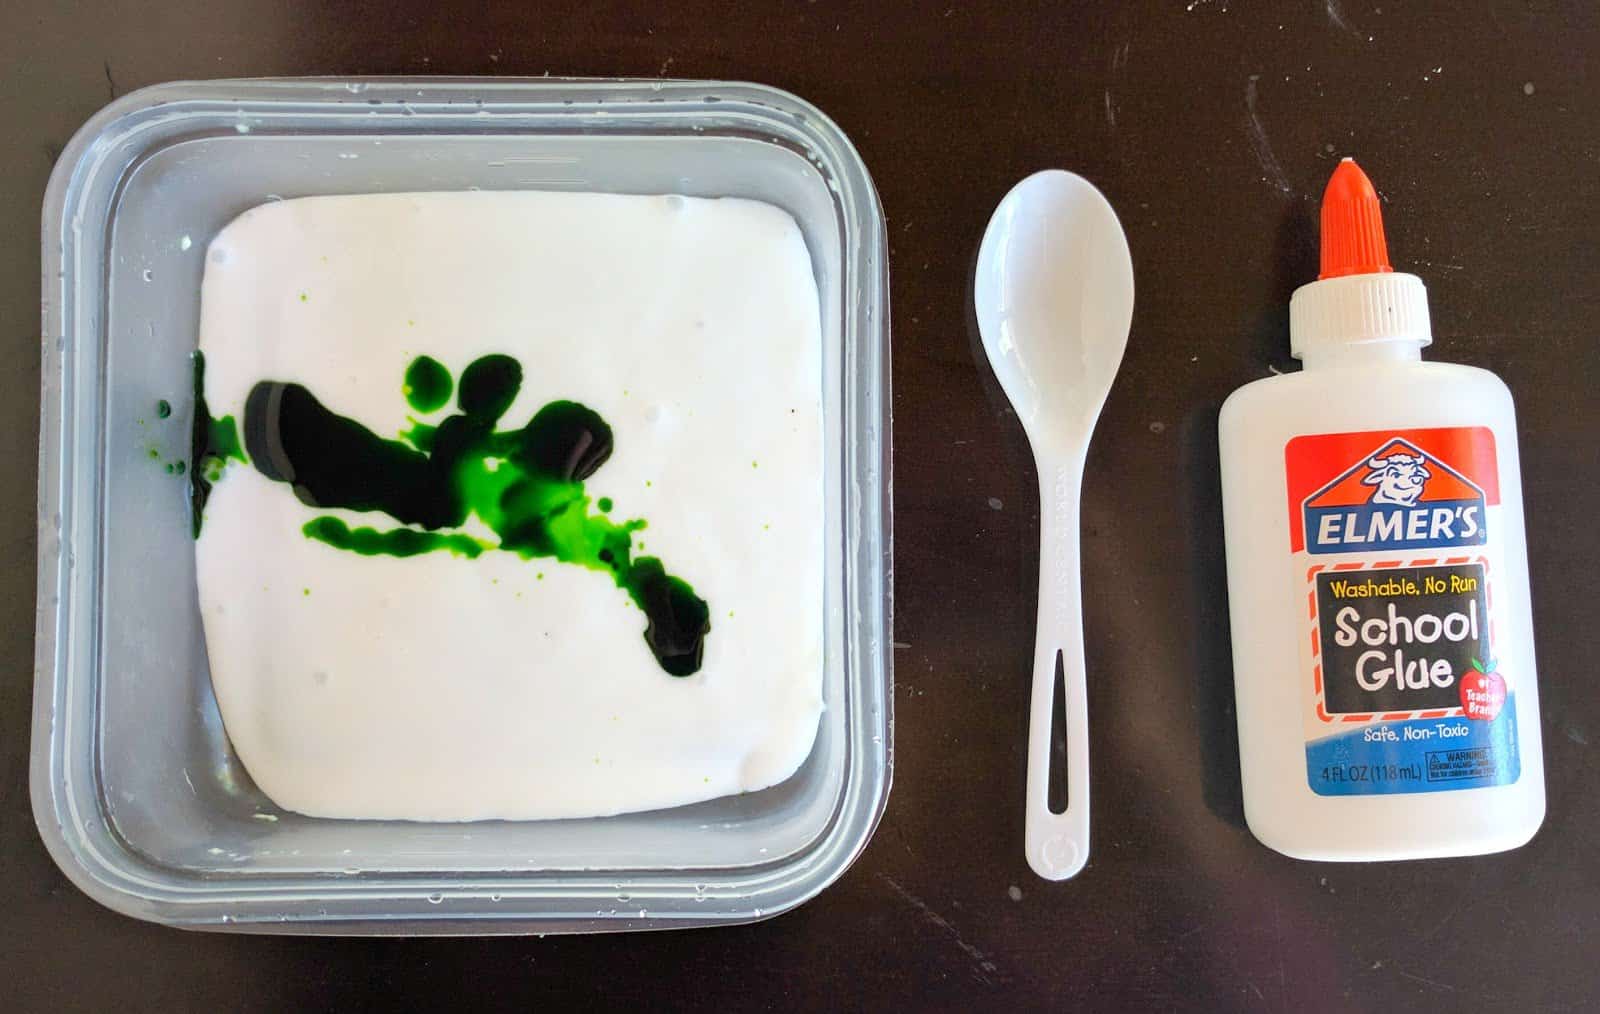
- Pour the PVA Glue: Start by pouring your desired amount of PVA glue into the bowl.
- Add Some Color: If you’re using food coloring, this is the time. Just a few drops should do the trick, and then mix it thoroughly.
- Thicken with Baking Soda: Sprinkle a bit of baking soda into the mix—about half a teaspoon for every 4 ounces of glue—and stir it in.
- Slime Activator Time: Add your contact lens solution to the mixture little by little, stirring constantly. You’ll notice the mixture starting to thicken and stick together.
- Mix, Mix, Mix: Keep stirring until your slime begins to form, and then get ready to knead it with your hands.
- Knead the Slime: When the mixture becomes too difficult to stir, take it out and start kneading with your hands until you reach the perfect slime consistency. If it’s too sticky, add a tiny bit more contact lens solution.
Voilà! You’ve now got some homemade PVA glue slime. But we’re not done yet! Keep reading for important tips and tricks, as well as answers to common slime-making questions.
Important Tips for Slime Success
- Slime Consistency: If your slime feels too sticky, add a little more contact lens solution. If it’s too stiff, add a bit more glue.
- Food Coloring Caution: Remember, food coloring can stain hands and surfaces, so protect your workspace and consider wearing gloves if you want to avoid colorful hands.
- Storing Slime: When not in use, store your slime in an airtight container to keep it fresh.
Ready to be the coolest parent on the block? Making slime with PVA glue is just the beginning of an incredible adventure. Keep those sleeves rolled up, because things are about to get delightfully gooey, and your kids are going to love the hands-on fun! Stay tuned for even more exciting slime variations and creative ideas to take your slime game to the next level.
5 Things Parents Should Know When Preparing to Make Slime with PVA Glue
1. Safety Comes First
While PVA glue is non-toxic and generally safe to handle, it’s always best to supervise your kids during the slime-making process. Ensure they aren’t putting slime near their mouths, eyes, or other sensitive areas. If you have very young kiddos who might be tempted to taste their creations, keep a close watch during fun time!
2. Choose the Right PVA Glue
Not all PVA glues are created equal when it comes to slime-making. Look for white school glue labels, which usually have the right composition for perfect slime consistency. Slime-friendly brands often advertise “washable” and “non-toxic” on their labels, which is precisely what we want!
3. Prep Your Space
Slime can get a little messy, so let’s prepare to avoid permanent souvenirs of this activity on your furniture. Cover your table with an old tablecloth, newspaper, or plastic sheet. Keep wipes or a damp cloth at hand for quick clean-ups.
4. Measure Ingredients
Getting the right proportions can make or break your slime success. While experimenting is part of the fun, starting with measured ingredients can lead to a better first batch. It will also teach your kids the importance of following a recipe—science in action!
5. Patience is Key
The slime might not reach the perfect texture immediately. It can take a little time and patience to knead it into that irresistibly fun texture. Encourage your kids to keep at it and use it as a moment to learn about persistence and the joys of seeing a project through.
As you embark on this gooey journey, remember to enjoy every second of it. This isn’t just about the slime—it’s about the memories you’re making with your kiddos. So, crack open that bottle of PVA glue and get ready for an afternoon filled with laughter, creativity, and maybe just a little bit of slime in your hair. Happy slime-making!
See more great Things to Do with Kids in New Zealand here. For more information see here
Disclaimer
The articles available via our website provide general information only and we strongly urge readers to exercise caution and conduct their own thorough research and fact-checking. The information presented should not be taken as absolute truth, and, to the maximum extent permitted by law, we will not be held liable for any inaccuracies or errors in the content. It is essential for individuals to independently verify and validate the information before making any decisions or taking any actions based on the articles.


