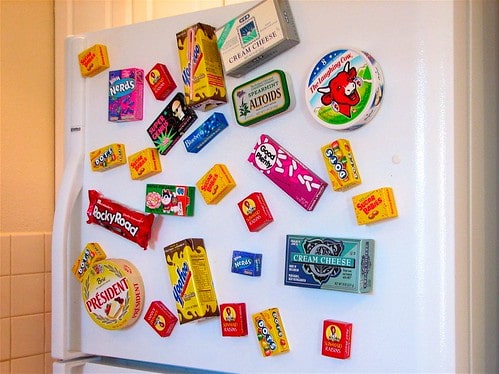
Craft-the-Fun: Creative Fridge Magnets Making for Parents and Kids
Hey there, craft-loving families! Are you on the hunt for a fun, easy, and incredibly charming activity to share with your little ones? Look no further! Welcome to our ultimate guide to DIY fridge magnets, where wonder sticks to your refrigerator, and memories are magnetized with joy!
Whether you’re a seasoned DIY enthusiast or a beginner eager to delve into a new craft, this handy guide will walk you through the magnetic world of creativity right in the cozy comfort of your home. Perfect for rainy days, birthday parties, or just some quality family time, making fridge magnets is not just about decorating your kitchen but also about bonding and learning new skills together.
Why Fridge Magnets Making Is the Perfect Family Craft
- Boosts Creativity: Designing fridge magnets from scratch encourages everyone involved to unleash their inner artist.
- Enhances Fine Motor Skills: For the young ones, this activity is excellent for developing dexterity and coordination while having fun.
- Educational Experience: Kids can learn about magnets, materials, and even incorporate elements of their schoolwork, like alphabet letters or numbers.
- Sustainable Crafting: It’s a wonderful opportunity to teach about recycling by using materials found around the house.
- Customized Keepsakes: Create personalized gifts or keepsakes that can be cherished for years to come.
With these benefits in mind, let’s get started! In this guide, we’ll cover everything from materials to step-by-step instructions, tips, and even a sprinkle of creative ideas to light up your imagination!
Materials You’ll Need for Fridge Magnets Making
One of the best parts about making fridge magnets is that you can start with just a few basic materials. Here’s what you’ll need:
- Magnet Strips or Magnet Dots: These are the base of your fridge magnet, readily available at craft stores or online.
- Adhesive: Depending on your materials, you may need glue, double-sided tape, or a hot glue gun.
- Decorative Elements: Think outside the box! Buttons, felt, fabric scraps, photos, beads, or even small toys can be transformed into magnets.
- Base Material: Anything from cardboard cutouts and pop sticks to small wooden shapes and clay can serve as the base for your magnets.
- Paint and Brushes: If you’re planning to paint your magnets, having a variety of colors and brush sizes is essential.
- Scissors/Cutting Tools: These will be used to shape your base materials into the desired form.
Once you’ve gathered your materials, it’s time to clear a space on the kitchen table or the floor of the living room and spread out your crafting station. Ensure it’s an area where everyone feels comfortable and where a little bit of mess won’t cause any stress.
Getting Started with Your Fridge Magnets
Before you dive into the creation process, take a moment to plan out your magnet designs. Ask your kids for input – what would they love to see hanging on the fridge? Is it their favorite animal, a cool spaceship, or perhaps a sparkling rainbow?
Remember, the key to a fantastic crafting session lies in the joy of creating, not just in the end result – so encourage everyone to express their unique ideas and styles!
Step-by-Step Instructions for Basic Fridge Magnet Making
Now, let’s break down the process into simple, manageable steps that will guarantee fridge magnet magic:
Step 1: Design Your Magnet
Start by sketching out your design on paper or directly onto your base material. This could be a simple shape, like a heart or star, or something more intricate like a little character or landscape.
Step 2: Prepare the Base
Cut out the base material according to your design using scissors or a cutting tool. For a 3D effect, you can even layer different pieces of materials.
Step 3: Decorate Your Magnet
This is where the fun truly begins! Paint, glue on decorative elements, or stick on photos to bring your creation to life. Get creative and mix different textures and materials.
As you embark on this delightful magnet-making adventure, remember to let those creative juices flow freely. Watch as the front of your refrigerator transforms into a canvas of imagination, featuring miniature masterpieces that everyone in the family contributed to. Keep your spirits high and your glue stick ready, as our guide to DIY fridge magnets has only just begun. With vibrant colors, a variety of textures, and an abundance of love, your creations will not only hold up notes and drawings but also the precious memories of time spent together crafting something beautiful. We’ll continue to explore more advanced techniques and designs that are sure to spark even more joy and creativity in your family’s magnet-making journey. So stick around, the fun is just getting started!

As you get set to embark on this fridge magnet-making journey, here are five essential tips that parents should know to prepare for an unforgettable crafting experience with their kids:
Tip 1: Safety First
Creating with kids means safety comes first. Always use child-friendly scissors and supervise the use of any sharp tools. Hot glue guns should be handled by adults or older children under close guidance. Keep small objects that may pose a choking hazard, like beads or buttons, out of reach from the littlest crafters.
Tip 2: Embrace the Mess
Get ready for a bit of chaos – it’s part of the fun! Set up your crafting area with materials that are easy to clean. Cover your surfaces with washable tablecloths or newspapers and keep wet wipes or a damp cloth handy for quick cleanups.
Tip 3: Plan for Time
Magnet making isn’t a race – it’s a relaxing time to bond and create. Allocate enough time so that kids don’t feel rushed. This is especially important for drying time if you’re using paints or glue that needs to set.
Tip 4: Personalize the Experience
Encourage kids to think about what they love. Personalize magnets using their artwork or favorite colors. You can also create themed magnets for holidays or to complement lessons such as the solar system or alphabet.
Tip 5: Simple Start, Brilliant Finish
Begin with simple projects that provide quick gratification to keep interest levels high. As confidence grows, you can introduce more complex designs.
Keeping these tips in mind will ensure that your DIY fridge magnet crafting session is both enjoyable and successful. Now, let the creativity begin and the magnet wonder flourish as you spend this precious time together!
Advance Your Magnet Making: Techniques and Designs
Once you’ve mastered the basics, it’s time to level up your fridge magnet game!
- Layering: Start experimenting with layering materials to add depth and complexity to your designs.
- Textures: Introduce different textures by including materials like sandpaper, burlap, or even tin foil for a metallic sheen.
- Using Molds: Silicone molds can be used with air-dry clay or resin to create unique shapes and professional-looking magnets.
- Mixed Media: Combine painting with decoupage, or add hand-drawn elements to a photo to make your magnet design pop.
- Education-Forward: Create magnets that double as educational tools such as alphabet letters, numbers, or even small puzzles.
Let your family’s creativity soar as you embark on more advanced projects. With each little piece of art, you’re not just creating fridge magnets; you’re crafting memories that will stick just like your adorable creations on the refrigerator door.
Remember to always capture those smiles and maybe even the concentration faces as you all sit and create together. Click a few photos, and hey, they might just be the next fridge magnet project! So what are you waiting for? Gather your colorful supplies and let’s make some fridge magnets that are packed with love and creativity!
See more great Things to Do with Kids in New Zealand here. For more information see here
Disclaimer
The articles available via our website provide general information only and we strongly urge readers to exercise caution and conduct their own thorough research and fact-checking. The information presented should not be taken as absolute truth, and, to the maximum extent permitted by law, we will not be held liable for any inaccuracies or errors in the content. It is essential for individuals to independently verify and validate the information before making any decisions or taking any actions based on the articles.


