
Twinkle, Twinkle Little Star Biscuits: A Magical Guide for Parents
Hey there, super parents! Ready to sprinkle some stardust into your baking? Light up your kitchen with the joy of making star biscuits that are as enchanting to look at as they are scrumptious to eat. Not only will we be sharing our secret recipe for the yummiest star-shaped treats, but we’ll also dish out fun decorating tips that will make your baking project an absolute hit!
Whether it’s a rainy day indoors, a festive holiday, or just a love-for-cooking kind of day, baking star biscuits with your little ones can create memories that twinkle for years to come. So, put on your aprons, gather your starry-eyed sous-chefs, and let’s make some magic in the kitchen!
Why Star Biscuits Are a Stellar Idea
Baking with your children is about so much more than the delicious treats you create together. As you measure flour, whisk eggs, and roll out dough, you’re nurturing important life skills – from math and science concepts to fine motor skills and patience. Plus, the star shape isn’t just charming; it’s an opportunity for little ones to dream big as they shape their dough into something extraordinary.
Gathering Your Constellation of Ingredients
Before you dive into the world of baking, you’ll need to stock up on some essential ingredients. The beauty of our star biscuit recipe is that it calls for simple, readily available items that you might already have in your pantry. Here’s what you’ll need for the basic recipe:
- All-purpose flour
- Granulated sugar
- Unsalted butter (softened)
- A pinch of salt
- Vanilla extract
- Egg
- Baking powder
Make sure all your ingredients are at room temperature to ensure evenly mixed dough and perfectly baked biscuits. We’ll get into the precise measurements and steps in just a bit, so stick with us!
Tools of the Trade: Baking Equipment You’ll Need
No need to wish upon a star for fancy gadgets! To whip up our star biscuits, you’ll mostly use everyday kitchen tools. Here’s the list:
- Rolling pin
- Star-shaped cookie cutters of various sizes
- Mixing bowls
- Measuring cups and spoons
- Baking sheet
- Parchment paper or a silicone baking mat
- Cooling rack
- An electric mixer (handheld or stand mixer)
Having everything prepared and at your fingertips will make the process a breeze and give your junior pastry chefs a real taste of baking success!
Laying the Foundations: How to Prep Your Baking Space
Before we dive into the stars, ensuring a safe and organized space is key for a fun and educational baking experience. Here’s how to set yourself up for success:
- Clean and clear: Start with a clean countertop and make sure there’s enough space to roll out dough and place your baking tools.
- Safety first: Go over kitchen safety with the kids, like not touching hot pans or electrical appliances without supervision.
- Accessible ingredients: Have all your ingredients measured and ready to go so little ones aren’t left waiting (and possibly wandering).
Now that we’ve covered the essentials, are you ready to get started on the actual baking process? Stay tuned as we embark on the exciting journey of mixing, rolling, and baking our way to the most delectable star biscuits that are simply out of this world!
Five Things Parents Should Know in Preparing for Star Biscuits
- Pre-baking prep is crucial: Before you start, go through the recipe with your kids. Help them understand each step, and answer any questions they may have. This will not only help with bonding but will also make the process smoother and more enjoyable for everyone.
- Hygiene matters: Instill good habits by reminding children (and yourself!) to wash hands before starting, and keep hair tied back. Cleanliness is king in the kitchen, and safe food handling is a must, especially when little hands are eager to help.
- Be patient and flexible: Remember, the goal is to have fun and bond, not to bake the perfect biscuit on the first try. Kids are learning and might be a bit messy or slower at tasks. It’s all part of the experience, so embrace the flour-covered faces and doughy fingers!
- Delegate age-appropriate tasks: Kids of different ages will have different skills. Give younger kids simpler tasks like pouring and mixing, while older children can take on measurements and rolling. This keeps everyone engaged and builds confidence in their abilities.
- Get creative with decorations: Once baked and cooled, let your imagination soar by decorating the star biscuits. From icing and sprinkles to edible glitters and colored sugar, the sky’s the limit. This is an opportunity to see your child’s creativity shine.
The Ultimate Star Biscuit Recipe
Here’s the step-by-step guide to creating the tastiest star biscuits in the galaxy! We’ve broken it down into simple stages that you and your kiddos can follow easily.
Ingredients:
- 2 cups of all-purpose flour, plus extra for dusting
- 1/2 cup of granulated sugar
- 1 cup of unsalted butter, softened (that’s about 2 sticks)
- 1/4 teaspoon of salt
- 1 teaspoon of vanilla extract
- 1 large egg
- 1 teaspoon of baking powder
Instructions:
- In a bowl, whisk together flour and baking powder. Set aside.
- In a separate mixing bowl, cream the butter and sugar with the electric mixer until light and fluffy.
- Add the egg and vanilla extract, then blend until well combined.
- Gradually add the dry ingredients into the wet mixture and mix until a dough forms.
- Divide the dough in half, flatten into discs, wrap in cling film, and chill for at least 1 hour.
- Preheat your oven to 350°F (180°C) and line your baking sheet with parchment paper.
- On a lightly floured surface, roll out one dough disc to about 1/4 inch thick. Use your star cutters to cut out shapes and transfer them to your baking sheet.
- Bake for 10-12 minutes or until the edges are slightly golden.
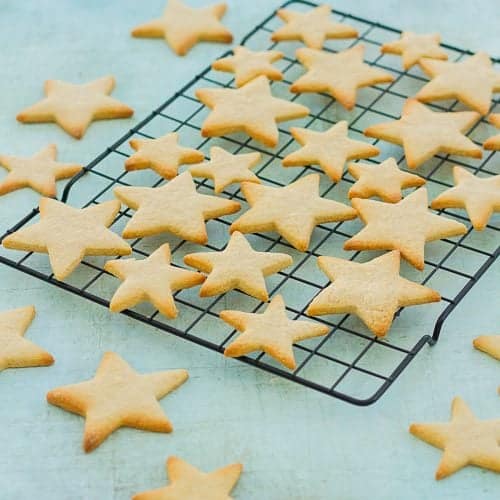
- Let the biscuits cool on the sheet for a couple of minutes before transferring them to a cooling rack.
- Once fully cooled, decorate to your heart’s content!
Whether you’re a baking novice or a seasoned pro, this guide will help create an exciting and tasty adventure for you and your family. Remember, it’s not just about the biscuits; it’s the love and laughter shared along the way that makes this activity truly special.
Baking can undoubtedly turn an ordinary day into an extraordinary one. So why wait? Grab those aprons, round up the troops, and get ready to add a dash of wonder to your kitchen with homemade star biscuits that’ll leave everyone starry-eyed and smiling!
Tips for Perfect Star Biscuits Every Time
To ensure that your star biscuits are not just good, but constellation-worthy, here are some extra tips:
- Chill the dough: Make sure to chill the dough as this will help the biscuits maintain their shape when baking.
- Even thickness: Roll out your dough to an even thickness to ensure uniform baking and crispness.
- Keep an eye on the oven: Every oven is different, and baking times can vary, so keep an eye on your biscuits, especially towards the end of baking time.
- Cooling is key: Allow biscuits to cool sufficiently before moving them to prevent breaking. Patience here means perfect biscuits later!
- Add personal touches: Use this baking activity as a way to learn more about your child’s preferences, be it their favorite colors for decorations or even flavors like almond or lemon extract.
See more great Things to Do with Kids in New Zealand here. For more information see here
Disclaimer
The articles available via our website provide general information only and we strongly urge readers to exercise caution and conduct their own thorough research and fact-checking. The information presented should not be taken as absolute truth, and, to the maximum extent permitted by law, we will not be held liable for any inaccuracies or errors in the content. It is essential for individuals to independently verify and validate the information before making any decisions or taking any actions based on the articles.


