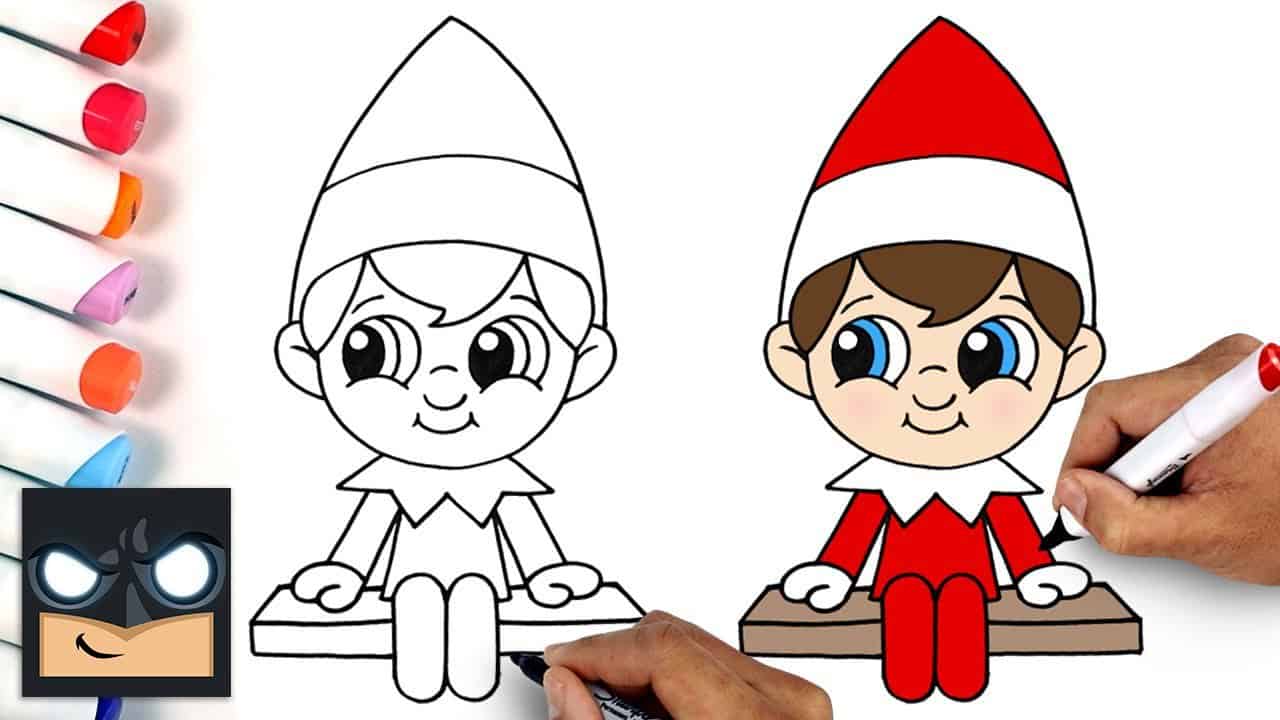
Magical Lines: A Parent’s Guide to Drawing a Delightful Elf
Hey there, artsy families! Ready to sprinkle a little fantasy into your next drawing session? Elves are one of the most enchanting characters in fairy tales and fantasy books, and drawing one can be a wonderful activity to share with your kiddos. Whether you’re gathered around the kitchen table or cozying up in the living room, creating an elf together is sure to spark imagination and bring smiles all around. In this handy-dandy guide, I’ll walk you through each step of drawing an adorable elf, ensuring fun for both you and your young artists!
Materials You’ll Need
- Sketch Pad: A nice, blank canvas for your art adventure.
- Pencils: Good ol’ HB pencils are perfect for sketching. Keep a sharpener handy!
- Erasers: For those little “happy accidents”.
- Colored Pencils or Markers: To bring your elf to vivid life!
Step 1: The Basics of an Elf Head
Let’s start with the head – the epicenter of your elf’s charm. Elves typically have delicate features, so think graceful curves when you’re sketching.
- Begin with a circle for the head.
- Add a chin by drawing a line that narrows slightly as it moves below the circle.
- Sketch two lines down the center of the face, one vertical and one horizontal, to help align the eyes, nose, and mouth.
Step 2: Elves’ Eyes & Ears
Elves are famed for their striking eyes and iconic pointed ears, so give these features extra attention.
- Where the horizontal line crosses the vertical line, draw two almond shapes for eyes.
- Add pupils and a twinkle of mischief to those eyes with careful circles and tiny highlights.
- For the ears, envision an elongated leaf shape, starting from around the eye line and extending upwards.
Step 3: An Enchanting Elf Nose and Mouth
Continue defining those whimsical features with a cute little nose and a smile that’s brimming with elfish joy.
- Just below the horizontal line, draw a small, soft triangle without its bottom for the nose.
- For the mouth, go for a gentle curve that holds the promise of countless elven stories.
Step 4: The Elf’s Hairstyle
No elf is complete without a hairdo that’s full of character! Whether it’s braids, curls, or something uniquely magical, hair brings personality to the page.
- Decide on a hairstyle for your elf and start sketching it in, flowing from the top of the head.
- Remember to erase any overlapping lines of the initial circle that are now hidden by hair.
Step 5: Adding Body and Style
With the head and face taking shape, let’s add some pizzazz to the elf’s body and outfit.
- Sketch a slender neck leading down to a pair of dainty shoulders.
- Then, draw the outlines of the elf’s upper body, remembering that elves are often depicted as lithe and agile.
- Envision a clothing style – maybe a tunic or robe – and sketch that in, adding details like buttons or intricate patterns to reflect your elf’s personality.
And here’s where the real fun begins! As you continue drawing your elf, think about the story behind this fantastic creature. What kind of elf are you creating? Is it a woodland elf with leaves woven into its hair, or a high elf adorned in silken robes? As parents, sharing this creative process with your children encourages them to use their imagination, develop their story-telling abilities, and enjoy the enchantment of art.
The journey of drawing your elf doesn’t stop here, there is so much more to explore! From choosing the right accessories to defining the posture and movements, every choice adds personality and depth to your drawing. Keep your pencils ready, as we’ll soon dive into more intricate details, colors, and shading techniques that will bring your elf drawing to life, capturing the essence of elven beauty and grace.
With just these first steps, you’re already well on your way to creating a whimsical masterpiece that could even be the start of a home gallery of mythical beings! Stay tuned for the next chapter where we’ll continue to build upon this enchanting foundation. Happy drawing, and may your family’s creativity shine as brightly as starlight on elven cloaks!

5 Things Parents Should Know When Preparing to Draw Elves with Kids
Gearing up for a fantastical drawing adventure? Before diving into the realm of elves and the joy of sketching, there are five magical tips that will help make your drawing experience as smooth as a fairy’s glide. Keep these in mind, and you’re sure to create some enchanting memories with your little ones!
1. Set the Stage for Creative Success
Find a comfortable and well-lit spot for your drawing escapade. Clear the table of any non-artistic clutter and ensure that everyone has enough space to work their magic. A positive and inviting environment will encourage your kids’ creativity to flow freely!
2. Emphasize the Process Over Perfection
When it comes to drawing with your kids, remember that the process is far more important than the end result. Encourage them to experiment and express themselves, even if the lines aren’t straight or the proportions aren’t perfect. It’s all about the fun and the learning experience!
3. Explore Variation and Personal Touches
Each elf can and should be unique! Discuss with your kids what kind of elf they’d like to draw. Do they prefer a mischievous elf, a warrior elf, or perhaps an elder elf full of wisdom? Personal touches will make each drawing special and are a great opening to talk about diversity and individuality.
4. Use Resources for Inspiration
If you or your kids are feeling stuck, don’t shy away from using references. Look up images of elves in books or online for inspiration. This not only helps to visualize different styles but can also introduce your family to various artistic interpretations and cultural depictions of elves.
5. Make it a Teachable Moment
Art can be educational, too! While drawing, chat with your kids about the folklore and mythology behind elves. You can teach them a little about symmetry and anatomy in a fun and accessible way as you draw the different parts of the elf’s body. And don’t forget to discuss color theory once you start the coloring stage. Artistic moments are golden opportunities for learning!
Now that you’ve got these five points as your mystical compass, you’re ready to embark on your elf-drawing journey with confidence. Gather those art supplies, rally your eager young artists, and begin the wondrous adventure of bringing your very own family of elves to life. Remember, every stroke, every line, and every splash of color is a step towards a family masterpiece that will be treasured for years to come!
See more great Things to Do with Kids in New Zealand here. For more information see here
Disclaimer
The articles available via our website provide general information only and we strongly urge readers to exercise caution and conduct their own thorough research and fact-checking. The information presented should not be taken as absolute truth, and, to the maximum extent permitted by law, we will not be held liable for any inaccuracies or errors in the content. It is essential for individuals to independently verify and validate the information before making any decisions or taking any actions based on the articles.


