
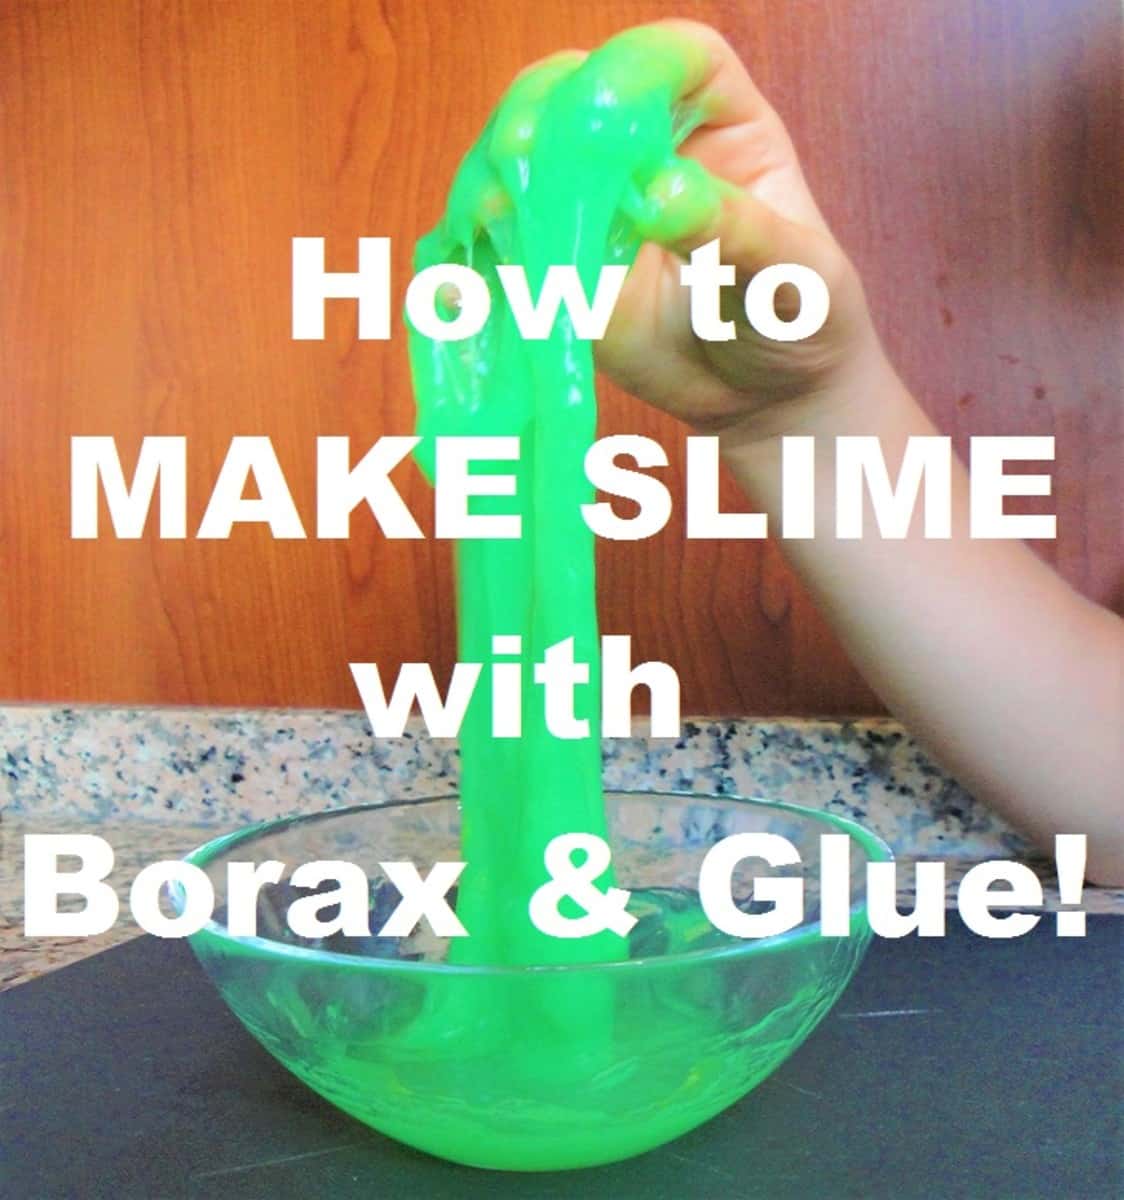
The Ultimate Guide to Making Borax Slime with Your Little Ones!
Welcome, creative parents and fun-loving kids! Are you ready to dive into the gooey world of slime-making? Today, we’re about to embark on a slime-tastic adventure that is not only going to be a blast but also super easy to follow. Making borax slime at home is a wonderful way to engage with your children, sparking an interest in science through a safe, hands-on activity. So, let’s roll up our sleeves, gather our ingredients, and get ready to create the stretchiest, squishiest slime ever!
Why Borax Slime is a Hit with Kids and Parents Alike
Slime isn’t just a trendy fad; it’s a magical substance that captures the imagination of children across the globe. Not only is it a tactile and sensory experience, but when you make it together, you strengthen bonds and make cherished memories. Additionally, this treasure trove of fun offers educational value as your young ones learn about measurements, chemical reactions, and following instructions.
Items You’ll Need to Craft the Perfect Slime
Before we get our hands sticky, let’s make sure we have everything we need. Here’s a nifty checklist for our borax slime journey:
- A large mixing bowl
- A measuring cup and spoons
- A stirring stick or spoon
- Food coloring (optional but fun!)
- Glitter or confetti (for those who love some sparkle)
- Warm water
- White glue (PVA)
- Borax powder
Please Note on Safety:
Borax is a common household cleaner and laundry additive. When used properly, it’s safe for slime-making. However, it is important to follow safety guidelines:
- Always supervise children during the slime-making process.
- Ensure no one ingests any slime or its ingredients.
- Wash hands thoroughly after playing with the slime.
Step-by-Step Borax Slime Recipe for Guaranteed Fun
Now, let’s get to the exciting part – creating your own batch of slime! Follow these simple steps, and you’ll be a slime pro in no time.
Step 1: Glue and Water Mixture
In your mixing bowl, pour in 1 cup of white glue. Add to it 1 cup of warm water. If you’re planning to color your slime, this is the moment to add a few drops of food coloring. Stir the mixture until it’s well combined, and your color is evenly distributed.
Step 2: Borax Solution
Grab a separate cup, and mix 1 teaspoon of borax powder with 1 cup of warm water. Make sure to stir thoroughly until the borax is completely dissolved. This is your slime activator, the secret ingredient that turns glue into gooey goodness!
Remember, there’s no rush! Enjoy each step and watch your little one’s eyes light up as they see the science in action.
Step 3: Combining the Two Mixtures
It’s time for the magic to happen! Slowly add the borax solution to your glue mixture, stirring constantly. You’ll notice it will start to thicken and clump together – that’s your slime forming!
Step 4: Kneading the Slime
When the slime has mostly come together, take it out of the bowl and start kneading with your hands. Don’t worry if it’s a bit wet at first; it will become the perfect slime consistency as you knead.
There you have it! Your very own homemade slime with borax.
Need a pro tip? If you’ve added too much borax solution and the slime feels too hard, don’t fret! Simply work in a bit more water and knead until it feels just right. If it’s too sticky, add a little more borax solution, but be careful – a little goes a long way!
We’re on a roll, but there’s still more fun to be had. Keep reading for additional tips and tricks, how to store your slime, and engaging ways to play with your new stretchy friend!
Embarking on this crafting journey not only gives your kids an incredible plaything but it also instills basic scientific concepts in a playful environment. So, what are you waiting for? Let the joyous slime-making begin and cherish these moments of laughter and learning with your kids!
Five Things Parents Should Know Before Making Slime with Borax
Preparation is key when embarking on the slime-making quest. Here are five essential tips to ensure you’re all geared up for a sensational slime experience:
1. Understand the Role of Borax
Borax is not only a cleaner but also a slime activator that causes the PVA glue to turn into slime through a chemical reaction. Familiarize yourself with its correct usage and handling to ensure a safe and fun experience. Remember, less is often more when it comes to adding borax to your mixture.
2. Choose the Right Glue
Not all glues are created equal for making slime. You’ll want to use white PVA glue (often marked as school glue) for the best results. Avoid using glues that are labeled as washable or no-run as they may not react as well with the borax.
3. Prep Your Workspace
Slime-making can get messy, so be prepared! Cover your workspace with newspapers or a disposable tablecloth, have paper towels on hand, and wear old clothes. This foresight will help in quick cleanups and stress-free fun.
4. Have Fun with Customizations
Your slime doesn’t have to be plain! Before starting, think about how you can personalize your slime with food coloring, glitter, beads, or even small toys. These additions can make the slime-making process even more exciting for your kids.
5. Know the Storage Logistics
Slime can last a long time if stored properly. Have an airtight container ready to store your slime after playtime. This keeps it from drying out and makes sure you have stretchy slime for many days to come!
Tips and Tricks for the Perfect Slime
As with any recipe, slime-making comes with its own set of tips and tricks to enhance your creation:
Tip 1: Slime Consistency
If your slime isn’t the desired consistency, don’t worry. You can adjust it by adding more activator (borax solution) or more glue and water, depending on whether it’s too sticky or too stiff.
Tip 2: Add-Ins
Introduce add-ins in the final stages of mixing. This keeps things like beads or glitter from falling out and allows for more even distribution within the slime.
Tip 3: Theme Your Slime
Occasions like Halloween or Christmas offer a fun opportunity to theme your slime accordingly. Black and orange glitter for Halloween, green and red for Christmas—the possibilities are endless!
Tip 4: Slime as a Learning Tool
Utilize this fun activity to discuss science with your kids. Explain what a chemical reaction is, talk about polymers, or dive into the science of color mixing.
Tip 5: Sensory Play
Beyond the fun, slime is an excellent tool for sensory play, which is crucial for children’s development. It helps with fine motor skills and sensory processing and can be a calming activity for children who enjoy tactile stimulation.
Now that you’re all prepped with the necessary knowledge and tips, there’s nothing holding you back from becoming the reigning royalty of slime kingdom. Embrace the mess, enjoy the company of your excited kiddos, and make beautiful memories one glob of slime at a time!
See more great Things to Do with Kids in New Zealand here. For more information see here
Disclaimer
The articles available via our website provide general information only and we strongly urge readers to exercise caution and conduct their own thorough research and fact-checking. The information presented should not be taken as absolute truth, and, to the maximum extent permitted by law, we will not be held liable for any inaccuracies or errors in the content. It is essential for individuals to independently verify and validate the information before making any decisions or taking any actions based on the articles.


