
Easy Nut-Free Muesli Bar Recipe for Kids
Hello, health-conscious parents and snack-lovers! ? Looking for a nut-free muesli bar recipe that is not only delicious but also school-safe and allergy-friendly? You’ve landed in the right place! Whether it’s snack time or lunchbox fillers, our recipe is sure to become a hit with the kiddos. So, tie on your apron and let’s dive into this super easy and nutritious snack option!
Why Go Nut-Free?
Nuts are a common allergen among children, and many schools implement nut-free policies to ensure the safety of all students. Creating a nut-free muesli bar ensures that your child—and their classmates—can enjoy a tasty treat without any worries. Plus, it’s a considerate option for playdates and parties!
What You Need: Ingredients and Supplies
Before we begin, here’s what you’ll need for your homemade muesli bars:
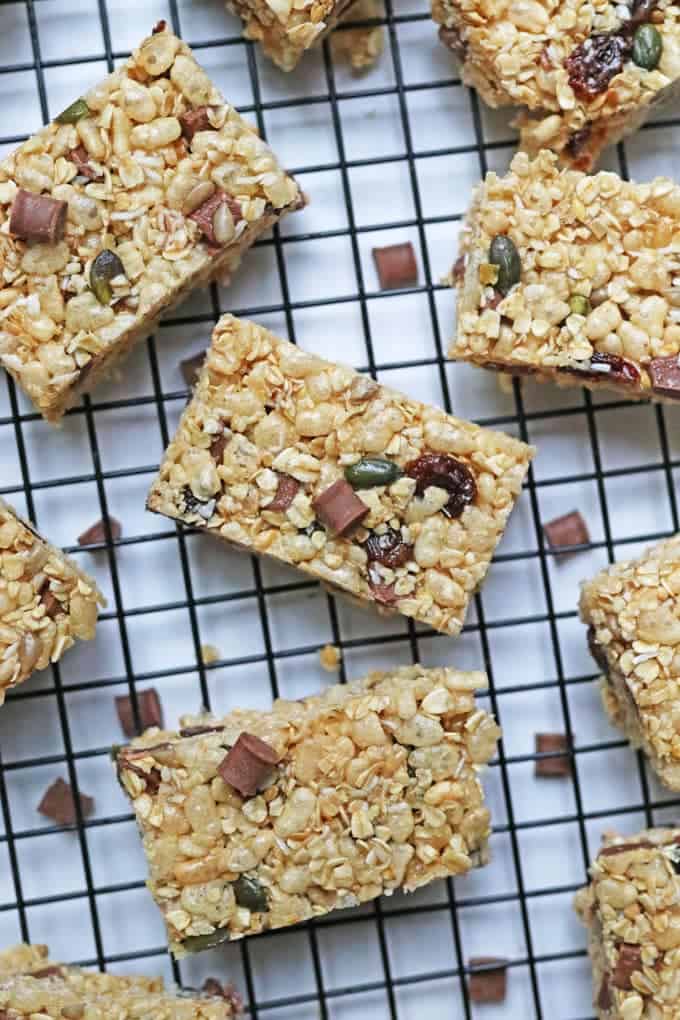
- Old-fashioned oats: A hearty, wholesome base chock-full of fiber.
- Dried fruits: Think raisins, apricots, or even dates for natural sweetness.
- Seeds: Pumpkin or sunflower seeds offer a crunchy texture and are packed with nutrients.
- Binders: Honey and coconut oil will hold our bars together and add a touch of flavor.
- Vanilla extract: For that irresistible aroma and a hint of vanilla goodness.
- Salt: Just a pinch to enhance all the sweet and savory flavors.
- And more! You can always add puffed rice, shredded coconut, or even a sprinkle of cinnamon or cocoa for an extra special touch.
Ensure that you have the following supplies:
- A mixing bowl for combining ingredients
- A baking dish (roughly 9×9 inches) for shaping your bars
- Non-stick baking paper to line your dish
- A saucepan for gently heating your binders
- A spatula or wooden spoon for mixing
- A sharp knife or pizza cutter for slicing the bars
Let’s Get Started: The Nut-Free Muesli Bar How-To
Creating your own muesli bars is simpler than you might think. Here’s the step-by-step process:
- Prep Your Pan: Line your baking dish with non-stick baking paper, allowing some overhang on the sides for easy removal later.
- Mix Dry Ingredients: In a large mixing bowl, combine the oats, dried fruits, and seeds. If adding any optional dry ingredients like puffed rice or spices, toss them in now!
- Warm Your Binders: In a small saucepan over medium heat, combine the honey and coconut oil. Stir until it becomes a smooth liquid and then remove from heat. Add the vanilla extract and salt.
- Combine and Press: Pour the warm binder mixture over the dry ingredients and mix well until everything is coated. Transfer the mixture to your prepared pan. Press down firmly with a spatula or the back of a spoon; compacting them will help prevent the bars from crumbling later.
- Chill and Set: Place the pan in the refrigerator for at least an hour, allowing the ingredients to bond and set. This chilling time is crucial for getting the perfect bar consistency.
- Slice and Enjoy: Once set, use the paper overhang to lift the whole slab out of the pan onto a cutting board. With a sharp knife or pizza cutter, slice into bars or squares.
Making nut-free muesli bars is not only a fun activity with the kids, but it also gives you complete control over the ingredients. You can make adjustments based on preferences and dietary needs, ensuring everyone gets to enjoy these scrummy snacks.
But wait, there’s more! In the next part of our guide, we’ll look at how to store your muesli bars, answer some common questions, and share a few variations to keep snack time exciting. So, stick around to master the art of homemade muesli bars!
With these simple steps, you’re well on your way to creating a wholesome, nut-free treat that’s sure to be the envy of the playground. Your little ones (and their tummies) will thank you! ?
5 Things Parents Should Know When Preparing Nut-Free Muesli Bars
1. Allergy Awareness
One of the main reasons for making nut-free muesli bars is to accommodate those with allergies. When preparing these bars, it’s essential to read all ingredient labels carefully to ensure they don’t contain nuts or haven’t been processed in a facility with nuts. Cross-contamination can happen, and being diligent is the best way to keep everyone safe.
2. Ingredient Substitutions
If your little one is not a fan of certain dried fruits or seeds, don’t fret! The beauty of homemade muesli bars is in their versatility. Swap out ingredients based on your child’s tastes and dietary restrictions. For instance, dried cranberries can replace raisins, or you could use roasted chickpeas in place of seeds for an extra protein boost.
3. Texture and Consistency
The key to a muesli bar that holds its shape is in the pressing. Ensure you press the mixture firmly into your lined baking dish. An unevenly pressed muesli bar can lead to some parts crumbling apart. If you find the mixture too dry, you may add a bit more honey or coconut oil to help it stick together.
4. Nutritional Benefits
When you make muesli bars at home, you can pack them with ingredients full of nutritional benefits. Oats are an excellent source of fiber, seeds are rich in healthy fats and proteins, and dried fruits provide natural sugars and vitamins. This combination keeps energy levels stable and can aid in your child’s development and health.
5. Safe Storage
Storing your muesli bars correctly is just as important as making them. Once cut, store them in an airtight container at room temperature for up to a week. If you’ve made a large batch, you can freeze them for longer shelf life. Lay the bars flat in the container with parchment paper between layers to prevent sticking.
Storing Your Nut-Free Muesli Bars
After all your hard work, you’ll want to ensure your muesli bars stay fresh as long as possible. Once sliced, store the bars in an airtight container with layers of parchment paper between them to prevent sticking. They can stay at room temperature for up to one week. For longer storage, place them in the freezer where they’ll keep for up to a month.
Troubleshooting Common Muesli Bar Questions
What if my muesli bars are too crumbly? If your bars aren’t holding together, try pressing the mixture more firmly into the pan or add a bit more honey or coconut oil as a binder. Chilling them for longer can also help.
Can I make these vegan? Absolutely! Substitute the honey with maple syrup or agave nectar to keep the bars plant-based, and check that any added ingredients like chocolate chips are vegan-friendly.
My child has a seed allergy too; what can I use instead? For a seed allergy, puffed rice, shredded coconut, or soy nuts (if soy is safe) provide a similar crunch without the allergens.
Creative Variations on Your Nut-Free Muesli Bars
Mix it up with these creative ideas:
- Add a chocolate drizzle on top or mix in some dairy-free chocolate chips for a sweet touch.
- Make a tropical bar with dried pineapple, mango, and coconut flakes.
- Stir in some powdered peanut butter for a nutty flavor without the allergens.
- Create a holiday-themed bar with dried cranberries, orange zest, and a dash of ginger.
We hope this guide inspires you to create delightful, nut-free muesli bars that are perfect for all occasions. Happy baking, and enjoy the tasty results!
See more great Things to Do with Kids in New Zealand here. For more information see here
Disclaimer
The articles available via our website provide general information only and we strongly urge readers to exercise caution and conduct their own thorough research and fact-checking. The information presented should not be taken as absolute truth, and, to the maximum extent permitted by law, we will not be held liable for any inaccuracies or errors in the content. It is essential for individuals to independently verify and validate the information before making any decisions or taking any actions based on the articles.


