
Unleash Creativity with Easy No-Cook Playdough Recipes: A Parent’s Guide
Hey there, Super Parents!
Are you ready to roll up your sleeves and dive into a world of squishy, colorful fun with your little ones? If you’re a busy bee but still wish to provide a sensory-rich playtime, you’re in the right place! Playdough is a fantastic tool for encouraging creativity, fine motor skills, and hours of amusement for your children. And guess what? You don’t need a chef’s hat or a stove to make magic happen!
Let’s jump into the cheerful universe of no-cook playdough with easy-peasy recipes that will win over the whole family. Say goodbye to lengthy prep times and hello to immediate play!
Why Choose No-Cook Playdough?
Before we get our hands doughy, let’s chat about the perks of no-cook playdough. It’s about ease and safety – without compromising the fun. Here’s why it’s awesome:
- Super Quick to Make: Time is precious, and no-cook recipes are zippy quick. You’ll have a fresh batch of playdough ready before your kiddo can say “More please!”
- Safe for All Ages: With no hot stoves or ovens involved, even the tiniest tots can join in on the stirring action, making it a fun family affair.
- Toxin-Free: When you’re the chef, you control the ingredients. This means you can ensure your playdough is non-toxic and suitable for your child’s playtime adventures.
- Customizable Colors and Scents: Express your artistic freedom by adding a variety of colors, glitters, and even natural scents to your playdough creation.
Top Tip: Always pick food-grade ingredients to keep your playdough kid-friendly and worry-free.
Ingredients You’ll Need for the Ultimate No-Cook Playdough
Creating no-cook playdough is like a delightful kid-friendly kitchen experiment, minus the heat! Here are the staple ingredients that’ll be the stars of your playdough recipe:
- Flour: The base of your dough, giving it structure and making it malleable.
- Salt: This not-so-secret ingredient helps preserve your playdough and adds texture.
- Warm Water: To mix everything together smoothly.
- Cooking Oil: A dash of oil keeps your playdough soft and pliable.
- Cream of Tartar: Acts as a natural preservative, but it’s optional if you plan on using the playdough right away.
- Food Coloring: This is where the fun begins! Splash in your favorite colors to make your playdough pop.
Some folks might wonder, “Do we really need the cream of tartar?” Well, it certainly helps maintain your playdough’s elasticity and longevity, but if you’re in a pinch or prefer to keep it simple, you can go without. Just know that the shelf life might be a tad shorter.
Step by Step: Your First No-Cook Playdough Masterpiece
It’s time to create! Grab your little helpers, because we’re about to do some serious playdough alchemy. This section will carefully guide you through each step to ensure your foray into dough-based creativity is a resounding success.
First things first, let’s gather our materials:
- A large mixing bowl
- Measuring cups and spoons
- A spatula or wooden spoon
- Your lineup of ingredients (as listed above)
Ready? Here we go!
- Begin by measuring out 2 cups of all-purpose flour and pouring it into your mixing bowl.
- Next, add in 1/2 cup of salt. If you’ve opted to use cream of tartar, mix in 2 teaspoons now.
- Time for the water! Pour in 1 cup of warm water slowly while mixing with your spatula or wooden spoon. If the dough is too dry, add a little more water, bit by bit, until you reach the perfect consistency.
- Add a splash of 2 tablespoons of cooking oil to your dough and continue to mix thoroughly. This will help keep your dough nice and soft!
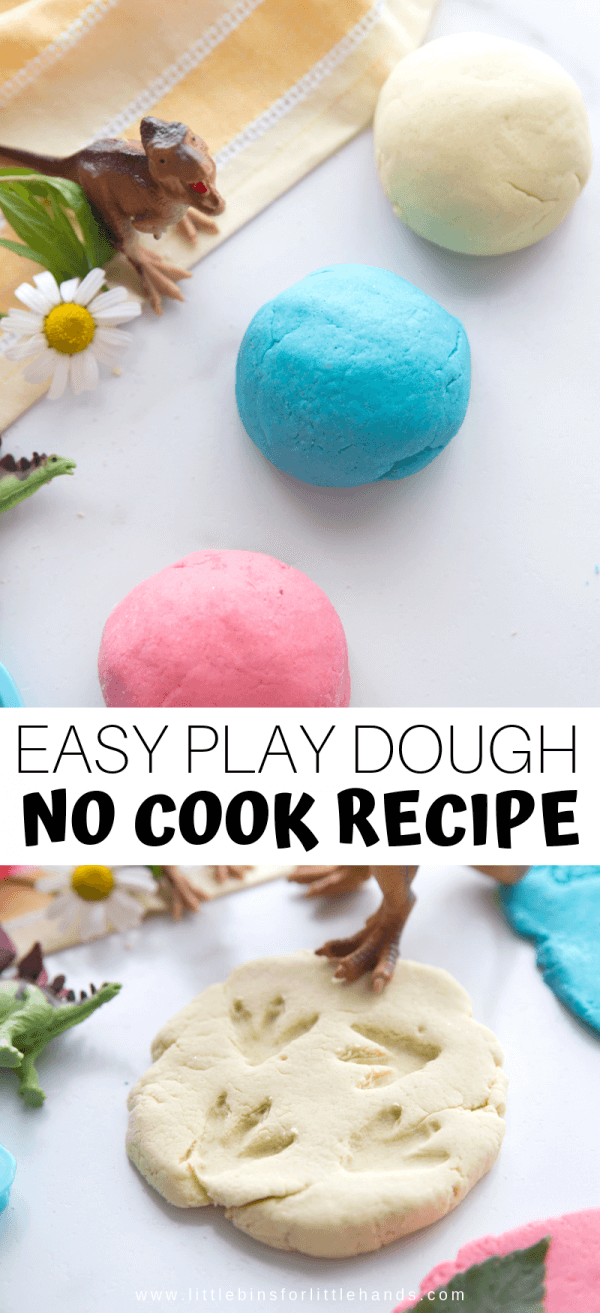
- Now for the color! Squeeze in a few drops of your chosen food coloring and stir away. Watch in awe as your playdough transforms with vibrant hues!
Once it’s all mixed, it’s time to get tactile. Scoop your dough out onto a clean surface and knead it with your hands. Fold, press, and roll until the texture is even, and the color is beautifully blended throughout. Voilà! You’ve created your very own batch of no-cook playdough!
Don’t forget to store your playdough properly after playtime is over. An airtight container or a zip-lock bag will keep it fresh, ready for its next adventure. Continue exploring below for storage tips, fun variations, and playful activities to do with your homemade no-cook playdough.
And there you have it, folks! Creating your very own no-cook playdough at home is as simple as pie—scratch that—even simpler! With just a handful of ingredients and a little bit of mixing magic, you and your little ones can embark on an exciting journey of imagination and discovery without even turning on the oven. Enjoy the squishiness!

Five Things Parents Should Know in Preparing No-Cook Playdough
Before we roll out the dough and unleash the rainbow, here are five golden nuggets of wisdom for all the amazing parents about to embark on the no-cook playdough journey:
- Embrace Messiness: Making playdough can be a messy affair, and that’s perfectly okay! Set up a space where your kiddos can be free to explore without worrying about spills. A plastic tablecloth or an old newspaper work wonders to catch wayward bits of dough.
- No Fancy Tools Needed: Sure, you can find specialized playdough tools, but the beauty of playdough is its simplicity. Look around your home for items like cookie cutters, plastic knives, and rolling pins to shape and mold your creations.
- Allergy Awareness: In the excitement of making playdough, don’t forget to check for possible allergens. Gluten sensitivities, for example, might require swapping out wheat flour for a gluten-free alternative. Always tailor the recipe to suit your child’s needs!
- Involve Your Kids in the Process: Not only is making playdough a creative activity, but it’s also educational! Have your kids help measure ingredients, choose colors, and mix the dough. This hands-on approach promotes learning and makes the experience even more memorable.
- Color and Scent Creativity: Beyond the primary colors, experiment with mixing to create new shades. Introduce a scent-sory element using natural extracts like vanilla, lemon, or peppermint for an extra layer of fun. But, keep a close eye on little ones who might think it’s tasty enough to eat!
With these pro tips in your pocket, you’re more than ready to move forward with your no-cook playdough extravaganza. Still, there’s more to explore, so stick with us for even more no-cook playdough wisdom!
Storing No-Cook Playdough for Lasting Fun
After playtime is over, and your dough creations have been squashed and reimagined a dozen times over, proper storage is key to longevity. Here’s how to keep your dough play-ready:
- Place your playdough in an airtight container or a sealable bag to prevent drying out.
- Keep your playdough in a cool, dry place. This helps avoid any moldy surprises.
- Labeled containers with dates can help you keep track of your playdough’s age.
- If the playdough begins to dry out, you can knead in a tiny bit of water or oil to bring back its elasticity.
A little TLC means you won’t have to make new batches too often—unless, of course, you’re looking for an excuse to whip up another color!
Fun Playdough Activities and Variations
Your basic no-cook playdough recipe is just the beginning! Take it to the next level with these imaginative twists and playful ideas:
- Introduce glitter or confetti into your mixture for a dazzling effect.
- Create a natural sensory experience by adding spices like cinnamon or nutmeg (in small, child-safe amounts).
- Challenge your kids to sculpt their favorite animals, characters, or shapes.
- Themed play mats can prompt creative storytelling and structured play. Print or draw different scenes for your playdough to interact with.
- Try edible playdough recipes using ingredients like peanut butter or marshmallows for a yummy, albeit stickier, treat.
The possibilities for no-cook playdough are limited only by your imagination. Let your and your kids’ creativity run wild, and enjoy the masterpieces that emerge. Hands-on fun, motor skill development, and memory-making moments are all wrapped up in this simple, joyous activity. So, keep at it, superstar parents—you’re crafting more than just playdough; you’re crafting joyous childhood memories that stick (less stickily than the dough, we hope!).
See more great Things to Do with Kids in New Zealand here. For more information see here
Disclaimer
The articles available via our website provide general information only and we strongly urge readers to exercise caution and conduct their own thorough research and fact-checking. The information presented should not be taken as absolute truth, and, to the maximum extent permitted by law, we will not be held liable for any inaccuracies or errors in the content. It is essential for individuals to independently verify and validate the information before making any decisions or taking any actions based on the articles.


