
Whip Up Whimsy: Your Guide to Icing for Piping Cupcakes
Hello there, amazing cupcake creators! Welcome to your ultimate guide on how to master icing for piping the most adorable and scrumptious cupcakes that are bound to wow everyone at any party. Whether you’re a baking newbie or a seasoned pro looking to brush up on your skills, this guide is packed with all the sweet secrets you need to know!
The Essentials of Piping Icing
Before we dive into the colorful world of cupcake art, let’s cover some basics. Piping icing onto cupcakes is not just an artistic expression; it’s also about the right consistency, tools, and technique. We’ll explore each of these elements so you can start your cupcake journey with confidence.
Finding the Perfect Icing Consistency
The road to perfect piping starts with consistency. Too stiff, and you’ll struggle to squeeze it out; too runny, and your designs will puddle into sweet little blobs. The icing should hold its shape when piped. You’re looking for that sweet spot where it’s easy to pipe but firm enough to stand tall. We’ll show you how to strike the right balance with recipes and adjustments that make all the difference!
Selecting Your Tools
Now that we’ve got our icing just right, it’s time to talk tools. No superhero goes into a challenge without a trusty sidekick, and your piping bags and tips are just that! Whether you’re opting for disposable bags or investing in a reusable set, getting to know your tips will open a world of possibilities. From simple round tips for dots and lines to fancy star tips for rosettes and shells, we’ve got the lowdown on all the must-haves for your toolkit.
Getting Started with Piping 101
With tall hats and rolled-up sleeves, let’s get down to business! You’ve got your icing at the right consistency, and your tools are ready to go. It’s showtime, folks!
Preparing Your Piping Bag
To start, snip off the tip of your piping bag and pop in your chosen nozzle. If you’re using a coupler (a handy little gadget that lets you change tips without changing bags), place it in first. Once your tip is secure, fill the bag with your magical icing, being careful not to overfill. Twist the open end to keep everything neat and tidy — nobody wants a frosting explosion!
Practicing Your Piping Grip and Pressure
Hold your piping bag at a 90-degree angle for most techniques, applying steady, even pressure as you squeeze. Your grip should be firm but gentle — think of it as holding a little chick without squishing it. Practice makes perfect, so don’t be shy to try a few lines and shapes on parchment paper before you unleash your skills on the cupcakes.
Design Like a Pro: Creative Piping Techniques
Once you’re feeling comfy with the basics, it’s time to level up your decorations. With a few simple techniques under your belt, you can create eye-catching swirls, roses, or even intricate lace patterns on your cupcakes. Imagine the oohs and aahs when your friends and family see what you’ve whipped up — talk about a confidence booster!
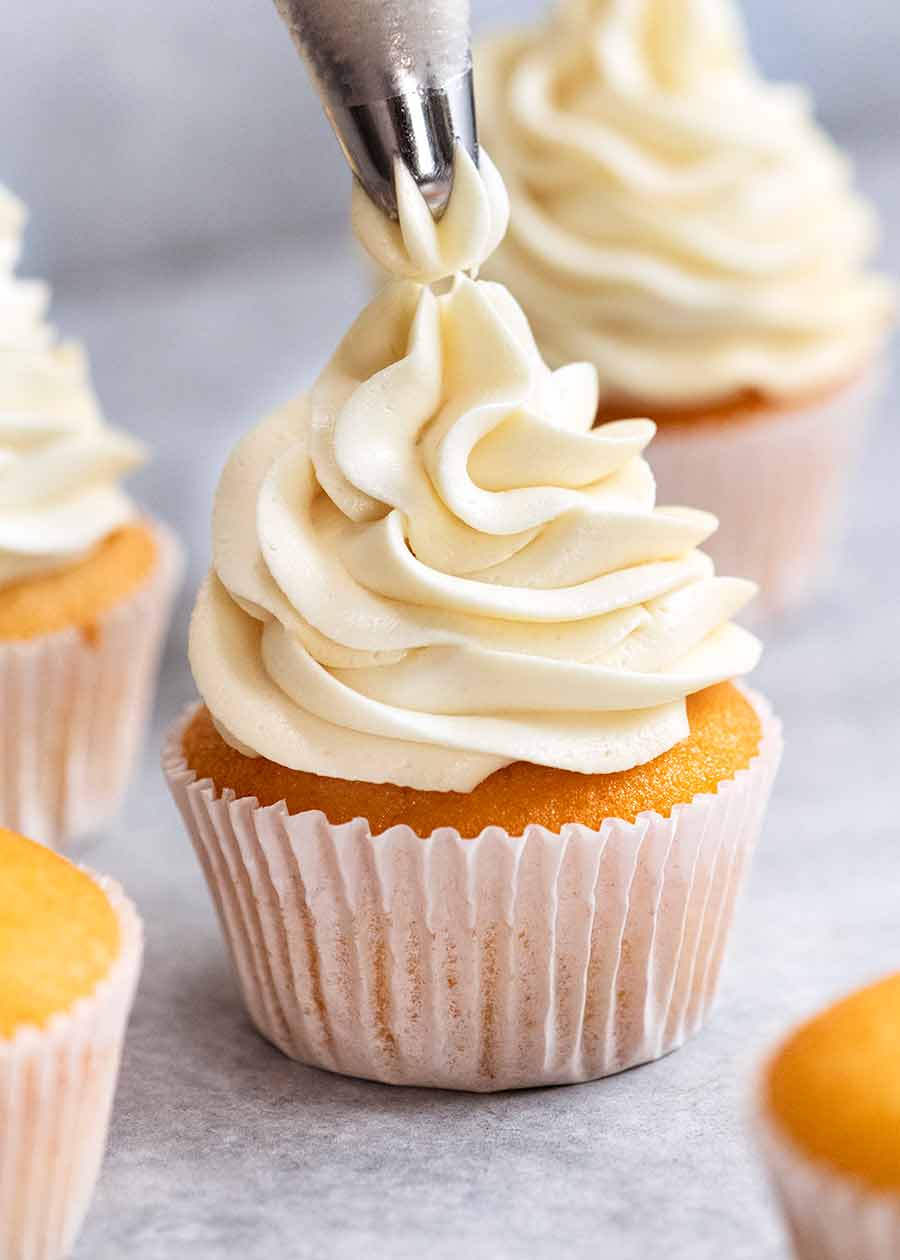
The Classic Swirl
Nothing says “party” like a classic swirl of icing on top of a cupcake. To achieve this iconic look, start at the outer edge of your cupcake and swirl inward, ending with a little flick of your wrist.
Beautiful Roses
For a more romantic touch, try piping roses. Beginning in the center, swirl outward in a tight spiral. It’s like a mini bouquet on each little cake.
Elaborate Designs and Textures
Are you ready to get fancy? With an array of special piping tips and a steady hand, you can create elaborate designs that look like they belong in a bakery window. We’re talking ruffles, stars, and even basketweave patterns that add texture and depth to your cupcake masterpiece.
Cupcake icing and piping is a delightful adventure that blends creativity with sweetness. And now that you’re armed with this knowledge, you’re all set to begin! So grab your apron, and let’s turn those plain cupcakes into edible works of art that are just as unique and special as the occasions they celebrate. Remember, every swirl, every flower, and every little dot is a chance to express your joy and add a dash of whimsy to the world — one cupcake at a time.

5 Things Parents Should Know in Preparing for Icing for Piping Cupcakes
1. Understand Food Allergies and Dietary Restrictions
Before diving into the mixing bowl, consider any food allergies or dietary restrictions your child or party guests might have. Choose icing recipes that are adaptable; for example, using alternative ingredients like dairy-free butter for lactose intolerance or ensure the food coloring is suited for everyone. Being inclusive from the start will make the cupcake experience sweeter for everyone!
2. Organize Your Workspace and Ingredients
Setting up a clean and organized workspace is a game-changer. Gather all your ingredients and tools beforehand to avoid a mid-piping search-and-rescue mission. Pre-measure your ingredients to streamline the process, and if you’re planning a cupcake decorating activity with children, pre-fill the piping bags to keep the fun mess-free and focused on creativity.
3. Choose the Right Recipe for Your Icing
The foundation of great icing is a good recipe. Opt for reliable, tested recipes ideally suited for piping, like buttercream or royal icing, and shy away from whipped cream or softer icings that may not hold up as well. For parents, the key is to find that sweet balance between delicious and practical. As a bonus, seek out recipes that can withstand room temperature – especially important for events!
4. Practice Piping Techniques in Advance
If you’re new to piping or want to teach your kiddos, it’s a fantastic idea to practice beforehand. Piping onto parchment paper or a baking mat is a stress-free way to get the hang of it. This allows you to get comfortable with the pressure required to make those cute designs and helps kids build their confidence – and believe me, confidence tastes delicious, too!
5. Embrace Creativity and Patience
Piping is an art form, and like all art, it takes practice. Embrace each ‘oops’ as a learning opportunity and encourage kids to do the same. Not every cupcake will look like it’s from a bakery, and that’s perfectly okay. This experience is about fun, creativity, and bonding. Plus, a cupcake made with love and giggles is the best kind there is!
By keeping these tips in mind, you’re not just preparing to make cupcakes; you’re setting the stage for a joyful baking adventure with your family. Cupcakes are just the canvas; the memories and smiles are the true masterpiece. Happy piping, dear parents!
See more great Things to Do with Kids in New Zealand here. For more information see here
Disclaimer
The articles available via our website provide general information only and we strongly urge readers to exercise caution and conduct their own thorough research and fact-checking. The information presented should not be taken as absolute truth, and, to the maximum extent permitted by law, we will not be held liable for any inaccuracies or errors in the content. It is essential for individuals to independently verify and validate the information before making any decisions or taking any actions based on the articles.


