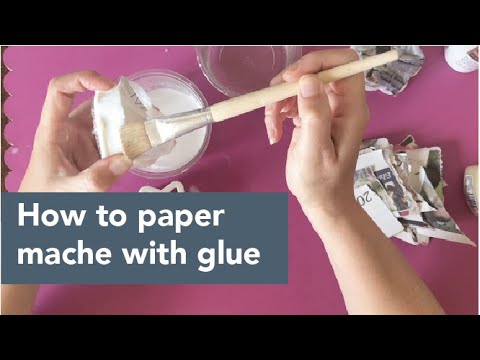
Simple Paper Mache Recipe for Creative Family Time
Hello crafty families! Are you ready to roll up your sleeves and dive into the whimsical world of paper mache? It’s not just an art project; it’s a fantastic way to bond with your kiddos and spark their creativity. Don’t worry if you’ve never tried it before; this easy paper mache recipe is foolproof and requires only two basic ingredients – glue and water!
What is Paper Mache?
Paper mache, or papier-mâché, is a fabulous craft activity that involves creating objects out of pieces of paper and an adhesive concoction. Once dried, the paper mache can be painted, varnished, or decorated in any way you and your little artists can imagine. This can work wonders for developing fine motor skills, patience, and understanding of textures and shapes.
Materials You’ll Need
- Plain white glue or flour
- Water
- Measuring cup
- Bowl for mixing
- Newspaper or recycled paper
- Paintbrush (optional, for spreading the glue)
- Balloon or form for shaping (optional)
Creating Your Paper Mache Glue
Traditionally, paper mache involves using a simple mixture of water and glue. For an eco-friendly twist, some opt for a flour and water concoction. Both are excellent adhesives for paper mache. Today, we’ll focus on the classic glue and water recipe to start with.
Step-by-Step Glue and Water Mixture
- Measure Ingredients: Begin by measuring equal parts of glue and water. If you’re planning a larger project, a good rule of thumb is one cup of glue to one cup of water, but you can adjust this depending on the size of your paper mache craft.
- Mix Thoroughly: Pour the glue and water into a bowl and mix them together until you achieve a smooth consistency. The mixture should be runny enough to coat the pieces of paper but thick enough to adhere to them without dripping excessively.
- Prepare Your Strips: Tear or cut your newspaper or paper into strips. The size can vary, but typically strips that are about 1-2 inches wide and 4-6 inches long work well.
- Dip and Coat: One by one, dip your paper strips into the glue mixture. Then, use your fingers or a paintbrush to wipe off any excess. You want each piece to be saturated but not sopping wet.
And voila! You have your paper mache glue ready to go. Now, let’s move on to the exciting part where you actually get to craft your paper mache creation!
Let’s Start Paper Mache-ing!
Before you start, cover your crafting area with old newspapers or a plastic sheet to keep things tidy. Choose a simple object like a balloon to serve as a form for your first paper mache project. Using a balloon is great for making round shapes such as planets, animals, and masks.
- Blow Up Your Balloon: Inflate a balloon to the desired size of your project. The balloon will act as the inside mold for your paper mache object.
- Apply the Strips: Begin to layer your glue-coated strips over the surface of the balloon. Overlap them in different directions to add strength. Keep adding strips until the balloon is covered with three to four layers of paper.
- Dry Thoroughly: Once your object is covered, it’s time to let it dry. This can take up to 24 hours, depending on humidity and the thickness of your layers. Patience is key!
Remember, folks, paper mache is not a race! Take your time, enjoy the process, and watch as your creation takes shape before your eyes. As a delightful bonus, this craft is not only fun but educational, teaching the kiddos about recycling, proportions, and structural integrity.

5 Things Parents Should Know When Preparing for Paper Mache Recipe with Glue and Water
1. The Right Consistency is Key
Striking the perfect balance between glue and water consistency is crucial for a successful paper mache project. Aim for a mixture resembling thin pancake batter. If it’s too thick, add a splash more water; if too runny, a bit more glue. This ensures that the paper strips adhere well without being overly wet.
2. Test the Mixture Beforehand
If you’ve got time, do a patch test! Before the whole family gets stuck in, check that your paper strips stick and dry as expected. This will help prevent the potential frustration of a paper mache project gone mushy, especially with younger crafters who are eagerly awaiting the final outcome.
3. Plan Your Drying Time
Depending on your climate, paper mache can take a while to dry. Make sure you’ve carved out enough time, potentially overnight, for your creations to set. It’s better to have projects drying out of reach from little hands that may want to touch and poke at the intriguing gooey masterpiece.
4. Embrace the Mess
Yes, paper mache is a bit of a gooey affair, but that’s part of the charm! Lay down that newsprint, don old t-shirts, and maybe do it outside if weather permits. A simple cleanup station with soap and warm water will swiftly deal with sticky fingers afterward.
5. Encourage Creativity and Patience
This activity is not just about the end product. Encourage your kids to enjoy each step, from ripping up paper to that final brushstroke of paint on a dried sculpture. Celebrate their patience as they wait for things to dry and their creativity as they dream up what to make next!
Making Your Paper Mache Experience a Blast!
To turn your crafting adventure up a notch, consider using colorful paper for an added visual effect, or perhaps add glitter to your mixture for a sparkly finish. Once your project is dry, painting and decorating can be a whole new avenue of artistic exploration.
Remember, it doesn’t have to be perfect. This is a chance for your kids to express themselves and for you to marvel at their imaginations—and maybe let your inner child out to play, too!
Ready to share your creation with the world? Here’s one more tip: snap a pic of your family’s artwork and tag it on social media. Who knows, you just might inspire another family to embark on their paper mache journey!
So grab that glue, whip up a batch of paper mache paste, and get ready to make memories—and maybe a little bit of a mess. It’s all part of the hands-on fun that makes paper mache a timeless treasure in the world of craft activities. Happy crafting!
See more great Things to Do with Kids in New Zealand here. For more information see here
Disclaimer
The articles available via our website provide general information only and we strongly urge readers to exercise caution and conduct their own thorough research and fact-checking. The information presented should not be taken as absolute truth, and, to the maximum extent permitted by law, we will not be held liable for any inaccuracies or errors in the content. It is essential for individuals to independently verify and validate the information before making any decisions or taking any actions based on the articles.


