
The Ultimate Guide to Car Seat Installation: A Parent’s Best Friend
Hey there, super moms and dads! Are you ready to become a car seat installation ninja? ?? Your child’s safety is paramount, and ensuring their car seat is installed correctly is the first big step towards peace of mind on the road. We’re here to guide you through the process with cheer and clarity!
Understanding Car Seat Types
Before we dive into the nuts and bolts of car seat installation, it’s essential to know what type of seat will best suit your child. There are three main types:
- Rear-facing seats – Ideal for newborns and infants; they offer the best protection for your little one’s head, neck, and spine.
- Forward-facing seats – For toddlers and young children who have outgrown the rear-facing stage but still need additional support.
- Booster seats – Designed for older children who are ready to use the car’s seat belt but need a little boost for proper fit and safety.
Choosing the right seat is just part of the journey. Next up: securing it into your vehicle like a pro!
Car Seat Installation 101: What You’ll Need
First things first, let’s get our tool belts ready! You’ll need:
- Your car seat’s instruction manual – the golden text of car seat installation.
- Your vehicle’s owner manual – yes, it’s finally time to use it!
- Patience and a smile – our best tools for any parenting challenge. ?
Now, let’s set the stage for a secure install!
Step-by-Step Guide to a Snug and Secure Car Seat Install
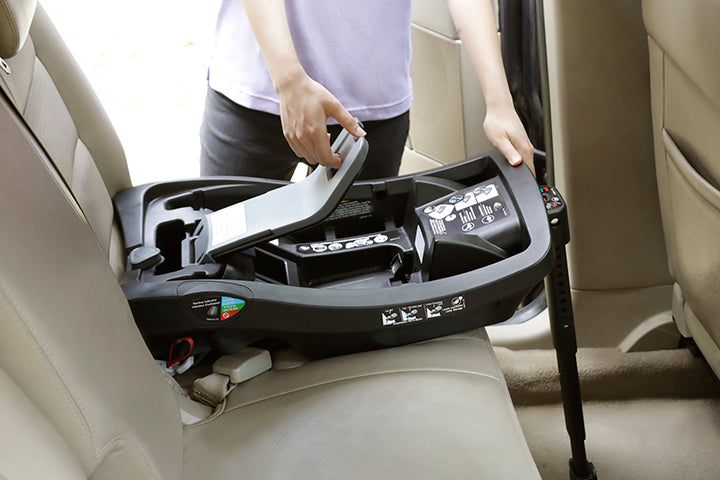
Attachment methods can vary, but you’ll typically encounter two options: using the vehicle’s seat belt or the LATCH system. LATCH stands for Lower Anchors and Tethers for Children, and it’s designed to make the car seat installation process easier and, more importantly, safer.
Installing with Seat Belt
- Locate your vehicle’s seat belt paths on the car seat. These paths are where your seat belt will thread through to hold the seat in place.
- Thread the seat belt through the designated path, ensuring that there are no twists and that it’s lying flat.
- Buckle the seat belt and lock it. Every vehicle has a different method to secure the belt, so consult your vehicle’s owner manual to ensure it’s locked properly.
- Press down firmly on the car seat and tighten. The goal is to eliminate any side-to-side or front-to-back movement more than 1 inch. You may need to put your body weight into it!
- Double-check that the seat is at the correct recline angle. Most seats have indicators to help with this.
Once you’ve got this method under your belt (pun intended!), let’s look at the LATCH system—another fantastic option!
Installing with LATCH
- Find the lower anchors in your vehicle. They’re typically located in the back seat where the seat cushions meet.
- Attach the car seat’s lower anchor connectors to these anchors. You’ll hear a click when they’re properly engaged.
- Press down firmly on the car seat and pull the LATCH strap to tighten. Just like with the seat belt method, we want no more than 1 inch of movement.
- If your car seat has a tether strap (typically for forward-facing seats), secure it to the corresponding tether anchor in your vehicle.
- Check for the correct recline angle and adjust accordingly.
Give yourself a round of applause! ? You’re doing a great job at ensuring your child’s car seat is installed securely. But wait, there’s more — let’s talk about some troubleshooting tips to tackle common installation hiccups.
Common Installation Issues and How to Fix Them
Even with the best instructions, sometimes things can get a little tricky. Here are a few common issues you might run into and how to solve them:
- The seat seems too loose: Recheck the belt path or LATCH strap and pull to remove any slack. You may need to put more pressure on the seat as you tighten.
- The recline angle isn’t right: Most car seats have built-in angle indicators or adjusters. Use rolled towels or pool noodles under the base of the seat if needed (as per your car seat’s manual).
- The seat belt won’t lock: Consult your vehicle’s manual for specific instructions on locking your seat belt. Some vehicles require pulling all the way out to switch to locking mode.
Remember, each car and car seat is unique, so always refer to those manuals for specific guidance tailored to your gear.

5 Things Parents Should Know in Preparing for Car Seat Installation
Becoming a car seat installation expert isn’t just about following the steps; it’s also about preparation! Here are five essential things to keep in mind:
- Car Compatibility: Not all car seats fit in all vehicles. Make sure your chosen seat is compatible with your car by trying it out or checking the manufacturer’s fit guide.
- Understand the LATCH Limits: LATCH has weight limits—usually a combined weight of the child and car seat that should not surpass 65 pounds. Beyond this, you’ll have to use the vehicle’s seat belt.
- Position Matters: The safest place for your car seat is typically in the back seat, away from active airbags. If possible, position it in the middle to offer the most protection from side-impact crashes.
- Know Your Anchors: Familiarize yourself with the location of the lower anchors and tethers in your vehicle. They’re the foundation of a secure LATCH system installation.
- Get Your Car Seat Inspected: After installation, have a Certified Child Passenger Safety Technician inspect your car seat to ensure it’s installed correctly. You can usually find these services at fire stations, hospitals, or through community safety events.
Car Seat Maintenance and Care
Installation is just the beginning. Regular checks and maintenance are imperative to ensure ongoing safety:
- Regularly Inspect for Wear and Tear: Car seats go through a lot! Regularly check for any signs of damage or stress which could compromise the seat’s integrity.
- Clean According to Manufacturer Instructions: Spills are inevitable, but correct cleaning is crucial to avoid damaging the seat material or harness.
- Readjust as Your Child Grows: You’ll need to adjust the harness and seat positioning as your child grows to ensure they’re always properly secured.
- Avoid Adding Non-Approved Accessories: Stick to what’s approved by the seat manufacturer to maintain safety standards.
- Re-Install After a Vehicle Change: Every time you move the seat to a different car, you must repeat the installation process to ensure it’s secure.
Regular checks are the backbone of car seat safety — keep up the fantastic work!
The Importance of Car Seat Registration
Finally, registering your car seat is a step you don’t want to skip:
- Safety Notices: Registration ensures you’ll be notified of any recalls or safety notices, helping you keep your child safe.
- Stay Informed: It keeps you updated with important information about your car seat model.
- Peace of Mind: Knowing you’ll be contacted in the event a safety issue arises with your car seat is invaluable peace of mind.
So, make sure to fill out that registration card or register online on the manufacturer’s website. Another high five to you, savvy parent!
Wrap-Up: Car Seat Installation Checklist
As we round off this ultimate guide, here’s one final checklist to keep handy:
- Review car seat and vehicle manuals.
- Choose the appropriate car seat for your child’s age, weight, and height.
- Decide on the installation method – seat belt or LATCH system.
- Ensure the car seat is installed tightly with less than 1 inch of movement.
- Double-check the recline angle and make adjustments if necessary.
- Have the installation checked by a professional if you’re unsure.
- Monitor and maintain the car seat regularly for safety and hygiene.
- Enjoy the journey knowing your little one is snug and secure in their car seat!


