A Helpful Guide for Parents: Mastering the Art of Measuring Dry Ingredients
Hey there, super parents! We know managing a household, crushing it at work, and creating delicious meals for your family is a tall order. Well, we’re here to make life a smidge easier by teaching you how to flawlessly measure dry ingredients. Why so specific, you ask? Well, when it comes to baking, precision matters. Even a slight miscalculation in ingredient measurements can cause a fabulous chocolate cake to transform into a chocolate pancake! But don’t worry, by the end of this guide, you’ll be a pro. Ready? Let’s get started!
Why Proper Measurement Matters
Before diving into the steps, let’s clear up why we’re emphasising the importance of proper measurement. Whether you are baking a cake, a batch of cookies, or a loaf of bread, each ingredient needs to be measured accurately to ensure the best results. Too much flour and your cake might turn out too dry. Too little baking powder and your bread won’t rise. The magic is in the measurement!
Understanding Different Measuring Tools
Measuringtools galore! But which ones should you really be using? And are they interchangeable? Let’s pour some knowledge into those cups.
Spoons and Cups
These are your go-to tools for measuring just about any dry ingredient. But remember, a teaspoon meant for stirring your coffee and a measuring teaspoon are not the same size, so make sure you have a set of measuring spoons handy.
Weight Versus Volume
We often use cups for everything, but they measure volume not weight. This distinction becomes important when you’re making bread or pastry where precision is key. Why? A cup of sifted flour weighs less than a packed cup, and can significantly change the outcome of your recipe.
Master the Method: Measuring Dry Ingredients Step by Step
After quite a bit of “spoonful again” and “flour showers”, here’s our tried and true process for taking the guesswork out of measuring dry ingredients. Are you ready to mix things up a bit?
1. Choosing the Right Tool
First, pick the right tool for your ingredient! For instance, use measuring spoons for smaller quantities, say less than a 1/4 cup, and stick to measuring cups for larger quantities.
This is just the start of our exciting journey into the world of kitchen precision! Stay tuned for more tips to take your culinary skills to the next level. Baking wizards, brace yourselves, because we are about to rock your world! Happy measuring!

2. Filling Your Measuring Tool
A common mistake is to scoop directly into the ingredient container using the measuring tool. This may lead to packing and thus, over-measuring! Instead, use a spoon to scoop the ingredient into the measuring cup or spoon until it’s overfilled.
3. Leveling It Off
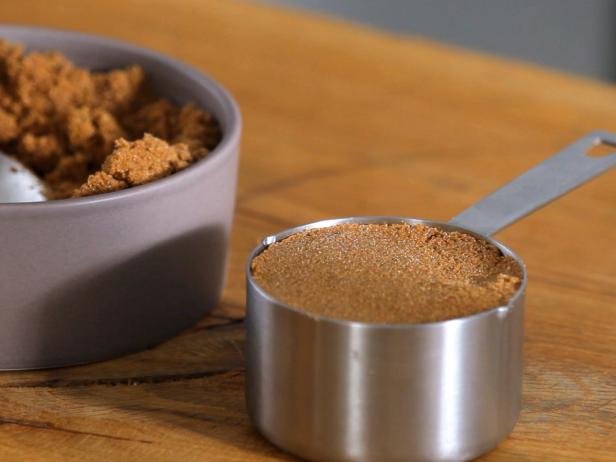
Once it’s overfilled, use the back of a knife or a straight-edged spatula to level it off. You want the ingredient to be even with the top of the measuring tool. That’s the accurate measurement!
4. When to Sift?
The question of “to sift or not to sift” often arises when measuring flour. Here’s what we suggest: If your recipe specifically says “1 cup sifted flour”, then sift before measuring. If it says “1 cup flour, sifted”, measure first, then sift!
The Pro Tip: Invest in a Kitchen Scale!
If you really want to level up your baking accuracy, purchasing a kitchen scale is totally worth it. Measuring ingredients by weight is far more accurate than using volume, plus it’s super simple and mess free!
Wrapping It Up – Enjoy Your New Skills!
And there you have it folks! A quick and easy guide to measuring dry ingredients like a true kitchen wizard. It may take a little practice, but once you get the hang of it, your meals and baked goodies will surely be a hit. Here’s to perfect measurements, and even better results! Happy baking, dear parents!
Understanding the Importance of Precisely Measuring Dry Ingredients
If you’re a parent and are preparing to cook or bake with your kids, it’s essential to teach them proper measurements for dry ingredients for satisfactory results. Here are five key things to remember:
1. Use the Right Measuring Tools
Primarily, always use dry measuring cups for dry ingredients. These cups allow for a more accurate measurement because they can be filled to the brim and easily leveled off.
2. The Scoop and Sweep Method
The scoop and sweep method is another crucial technique. Scoop the dry ingredient into a measuring cup until it’s overflowing, then, using the back of a knife, level off the excess. It’s a simple yet effective way of ensuring consistent measurements.
3. Weigh for Precision
Consider investing in a kitchen scale. While measuring cups are convenient, they might not provide the accuracy required in some recipes, where grams are favored over cups and could decide between success or flop.
4. Keep Your Measuring Cups Dry
Wet measuring cups can cause dry ingredients to clump or lead to inaccurate measurements. Dry your cups thoroughly before use for best outcomes.
5. Store Ingredients Properly
How you store ingredients can affect their measurement. For example, storing brown sugar in an air-tight container helps keep it from hardening, which could impact its volume measurement.
Teaching your children these essentials not only helps them become better bakers and cooks but also brings in an aspect of fun learning and creativity. With these pointers, parents can confidently involve their children in the kitchen, knowing they’re equipped to measure dry ingredients with accuracy.
For more great articles please see here. For more information see here
Disclaimer
The articles available via our website provide general information only and we strongly urge readers to exercise caution and conduct their own thorough research and fact-checking. The information presented should not be taken as absolute truth, and, to the maximum extent permitted by law, we will not be held liable for any inaccuracies or errors in the content. It is essential for individuals to independently verify and validate the information before making any decisions or taking any actions based on the articles.


