
Unveiling the Secrets to the Ultimate Pikelets Recipe Your Kids Will Adore!
Hello, dear parents! If you’re on a quest to whip up some magical treats that’ll have your kiddos hopping with joy, you’ve struck gold! We are about to embark on a delightful journey to create the best pikelets recipe, a classic go-to snack that’s not only scrumptious but also incredibly easy to make. Whether it’s for a hearty breakfast, a lunchbox surprise, or a sweet afternoon snack, pikelets are guaranteed to bring smiles and satisfied tummies.
What Are Pikelets?
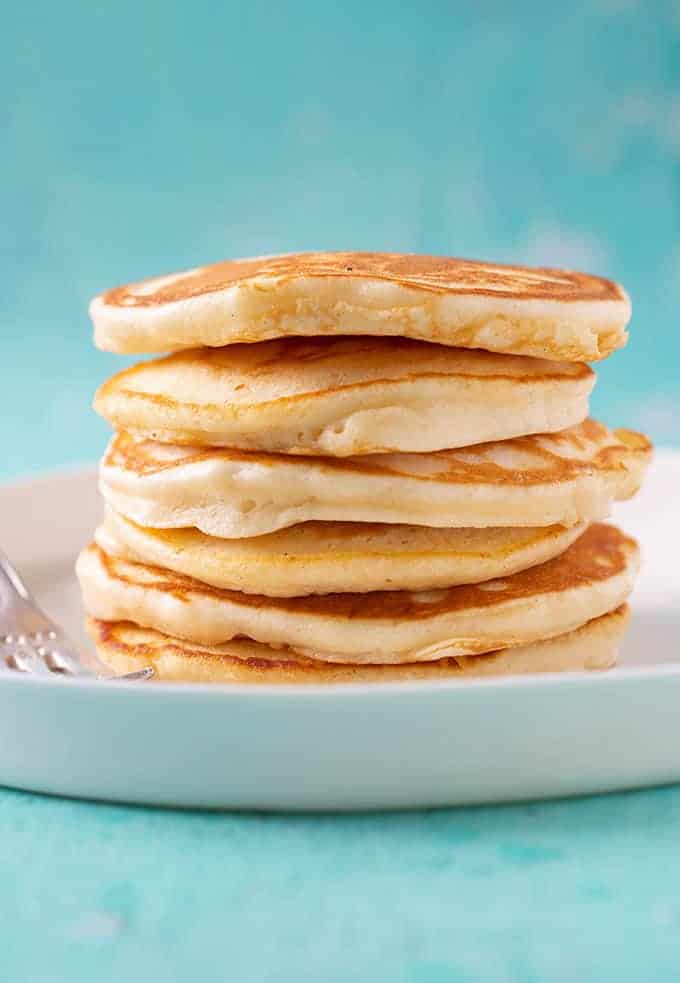
Before we dive into the whisking and flipping, let’s get to know our star treat a bit better. Pikelets are akin to pancakes’ adorable little cousins, originating from Britain but having won hearts all over. They are smaller, thicker, and fluffier than pancakes, making them a perfect size for little hands to enjoy.
The Basic Ingredients for Perfect Pikelets
Creating dreamy pikelets at home only requires a handful of simple ingredients that you probably already have in your pantry. Here’s what you’ll need:
- Self-raising flour – This is the rising agent that will give your pikelets their characteristic fluff.
- Sugar – Just a touch to sweeten the batter to perfection.
- Salt – A pinch to balance and enhance the flavors.
- Milk – For that creamy, rich texture.
- Egg – To bind the ingredients and add a little lift.
- Butter – Melted, to bring it all together and add a hint of buttery goodness.
Now that you know what you need, let’s get started on your pikelet-making adventure!
Step-by-Step Guide to Perfect Pikelets
Step 1: Mix Your Dry Ingredients
In a large mixing bowl, sift together your self-raising flour, sugar, and a pinch of salt. Make sure there are no lumps for an even and smooth batter.
Step 2: Combine Your Wet Ingredients
In a separate bowl, whisk together the milk and egg until nicely incorporated. If you’re feeling adventurous, you can add a splash of vanilla extract for an extra flavor hug!
Step 3: Combine Wet and Dry
Make a well in the center of your dry ingredients and gradually pour in the milk and egg mixture, stirring consistently. As you stir, drizzle in the melted butter and mix until the batter is smooth and free of lumps.
Tip: Don’t overmix the batter! Overmixing can result in a denser pikelet, and we’re aiming for light and fluffy.
Step 4: Heat Up Your Pan
Place a non-stick frying pan or griddle over medium heat. Once it’s hot, lightly grease it with butter or cooking spray – a little goes a long way!
Step 5: Cook Your Pikelets
Spoon tablespoons of batter onto the pan, leaving enough space between them for spreading. When bubbles start to form on the surface, it’s flipping time! Use a spatula to turn them over and cook until both sides are golden brown, usually about 1 minute per side.
Step 6: Serve and Enjoy!
Once cooked, serve your pikelets warm with a pat of butter, a drizzle of syrup, or your favorite toppings like fresh fruit or a dollop of whipped cream.
And just like that, you’ve created the perfect pikelets for your kids to indulge in! Remember, practice makes perfect, so don’t worry if your first batch isn’t exactly as you envisioned. Pikelet-making is a fun experience, and with each try, you’ll get better and better. Now, let’s look at some delicious variations and top tips to take your pikelet game to the next level.
Stay tuned for the tips and tricks that will help you master the art of pikelet making, and discover how to twist up the classic recipe for even more delicious results. Your journey to becoming a pikelet connoisseur starts here, and I can’t wait to guide you through each flip and dollop!
5 Essential Tips for Preparing the Best Pikelets
As you gear up to cook up a batch of these adorable and tasty treats, keep these five things in mind to ensure your pikelets turn out to be the highlight of snack time!
- Consistent Batter: The consistency of your batter is crucial. It should be thick enough to hold its shape when spooned onto the pan, yet runny enough to spread into a small, round disc. If it’s too thick, add a splash more milk; if too thin, a sprinkling of flour can help.
- Perfect Pan Temperature: Getting the temperature right can be the difference between a good pikelet and a great one. Too hot, and they’ll burn on the outside before cooking through. Too cool, and they won’t get that lovely golden color. Aim for a medium-low heat for the best results.
- Toppings Galore: Pikelets are delightful on their own, but toppings can elevate them to extraordinary. Think outside the syrup bottle and consider spreads like Nutella, peanut butter, or honey, and toppings like banana slices, berries, or a sprinkle of cinnamon.
- Quality Matters: With such a simple recipe, the quality of your ingredients will shine through. Use fresh eggs, quality butter, and consider organic milk for the best-tasting pikelets.
- Fun with Flavors: Don’t be afraid to experiment with the batter. Mix in a handful of blueberries, a few chocolate chips, or even some grated apple for a delightful twist. You could also add a hint of citrus zest for a refreshing flavor pop!
By keeping these five tips in mind, you’ll set the stage for pikelets that are not just mouthwatering, but also memorable. Now, let us jump to some creative variations you can try to keep the snack routine exciting!
Creative Pikelets Variations to Try
If you want to mix things up a bit and surprise your little ones with something new, here are some delicious pikelets variations:
- Wholemeal Pikelets: Swap out the self-raising flour for wholemeal flour and a teaspoon of baking powder for a healthier take on the classic recipe.
- Savory Pikelets: For a savory version, minimize the sugar, add some grated cheese and cooked, finely chopped bacon to the batter. Serve them with a dollop of cream cheese and a sprinkle of chives.
- Spiced Pikelets: Stir in a teaspoon of mixed spice or pumpkin spice mix into your batter for a warm, spiced flavor that’s especially comforting during the cooler months.
- Mini Pikelets: Make mini pikelets by using just a teaspoon of batter for each one – they’re perfect for tiny fingers and great for party platters!
- Herbal Pikelets: Infuse the milk with herbs like mint or basil for a subtle undertone, or finely chop the herbs and add them directly to the batter.
Remember, the best recipes come with a dose of creativity and a pinch of love. So, don’t be afraid to let your imagination lead the way, and most importantly, have fun in the process!
Storing and Making Ahead
Pikelets are best enjoyed fresh, but if you find yourself with leftovers or you want to plan ahead, here’s what you need to know about storing them:
Room Temperature: Pikelets can be kept at room temperature in an airtight container for a day. Make sure they’re completely cool before storing to prevent them from becoming soggy.
Refrigerator: In the fridge, pikelets will stay fresh for up to 3 days. Wrap them in aluminum foil or place them in a sealed container.
Freezer: For long-term storage, pikelets can be frozen for up to 2 months. Layer them between sheets of baking paper in a freezer-safe container or zip-lock bag. Thaw at room temperature or reheat gently in a toaster or microwave.
Final Thoughts
The pikelet adventure is a wonderful way to create joyful moments with your children in the kitchen. It offers them a taste of homemade happiness while sparking their creativity with various flavors and toppings. Each batch is not just a snack, it’s an experience – and with this guide, it’s one that’s easy to achieve and a joy to share!
See more great Things to Do with Kids in New Zealand here. For more information see here
Disclaimer
The articles available via our website provide general information only and we strongly urge readers to exercise caution and conduct their own thorough research and fact-checking. The information presented should not be taken as absolute truth, and, to the maximum extent permitted by law, we will not be held liable for any inaccuracies or errors in the content. It is essential for individuals to independently verify and validate the information before making any decisions or taking any actions based on the articles.


