Delightful Yo-Yos Recipe: A Family Baking Adventure!
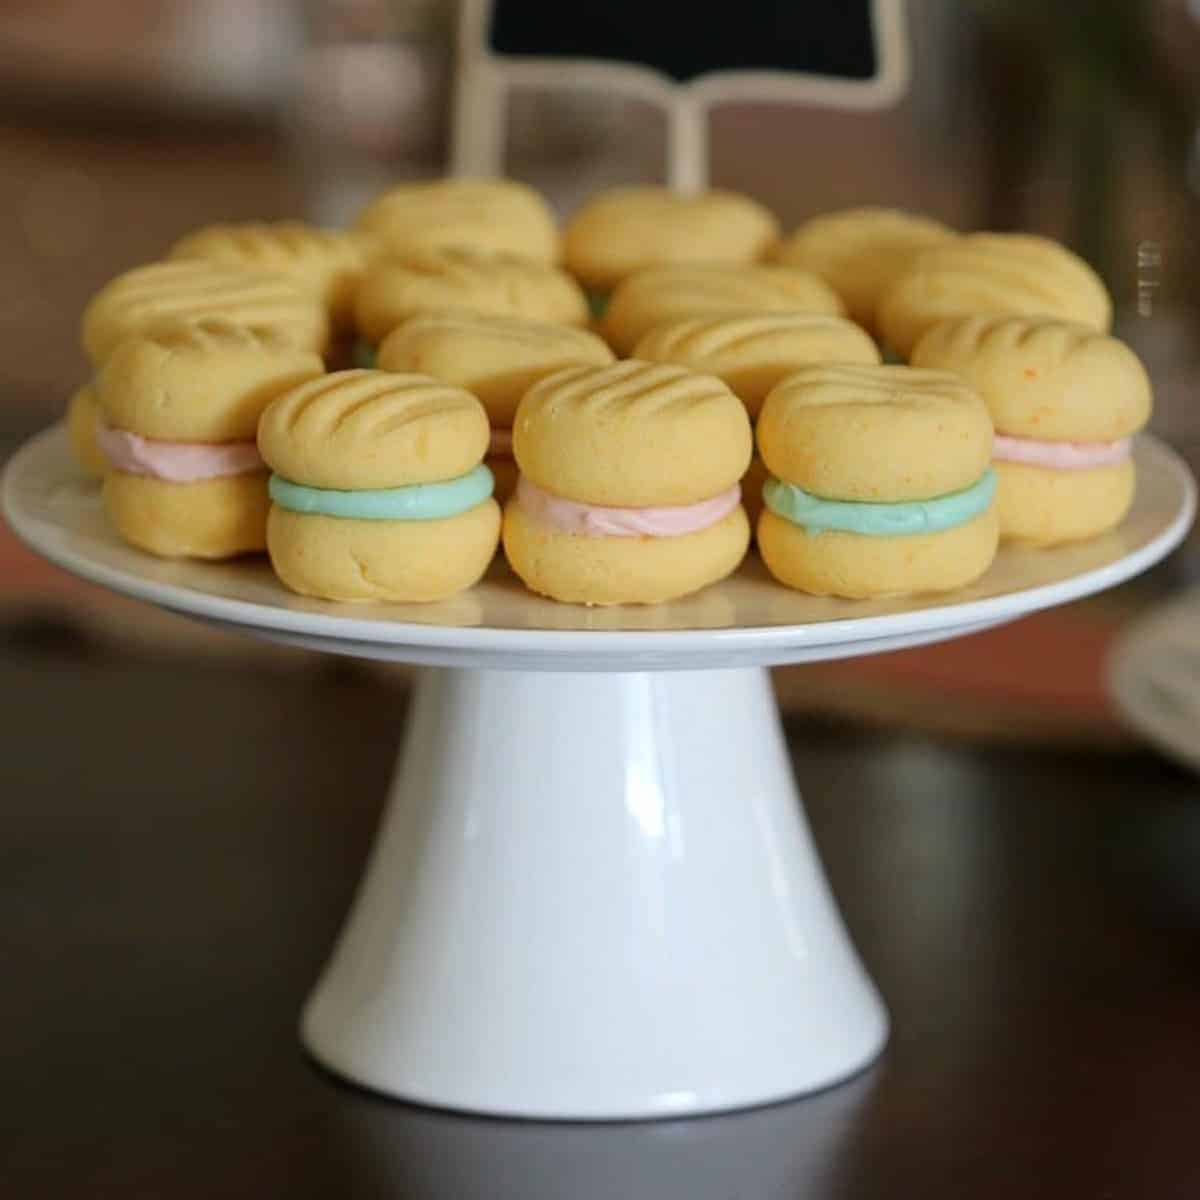
Welcome, dear parents and baking enthusiasts, to a wonderfully whimsical culinary journey where we explore the art of making yo-yos! These delectable little biscuits, also known as “melting moments” because of their ability to dissolve deliciously in your mouth, are a favorite among children and a nostalgic treat for many parents. With their buttery texture and sweet, creamy filling, yo-yos are sure to entice your tastebuds and create delightful kitchen memories with your little ones. So put on your aprons, gather your baking army, and let’s start whipping up some magic!
Why Yo-Yos Are Perfect For Family Baking
Before we jump into the recipe, let’s talk about why making yo-yos can be the perfect baking adventure for you and your family:
- Easy and Fun: Yo-yos have a simple recipe, which makes them an ideal starting point for teaching kids about baking. They’ll have a blast rolling the dough and assembling these tasty treats!
- Creative Customization: From classic vanilla to chocolate or even rainbow, yo-yos can be tailored to your family’s taste. Kids love adding their personal touch!
- Building Skills: Baking is a fantastic way to help children develop fine motor skills, learn measurements, and understand the science of cooking.
- Quality Time: Spending time together in the kitchen is great for bonding, and yo-yos are the perfect excuse for a family baking day.
Essential Ingredients for Perfect Yo-Yos
Ready to start baking? Here’s what you’ll need to create these buttery biscuits:
- 1 cup (250g) unsalted butter, softened
- 1/4 cup (60g) icing sugar, sifted
- 1/4 cup (60g) cornflour
- 1 1/2 cups (225g) all-purpose flour
- 1 teaspoon vanilla extract
- Pinch of salt
And for the filling:
- 1/2 cup (125g) unsalted butter, softened
- 3/4 cup (180g) icing sugar, sifted
- 1 teaspoon vanilla extract
- Food coloring (optional)
Remember, the key to the best yo-yos is to ensure all your ingredients are at room temperature, especially the butter. This guarantees a smoother dough and an even bake.
Step-By-Step Yo-Yos Recipe
Now, let’s dive into the baking process with our step-by-step guide.
- Preheat your oven to 180°C (350°F) and line two baking trays with parchment paper; this prevents sticking and ensures easy cleanup.
- In a large mixing bowl, cream together one cup of softened butter and the sifted icing sugar until pale and fluffy. This forms the base of your biscuit dough.
- Mix in the vanilla extract for that delightful aroma and flavor balance.
- Sift together the all-purpose flour and cornflour with a pinch of salt, gradually incorporating them into the butter mixture. Stir until a soft dough forms.
- Roll tablespoonfuls of the dough into small balls and place them on your prepared baking trays. Gently press each ball with a fork to create the classic yo-yo pattern.
- Bake the biscuits for 10-12 minutes or until they are just golden. Remember, they’ll continue to cook slightly once out of the oven, so don’t overbake!
While the biscuits cool down, it’s time to prepare the sweet, creamy filling.
- Beat the remaining softened butter until smooth, then gradually add the sifted icing sugar and vanilla extract, continuing to beat until the mixture is light and fluffy.
- If you wish to add a splash of color, now’s the time to mix in a few drops of your chosen food coloring.
- Once the biscuits have cooled completely, spread or pipe a generous amount of the buttercream onto the flat side of a biscuit, then sandwich it with another. Voilà, you’ve created your yo-yo!
These scrumptious sandwiches offer a moment of pure bliss with each bite. What’s more, the baking process isn’t just about making tasty treats—it’s about making memories! Keep on reading for top tips on variations and how to involve the whole family in this baking project. Plus, we’ll tackle common yo-yo troubleshooting so that you can achieve perfect results every time. Let’s embrace the joy of baking together!

Five Things Parents Should Know When Preparing Yo-Yos
Before we dive headfirst into a flour-filled fun fest, here’s a handy list of five things parents should know when preparing to bake yo-yos:
- Gather Essentials Beforehand: Ensure you have all your ingredients and baking tools ready before you begin. Measuring cups, spoons, a mixing bowl, an electric mixer (or a good old wooden spoon), baking trays, parchment paper, and a cooling rack are your kitchen comrades-in-arms.
- It’s a Messy Business: Embrace the mess! Baking with kids is bound to get a little chaotic, so prepare your workspace accordingly. Clear the counters, don an apron, and maybe lay down some newspaper or a tablecloth to catch rogue flour and sugar sparks.
- Patience and Timing: Patience is key—don’t rush the process. With kids involved, everything will take a bit longer, and that’s okay. Use this time to chat about the recipe, the textures, and the magical chemistry of baking.
- Cooling is Crucial: Let your yo-yos cool properly before filling them. This might test the patience of your eager taste testers, but it ensures the buttercream doesn’t melt and slide off when you sandwich them together.
- Storage Savvy: Yo-yos can be stored in an airtight container at room temperature for up to a week, making them a great make-ahead treat. This is essential info if you’re planning to bake in advance for a special occasion or as a surprise snack.
Now that you’re armed with these handy hints, you’re all set to embark on your family baking adventure with a greater chance of smooth sailing (and delicious yo-yos!).
Baking Yo-Yos: Involve the Kids
Each step of this yo-yos recipe is an opportunity for hands-on learning and fun:
- Measuring: Let the kids help with measuring ingredients and discuss the importance of precision in baking.
- Mixing: Assign a mixing master to be in charge of blending the butter and sugar until it’s ‘just right’.
- Dough handling: Rolling the dough into balls is much like playdough playtime but with a delicious outcome!
- Pattern making: Pressing the fork into the dough balls to create that recognizable yo-yo pattern can be a creative delight for your little ones.
Not only does this recipe foster togetherness, but it also cultivates a deeper understanding of food and where it comes from. Baking from scratch shows kids that there’s more to cookies and biscuits than pre-packaged goods from the store.
Yo-Yo Troubleshooting Tips
Sometimes a baking mishap can provide a teachable moment, and it’s all part of the learning curve. Here are a few common yo-yo predicaments:
- Dough Too Crumbly: If your dough is falling apart, it might need a touch more butter. Add it in small increments until the desired consistency is achieved.
- Biscuits Spread Too Much: This is often a sign of overworked dough or too-warm butter. Make sure your butter is room-temperature, not melted, and handle the dough gently.
- Filling Too Runny: If your buttercream isn’t holding up, pop it in the fridge for a bit, or add a little more icing sugar to firm it up.
With these tips in your back pocket and the family gathered in the kitchen, baking yo-yos promises to be as joyful as it is yummy. Let the laughter, learning, and indulgence in tasty treats begin!
. For more information see here
Disclaimer
The articles available via our website provide general information only and we strongly urge readers to exercise caution and conduct their own thorough research and fact-checking. The information presented should not be taken as absolute truth, and, to the maximum extent permitted by law, we will not be held liable for any inaccuracies or errors in the content. It is essential for individuals to independently verify and validate the information before making any decisions or taking any actions based on the articles.


