
A Comprehensive Guide for Parents: How to Install a Car Seat Like a Pro
Welcome, safety-conscious parents! Preparing to hit the road with your little one? Stay tuned as we guide you through the ins and outs of car seat installation – ensuring your most precious cargo is secure every journey of the way!
Understanding Car Seat Types
Before we dive into installation, it's crucial to understand the car seat landscape. There are various types of car seats – infant, convertible, and booster seats. Each caters to different stages of your child's growth and comes with unique installation features. Choosing the right one is the first step to a safe ride.
- Infant Car Seats: Ideal for newborns and small babies, these seats are rear-facing, providing the support necessary for their developing neck and spine.
- Convertible Car Seats: Designed to grow with your child, they can transition from rear-facing to forward-facing seats, suitable from birth to around 65 pounds.
- Booster Seats: For older children, boosters elevate your child so that the seat belt fits them safely and comfortably.
What You'll Need for Installation
Before getting started, make sure you have these items at the ready:
- Your car seat’s instruction manual
- The vehicle's owner’s manual
- A car with compatible LATCH (Lower Anchors and Tethers for CHildren) system or a seat belt that locks
- A level or leveling tool (some car seats come with built-in ones)
Step-by-Step Installation Guide
All set? Let's install that seat! We'll begin with a rear-facing infant car seat, and the steps are similar for most types:
Preparation
- Read your car seat and vehicle manuals thoroughly.
- Decide whether to use the LATCH system or the vehicle's seat belt to secure the seat. If your car doesn’t have the LATCH system, you'll need to use the seat belt.
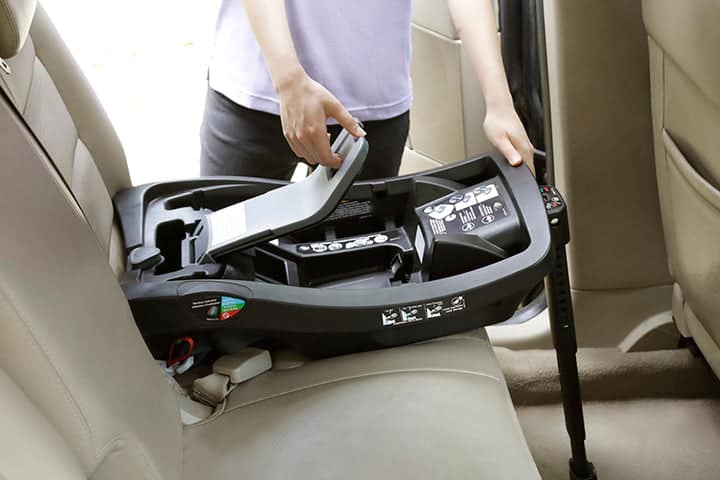
Rear-Facing Car Seat Installation with LATCH
- Locate the LATCH anchors in your vehicle.
- Place the car seat in the back seat of your car facing the rear.
- Attach the car seat's lower anchors to the LATCH anchors in your car, ensuring they click into place.
- Press down firmly on the car seat and tighten the straps. The seat should not move side-to-side or front-to-back more than 1 inch.
- If your car seat has a tether strap, consult your vehicle’s owner manual for tether anchor locations and how to attach the tether.
Remember, the rear-facing position is safest for children until at least the age of two, and it’s commonly recommended to maintain this position as long as possible within the seat’s weight and height limits.
Securing a Car Seat with a Seat Belt
- Place the car seat in the back seat of your vehicle facing the rear.
- Thread the seat belt through the rear-facing belt path (check your car seat’s manual for the exact location).
- Buckle the seat belt and lock it. To lock the belt, pull it all the way out and then let it retract to keep it tight around the car seat.
- Push down firmly on the car seat and tighten the seat belt. Again, the car seat should not move more than 1 inch in any direction.
- Make sure the car seat is at the correct recline angle. Most car seats have indicators or built-in levels to help with this.
The correct installation of your child’s car seat is critical for their safety. Take time to double-check every step and ensure the seat does not move excessively once installed. Your child's car seat is now ready to protect your little one on every adventure you embark on together.
A Comprehensive Guide for Parents: How to Install a Car Seat Like a Pro
Greetings, wonderful parents! Are you ready for the next step in securing your tiny treasure’s travel safety? Installing a car seat can seem daunting, but fear not! We’ll steer you through the process with ease and a dash of fun, because safety is the new cool!
The Fab Five: What Every Parent Should Know When Preparing for Car Seat Installation
Before we buckle up and begin, here are five stellar tips to prepare you for a smooth car seat installation:
- Get Acquainted: Car seats and vehicles are like dance partners; they need to be well-acquainted to perform beautifully. Familiarize yourself with your car seat’s design and your vehicle’s LATCH system or seat belt configurations.
- Proper Positioning: Pinpoint the best place in your vehicle for your car seat. It’s typically the back seat, away from active airbags. If you need to install it in the front seat, ensure the airbags are turned off.
- Clean Sweep: Ensure the installation area in your car is clean and clear of debris. A tidy space helps with a fuss-free installation.
- Level-Headed: Use a leveling tool to find the proper recline position for your car seat, ensuring a safe and comfy angle for your pint-sized passenger.
- Inspect and Reflect: Have a checklist to review every installation step. Secondly, don’t rush! Taking extra minutes now can ensure years of safe travels.
Armed with this knowledge, you’re well on your path to becoming a car seat installation guru!
Understanding Car Seat Types
Know your chariot of choice! The car seat universe is diverse, and selecting the correct seat is crucial to your child’s travel safety:
- Infant Car Seats: These are rear-facing snuggle nests for the tiniest travelers, offering robust support for delicate necks and spines.
- Convertible Car Seats: True transformers, they evolve from rear-facing to forward-facing, offering years of safe commuting.
- Booster Seats: They’re the stepping stones to big-kid travel, positioning the car’s seat belt optimally on your growing child.
Choose wisely and enjoy the peace of mind that comes from knowing your munchkin is secure!
What You'll Need for Installation
Ready for action? Let’s ensure you have the key ingredients for a successful installation:
- The car seat’s handy-dandy instruction manual
- The vehicle’s owner’s manual (it’s not just for the glove compartment!)
- A chariot with a LATCH system or a detective-worthy seat belt that locks
- A trusty level (check if your car seat has built-in magic)
Equip yourself with these items, and you’re ready for a car seat rodeo!
Step-by-Step Installation Guide
Your toolkit is ready; now let’s get to the heart of the matter. We’ll focus on the ever-so-important rear-facing infant car seat to start:
Preparation
- Dive into the manuals like they’re a bestselling novel—they hold the key to unlocking a safe install.
- Select your anchoring MVP: the LATCH system or the vehicle’s seat belt.
Rear-Facing Car Seat Installation with LATCH
- Spot those LATCH anchors in your vehicle – aha, there they are!
- Nestle the car seat snugly in the back seat, with a rear-facing gaze.
- Clip the car seat’s lower anchors onto the vehicle’s LATCH—listen for that reassuring click!
- Press down with a superhero’s might and pull the straps for a no-budge fit—the wiggle room test is your friend here!
- If a tether strap plays a role in your car seat’s destiny, use your vehicle’s manual as your guide in this tether-rific journey.
Stick with rear-facing as your mini-me grows—it’s the cozy cocoon of car travel for those first special years.
Securing a Car Seat with a Seat Belt
- Guide the car seat into its rear-facing position in the back seat like a trusty steed in its stable.
- Weave the seat belt through the path with the finesse of a seat belt savant (your manual will show you the way).
- Buckle up and lock that belt—make it a fortress around your car seat.
- While pushing down, tighten the belt like you’re securing the crown jewels—the less movement, the better.
- Tilt the seat to the promised land of the correct recline angle—the built-in level will tell tales of perfect positioning.
Installation triumph! Your child’s chariot awaits, fortified for every thrilling chapter of your family’s travels to come.
Always remember, practice leads to perfection. If there’s a hiccup along the way, take a breath, regroup, and refer back to your manuals. They’re your trusty sidekicks in this adventure. And hey, don’t be shy to call upon a professional—many local fire stations or car seat inspection stations are happy to lend their eagle eyes for a spot-check.
With the seat now installed, you’re one giant leap closer to a world of safe travels and priceless memories with your little bundle of joy. So go ahead, embark on those family road trips with confidence. Happy trails and snug journeys, dear parents!


