
Embark on a Safe Journey: Your Complete Guide to Installing Car Seats
Welcome aboard, dear parents and guardians! You’re about to set sail on an incredible voyage where the safety of your littlest co-pilot is our North Star. Installing car seats can often feel like you’re trying to crack a cryptex, but fear not! Our treasure map, also known as the ‘Ultimate Guide to Installing Car Seats,’ is brimming with X-marks-the-spot wisdom to ensure your precious cargo is snug and secure at all times.
Understanding the Importance of Proper Car Seat Installation
Before we dive into the nitty-gritty of car seat installation, let’s take a moment to grasp the importance of this life-saving device. Car seats, when installed and used correctly, can reduce the risk of fatal injury by a whopping 71% for infants and 54% for toddlers in passenger cars. That’s not just impressive; it’s a superpower you have at your fingertips!
Choosing the Right Car Seat
Like finding the perfect pair of shoes for your child’s ever-growing feet, selecting the right car seat is paramount. Here are a few essential considerations:
- Age, Weight, and Height: Car seats come in different shapes and sizes designed to protect your child’s developmental stage. Ensure you pick a seat that fits their current age, weight, and height.
- Car Seat Types: From rear-facing to forward-facing, and eventually booster seats, each type offers specific safety features tailored for various growth stages.
- Vehicle Compatibility: Not all car seats fit in all cars. Check your vehicle’s owner manual to confirm the car seat will fit your car’s specifications.
Installation Station: Where and How to Install Your Car Seat
Now, let’s get down to the business of installing your car seat:
- Positioning: The safest place for your child’s car seat is in the back seat, away from active airbags. If possible, position it in the middle to minimize impact during a collision.
- Direction: Babies and toddlers should ride in a rear-facing car seat for as long as possible, until they reach the maximum height or weight limit set by the manufacturer.
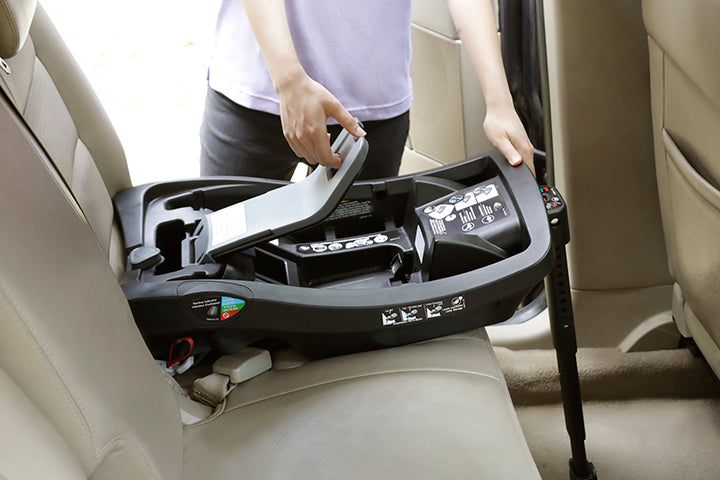
- Attachment: You’ll either use the vehicle’s seat belt or the LATCH system (Lower Anchors and Tethers for Children) to secure the car seat. Check your car seat and vehicle manuals to determine which system is best for your setup.
Step-by-Step Car Seat Installation Guide
With your trusty manual in hand (both your car’s and the seat’s), follow these guidelines:
- Rear-facing Installation:
- Place the car seat in the back seat, following the manual’s recommendations for laying it at the correct angle.
- Thread the seat belt or LATCH straps through the correct path (look for clearly marked guides on the seat) and buckle it in place.
- Press down firmly on the seat to compress the vehicle’s seat cushion while tightening the belt or LATCH straps. The car seat should not move more than an inch side-to-side or front-to-back at the belt path.
- Forward-facing Installation:
- Similar to rear-facing installation, position the seat in the back and use either the seat belt or LATCH system.
- In addition to the lower straps, tether the seat to the top tether anchor to limit forward movement in a crash.
- Make sure the seat is level and tightly secured with no more than an inch of wiggle room.
- Booster Seat Installation:
- Booster seats are simpler to install as they use the vehicle’s seat belts to secure your child and boost them up for a proper fit.
- Ensure the lap belt lies across your child’s upper thighs, and the shoulder belt across the chest and shoulder, not the neck or face.
And there you have it! A solid start to ensuring your child’s car seat is installed for maximum protection. But wait, there’s more to explore about this topic, so let’s keep the adventure rolling and delve deeper into those details.

Five Things Parents Should Know in Preparing for Installing Car Seats
As captivating as the main event of car seat installation is, there’s some vital groundwork that needs to be laid before diving in. Here’s your essential prep list to ensure a smooth installation process:
- Know Your Car Seat’s History:
If you’ve opted for a second-hand car seat, it’s crucial to know its history. Avoid seats that are over six years old, have been in an accident, or are missing labels with the date of manufacture and model number. Remember, a car seat with an unknown past can be a mystery not worth unravelling when your child’s safety is at stake.
- Register Your Car Seat:
It’s like RSVPing to a safety party! Registering your car seat ensures that you’ll be notified of any recalls or safety notices. You can typically register online with the manufacturer using the model number and date of manufacture.
- Pre-read the Manuals:
Study your vehicle’s owner manual and car seat instruction manual before your installation fest begins. Be well-versed with the sections on seat installation and know your LATCH locations or which seat belt to use.
- Gather Your Tools:
Most car seats don’t require special tools for installation, but it’s wise to have a towel or a pool noodle handy to adjust the angle of rear-facing seats if needed. And always keep a trusty manual at your side—consider it the compass guiding your installation journey.
- Seek Expert Help:
If you’re feeling queasy about installing the seat on your own, seek expert assistance. Certified Child Passenger Safety Technicians can oversee your installation or do it for you, ensuring that your precious gem is as safe as can be on the road.
Car Seat Installation Best Practices
Buckle up for some quick tips that can make a sea of difference:
- Thread all belts and LATCH straps according to the manual’s diagrams to avoid twists that could compromise your child’s safety.
- If using a seat belt, make sure it’s in the locked mode (if your vehicle is equipped with this feature).
- After installation, give the car seat a good shake at the base. A properly installed seat will not move more than an inch in any direction.
- Periodically check the car seat as it can loosen over time, especially with frequent boarding and de-boarding.
- Observe temperature changes as they can affect belt tightness. Adjust the installation with the change of seasons, if necessary.
Installing a car seat might seem like just one more item on your endless parenting to-do list, but it’s an act brimming with love and protection. As you navigate the sometimes choppy waters of car seat installation, take heart in knowing that every strap adjusted and every manual consulted is a testament to the extraordinary lengths you go to for your child’s safety. By following the treasure map laid out in this guide, you’ll have the confidence to embark on countless journeys with peace of mind, knowing that the smallest member of your crew is secured for the ride.
Remember that this guide is only the beginning of your journey. Car seat safety is a continuous path of learning, re-checking, and adjustment to keep your little one secure as they grow—and it’s a path that you, intrepid parent, are more than capable of navigating. With every click of a car seat buckle, you’re ensuring that your most valuable treasure—your child—is as safe as can be as you explore this wonderful world together.
For more great fun click here. For more information see here
Disclaimer
The articles available via our website provide general information only and we strongly urge readers to exercise caution and conduct their own thorough research and fact-checking. The information presented should not be taken as absolute truth, and, to the maximum extent permitted by law, we will not be held liable for any inaccuracies or errors in the content. It is essential for individuals to independently verify and validate the information before making any decisions or taking any actions based on the articles.


