
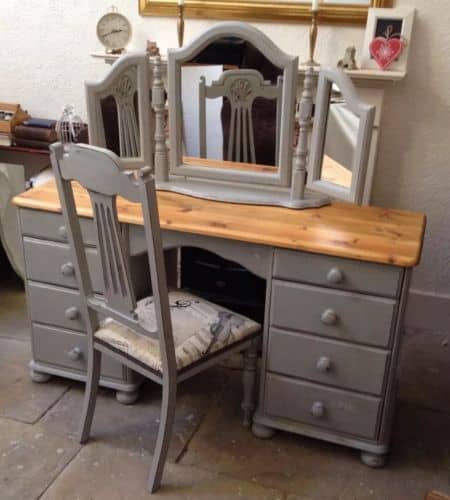
Unleash Creativity: Upcycle Your Dressing Table with This Ultimate Guide!
Welcome, wonderful parents, to your go-to guide on dressing table upcycling! With sustainability and style at the forefront of our minds, it’s time to breathe new life into that tired dressing table. Whether it’s your little one’s first vanity or a family heirloom piece waiting for its Cinderella moment, this guide will walk you through every step, ensuring your upcycle journey is as smooth as the finish on your revamped masterpiece!
What You’ll Need to Get Started
- Sandpaper: To smooth out any bumps and prepare the surface for painting.
- Primer: To ensure your paint adheres well and lasts longer.
- Chalk paint or furniture paint: Choose a color and finish that reflects your personal style.
- Paintbrushes or a roller: For applying your paint and primer.
- Sealant or wax: To protect your paint job and give it a professional finish.
- Painter’s tape: For those clean edges and protecting any parts you don’t want to paint.
- Decorative handles or knobs: To add a whimsical or elegant touch to your project.
- Creative flair and patience: Essential ingredients for any DIY project!
Preparation: The Foundation of Upcycling
As with any transformation, preparation is key! Start by cleaning your dressing table thoroughly and remove any hardware like knobs or pulls. Then, time to sand! Sanding not only removes the old varnish but also provides an anchor for new paint. Wipe it down to remove any dust post-sanding, because cleanliness and paint are best friends.
Painting: The Magic Happens Here
It’s vital to choose the right paint for your upcycle project. Chalk paint is a popular choice for its matte finish and ease of use. However, don’t shy away from experimenting with milk paint, latex paint, or even lacquer for that extra shine. Remember to apply primer first — it’s the secret handshake that introduces your table to the wonderful world of color. After priming, apply your chosen paint with even strokes, working with the grain of the wood. Allow each coat to dry thoroughly before applying the next, and be patient; good things come to those who wait!
Sealing the Deal: Protection Is Key
Once your dressing table is beautifully coated, it’s time to seal it. Choose between a wax or a polyurethane sealant. Wax will deepen the color and give a lovely, aged patina while a sealant will provide a harder, more durable finish.
Now that you’ve prepared and painted your heart out, let’s take a moment to admire your work. But don’t stop there, my upcycling friends! The next steps involve dressing up your dressing table with stylish knobs and adding those personal touches that make it uniquely yours. In the following section, we’ll explore how to choose the perfect knobs and finalize your project with finesse!
5 Things Parents Should Know in Preparing for Dressing Table Upcycle
1. Safety Comes First
Especially for the family handyperson, it’s essential to ensure a safe environment before starting. Use non-toxic paints if your little ones are helping, and always keep sharp or small objects out of reach.
2. Setting Up Your Workspace
Have a well-ventilated area for your upcycling adventure. Cover the ground with newspapers or a drop cloth to catch any spills or drips. Space where your dressing table can stay undisturbed between coats is ideal.
3. Time Management
This isn’t a race! Good upcycling can take several days, considering drying times between paint coats and potential design details you might want to add.
4. Choosing the Right Materials
Invest in quality primers and paints designed for furniture. The correct material will ensure durability and a professional-looking finish that withstands the test of time and childhood energy.
5. Get the Kids Involved
Upcycling can be a fantastic family activity. Encourage your children’s input on colors or accessories, like choosing new knobs. It delights them to see their ideas come to life!
Finalizing Your Upcycled Dressing Table: It’s All in the Details
Choosing Handles and Knobs
Handles and knobs are the jewelry of furniture. Go for a theme that matches the room, or opt for eclectic for a pop of surprise. Ceramic knobs offer a classic look, while metal ones can provide a modern touch.
Adding Personal Touches
Personalizing your project gives it character. Decoupage with patterned paper, stencil on a design, or let the kids hand-paint drawings for that special signature touch.
Accessorizing the Upcycled Table
No dressing table is complete without accessories. A beautiful mirror, a couple of trinket trays, or an elegant lamp can complete the look of your upcycled piece.
Taking Care of Your Upcycled Dressing Table
Once your dressing table is finished and being used, remember to clean it regularly. Use gentle cleaners and avoid harsh chemicals that could damage the paint. Regularly check the tightness of screws on knobs or handles to ensure they are secure.
Upcycling a dressing table can be a rewarding project that not only gives a piece of furniture a second life but also creates an opportunity for family bonding. Plus, you’re teaching your children the value of sustainability and creativity. So roll up those sleeves, get the paint ready, and let’s turn that old dressing table into a treasure that will spark joy every day!
See more great Things to Do with Kids in New Zealand here. For more information see here
Disclaimer
The articles available via our website provide general information only and we strongly urge readers to exercise caution and conduct their own thorough research and fact-checking. The information presented should not be taken as absolute truth, and, to the maximum extent permitted by law, we will not be held liable for any inaccuracies or errors in the content. It is essential for individuals to independently verify and validate the information before making any decisions or taking any actions based on the articles.


