
Create the Ultimate Comfort with Homemade Wheat Bags: A Step-by-Step Guide for Parents
Hello there, super crafty parents! Are you ready to dive into the world of DIY and whip up something truly special and snug for your family? Let’s talk about wheat bags! These cozy little treasures are perfect for soothing aches, warming beds, or simply for cuddling up during those chilly evenings. And the best part? They are super easy to make right at home!
In this comprehensive guide, I’m going to walk you through the process of creating your very own wheat bags. Not only are they wonderful for personal use, but they also make thoughtful gifts for friends and loved ones. Let’s get our craft on and spread some warmth and comfort.
Why Choose Wheat Bags?
Wheat bags are a fantastic natural alternative to electric blankets and hot water bottles. They are not only cost-effective but also eco-friendly and can be customized to your liking with various fabrics and scents. Additionally, they provide a moist heat that’s gentle on the skin and ideal for those with sensitive skin.
What You’ll Need to Get Started
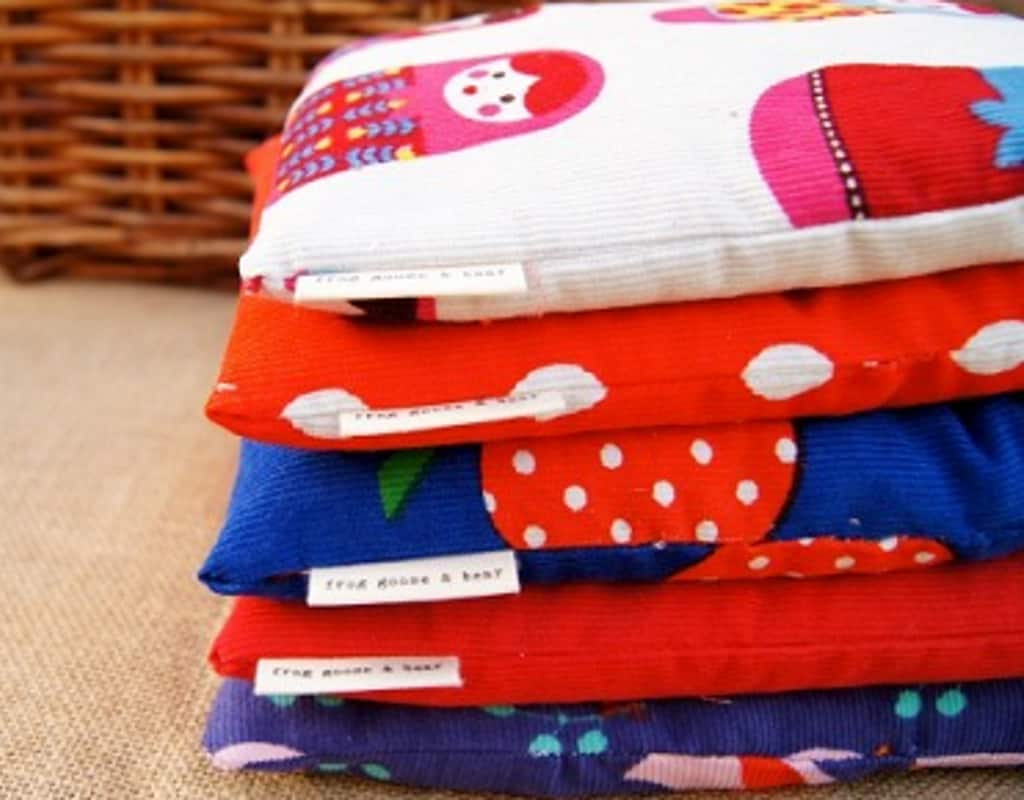
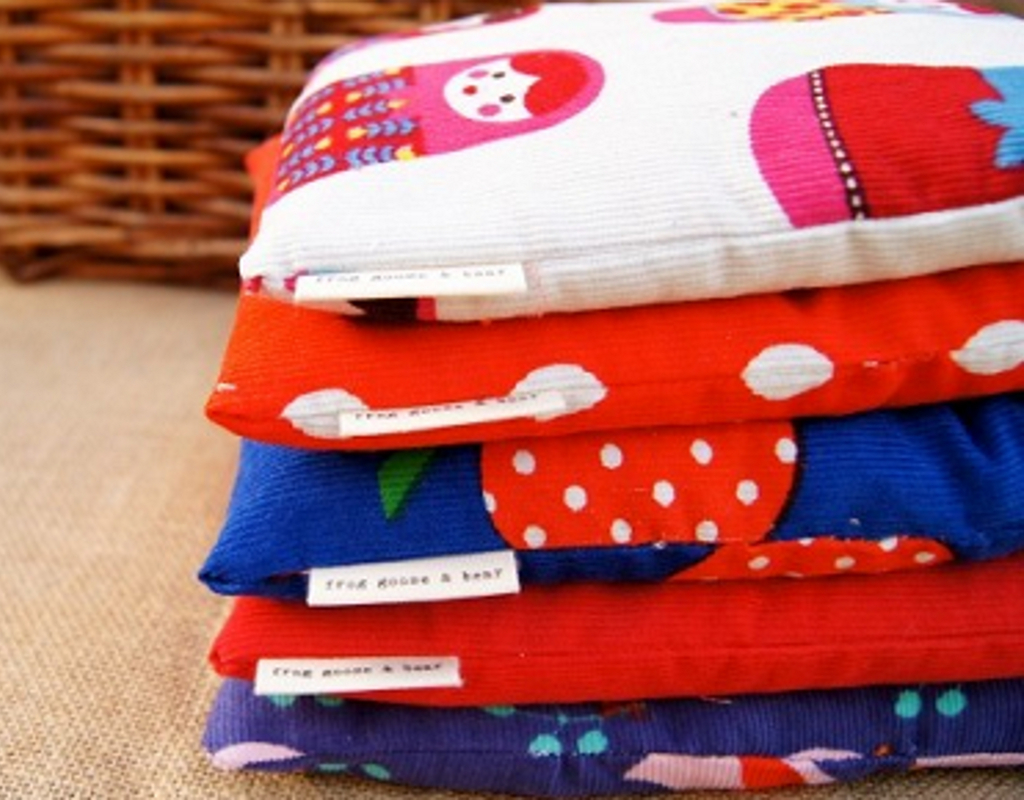
- 100% Cotton Fabric: Opt for a durable, non-stretch fabric. Quilting cotton is a fabulous choice due to its vast range of patterns and colors!
- Wheat Grains: You can purchase these from health food stores or online. Make sure they are clean and food-grade.
- Thread: A good quality cotton thread will do the trick. Match or contrast the color to your fabric – it’s up to you!
- Sewing Machine: This makes the process quicker, but if you’re a fan of hand-stitching, that’s perfectly fine too.
- Sewing Needles, Pins, Scissors: The essentials for any sewing project.
- Measuring Tape or Ruler: Accuracy is key when measuring your fabric.
- Funnel or Spoon: For filling your bag with wheat.
- Dried Herbs or Essential Oils (optional): For adding a pleasant scent to your wheat bag.
Picking the Perfect Fabric and Size
When it comes to choosing your fabric, not only should it be a print that sparks joy, but you’ll also want to make sure it’s something that can withstand the microwave’s heat. 100% cotton is your best bet. As for size, think about what you’ll be using it for. A smaller size is great for targeted areas like the neck, while larger ones can wrap around your shoulders or lay across your lap.
Let’s Sew: Crafting Your Wheat Bag
Before you start, decide the dimensions of your wheat bag. A good standard size is around 20 inches by 6 inches, but you can adjust it to suit your needs.
Once you have your dimensions, cut two pieces of fabric to size, adding half an inch on all sides for seam allowance. Pin the right sides of the fabric together and start sewing using a straight stitch, leaving about a 3-inch gap for turning and filling.
Once you’ve sewn the edges (except for the gap), clip the corners, making sure not to cut your stitches, turn the bag right side out, and press it flat. It’s time to fill it up!
Using a funnel or spoon, fill the bag about two-thirds full with wheat grains. This allows for flexibility and ensures it can conform to your body. If you’re adding dried herbs or a few drops of essential oil, now is the time to mix it in with your wheat.
After filling, carefully tuck in the open edges and pin them together. Sew the opening closed, either with a sewing machine or with a neat hand stitch.
Voilà! You have a handmade wheat bag ready for action. But before your family starts snuggling up with it, let’s cover some crucial safety tips.
Safety First: Using Your Wheat Bag
While wheat bags are a wonderful addition to your comfort arsenal, it’s important to use them safely:
- Always follow the heating instructions and do not overheat.
- Regularly check for signs of wear and tear, as a damaged bag can be a fire hazard.
- Do not leave a heated wheat bag unattended or use it as a bed warmer for young children.
- Ensure the microwave turntable can rotate freely with the bag inside to avoid hotspots.
Now that you’ve crafted your very own wheat bag, you can enjoy the warmth and relaxation it brings to your home. Remember, a homemade wheat bag isn’t just a tool for comfort; it’s a hug in fabric form that holds the heart of the person who made it—YOU!
With your newfound knowledge, get ready to spread the joy by gifting these delightful warmers to friends and family. Keep an eye out for the second part of our wheat bag crafting adventure, where we’ll explore more tips, tricks, and customization ideas.
5 Essential Tips for Parents Preparing to Make Wheat Bags
Ready to get started on your DIY wheat bag journey? Here are five essential tips to ensure that you’re well-prepared and that your crafting experience is as smooth as it is enjoyable!
1. Quality of Wheat – Your Top Priority
Using the right type of wheat is crucial for creating a durable and safe wheat bag. Look for triple-cleaned, insecticide-free wheat that is intended for heating. The cleanliness and quality of the wheat ensure that your wheat bag won’t have pests or foreign objects that could pose a risk when heated.
2. Choosing the Right Fabric
Since your wheat bag will be heated, selecting a non-synthetic fabric like 100% cotton is key. This will prevent any melting or unwanted fumes that synthetic materials can emit when microwaved. Cotton is also less likely to burn and is gentle against the skin, making it the safest choice especially for children.
3. The Importance of Sectioning
Creating sections within your wheat bag by sewing multiple channels will evenly distribute the wheat and prevent it from all falling to one side. This makes the bag more comfortable to use and ensures consistent heating. Usually, two to three sections are sufficient for an evenly balanced bag.
4. Think About the Microwave Size
Keep your microwave dimensions in mind when designing the size of your wheat bag. It should be able to rotate freely on the turntable without getting caught or folding over. This will help to heat your wheat bag evenly, reducing the risk of hot spots.
5. Preparing for Possible Allergies
If you, your children, or the intended recipients have allergies, consider this when selecting the contents of your wheat bag. Use hypoallergenic materials and avoid any added scents or herbs that might trigger allergic reactions. It’s better to err on the side of caution to ensure everyone can enjoy the cozy warmth of your homemade wheat bag.
By keeping these five tips in mind, you’re well on your way to making a safe, comforting, and long-lasting wheat bag that the whole family can appreciate. Each step of this process not only brings out your creative side but also adds a personal touch that mass-produced products simply cannot match. So, gather your materials, set aside some time, and create a warm, comforting hug that can be treasured during those cold days and nights.
See more great Things to Do with Kids in New Zealand here. For more information see here
Disclaimer
The articles available via our website provide general information only and we strongly urge readers to exercise caution and conduct their own thorough research and fact-checking. The information presented should not be taken as absolute truth, and, to the maximum extent permitted by law, we will not be held liable for any inaccuracies or errors in the content. It is essential for individuals to independently verify and validate the information before making any decisions or taking any actions based on the articles.


