
Whip Up the Perfect Homemade Hazelnut Spread for Your Kids
Welcome, dear parents, to a delightful journey of creating the yummiest and healthiest treat for your little ones – homemade hazelnut spread! If you’ve been searching for a fun kitchen project that you and your children can enjoy together, look no further. This guide will walk you through the steps of making your very own creamy, dreamy spread that’s not only delicious but also packed with good-for-you ingredients. Let’s ditch those store-bought jars with additives and preservatives and dive into the nutty goodness of do-it-yourself delight!
Why Make Hazelnut Spread at Home?
Before we roll up our sleeves and get to work, let’s talk about why homemade hazelnut spread is a fantastic choice for your family. First off, control is in your hands! You get to pick the highest quality ingredients, adjust sweetness to your liking, and skip on those unwanted artificial additives. Plus, homemade spreads tend to have more nuts – which means more essential vitamins and minerals for your growing kids!
Ingredients You’ll Need
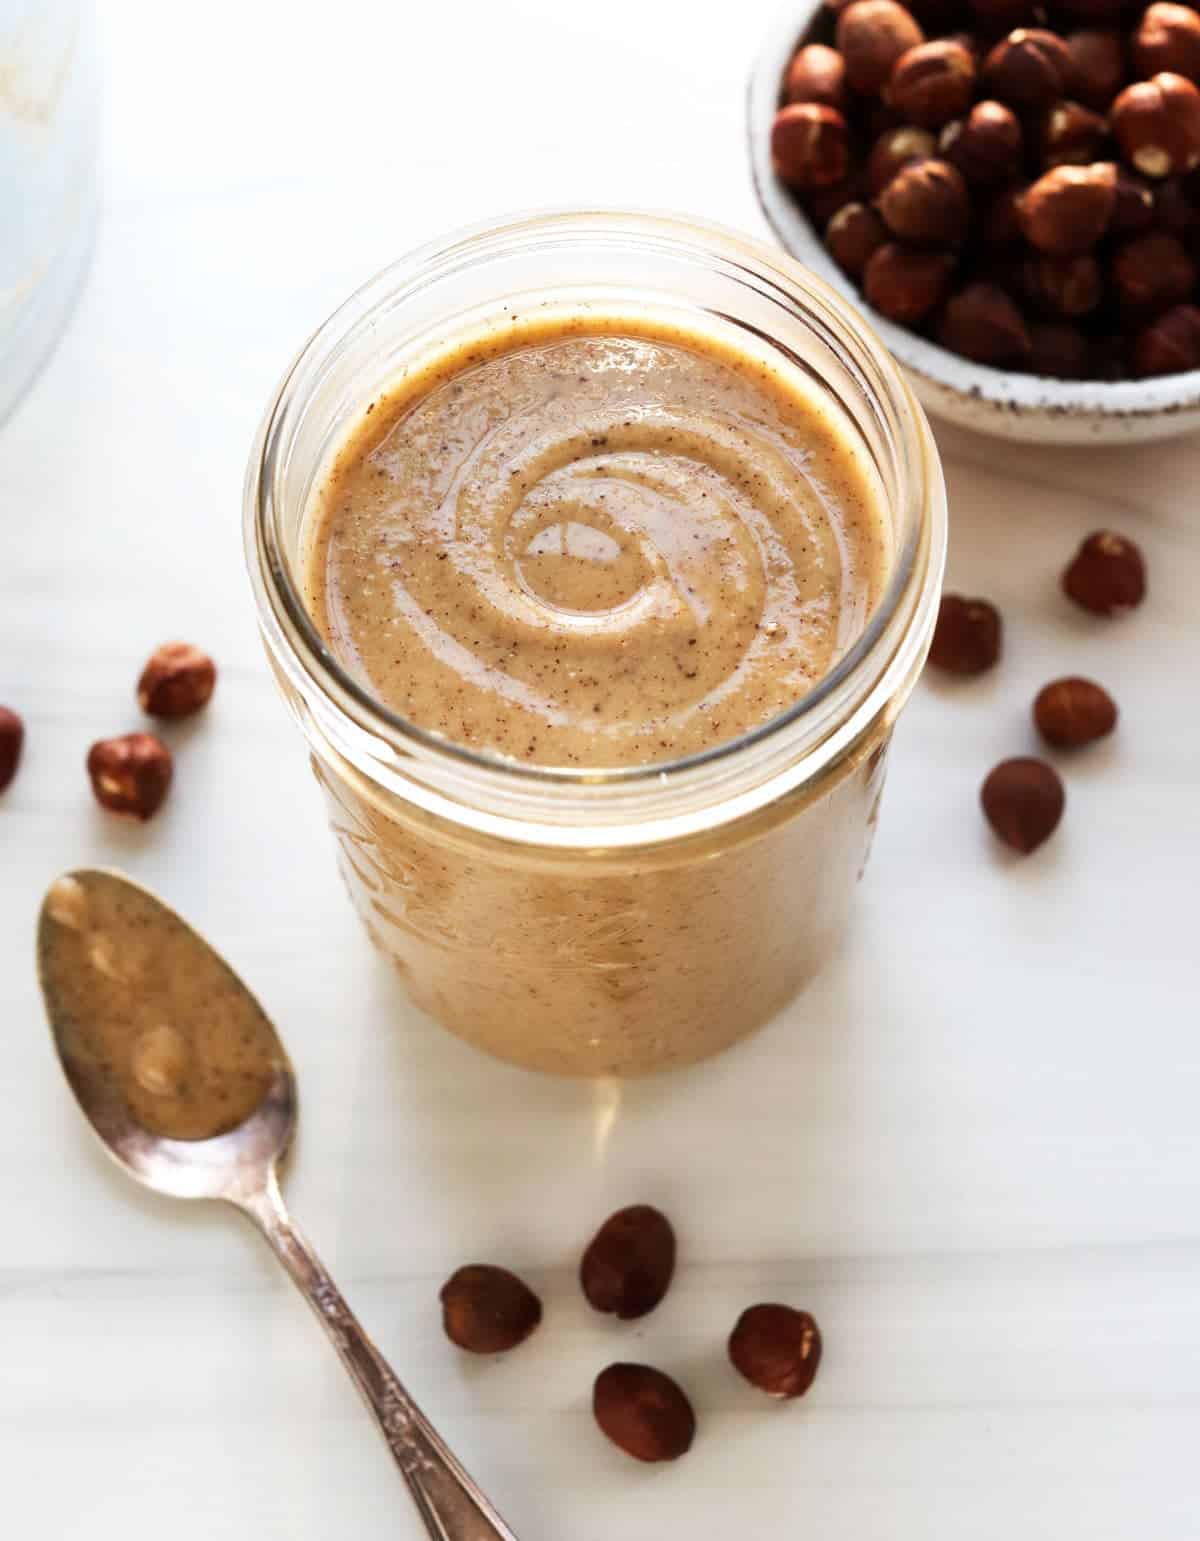
- 2 cups (240g) raw hazelnuts
- 1/2 cup (120ml) milk or a dairy-free alternative like almond milk
- 2 tablespoons coconut oil, melted
- 1/2 cup (60g) powdered sugar or a healthier alternative like coconut sugar
- 1/4 cup (25g) unsweetened cocoa powder
- 1 teaspoon pure vanilla extract
- A pinch of salt (to enhance flavors)
Equipment You’ll Need
- Food processor or high-power blender
- Oven for roasting hazelnuts
- Spatula for scraping down the sides
- Glass jars for storage
Step-by-Step Guide to Your Own Hazelnut Spread
Now, let’s get into the step-by-step process of making your delicious spread. But don’t worry; this is an easy-peasy recipe that yields fantastic results!
1. Toasting the Hazelnuts
Begin by preheating your oven to 350°F (175°C). Spread your raw hazelnuts on a baking sheet in a single layer. Toast them for 10-12 minutes or until they’re golden brown and the skins are blistered. Toasting not only brings out the earthy, nutty flavors of the hazelnuts but also makes it easier to remove the skins, which can add a bitter taste to the spread.
2. Removing the Skins
Once toasted, wrap the warm hazelnuts in a clean dish towel and let them sit for a minute or two. Then, rub them in the towel vigorously to remove as much of the skin as possible. Don’t worry if a few stubborn pieces cling on – they won’t ruin your spread!
3. The Blend
Now, take your skinned hazelnuts and transfer them into your food processor or blender. Grind them until a smooth butter forms – this can take about 5 minutes depending on the power of your machine. Be patient and stop occasionally to scrape down the sides.
Hit the pause button right there, fellow chefs-in-the-making! We’re midway through our nutty narrative, with plenty of delicious details still to churn through. Think of your food processor whirring away as we venture into the final touches that’ll transform these humble nuts into a silky spread that’s sure to capture the hearts (and taste buds) of your beloved brood. Stay tuned for the creamy conclusion of our homemade hazelnut spread adventure in the next section, where we’ll wrap up with some mouthwatering magic!
5 Things Parents Should Know in Preparing Homemade Hazelnut Spread
As you embark on this scrumptious project, there are a few key points to keep in mind for a seamless experience and the best possible homemade hazelnut spread.
4. Knowing Your Sweet Spot
The amount of sugar you add to your hazelnut spread can greatly affect the taste and healthiness. When preparing your ingredients, consider your family’s dietary requirements and preferences. If you’re keen on reducing sugar intake, start with less sweetener than the recipe suggests, taste the mixture, and adjust accordingly. Remember, you can always add more, but you can’t take it out once it’s in there!
5. The Cocoa Factor
Choosing the right cocoa powder can make a world of difference. Opt for high-quality, unsweetened cocoa powder to ensure that your hazelnut spread has a rich chocolatey flavor without unwanted sugar. Dutch-processed cocoa powder will give a smoother and less acidic taste, while natural cocoa powder offers a more robust chocolate flavor.
6. Nuts About Health
Hazelnuts are not only delicious; they’re also a great source of vitamins and minerals. By making your own spread, you’re turning snack time into an opportunity to boost your kids’ intake of healthy fats, vitamin E, and minerals like magnesium and calcium, all of which are essential for their growth and development.
7. Storage and Shelf Life
Your homemade spread doesn’t have the same preservatives as store-bought versions, so it’s essential to store it properly. After your spread is prepared, transfer it to airtight glass jars and keep it refrigerated. The hazelnut spread can usually last for up to a month when stored correctly but always do a quick smell and taste check before serving.
8. Having Fun with Flavors
This recipe is a fantastic base for you to get creative. Once you’re comfortable making the classic hazelnut spread, feel free to play with flavors. Introduce cinnamon, nutmeg, or even a dash of coffee for a unique twist. You can also swap the hazelnuts for almonds or cashews if you fancy a change. The sky’s the limit!
Now that we’ve covered the bonsai basics, let’s jump back into the mix!
3. The Creamy Concoction Continues
Once your hazelnuts have turned into butter, it’s time to take your spread to the next level. With the processor still running, slowly add in the melted coconut oil. This will help create a silky texture and add to the richness of the spread. Then, add your milk or milk alternative, vanilla extract, and a pinch of salt, continuing to blend until smooth.
4. Sweeten and Cocoa-fy
Add your powdered sugar or sweetener of choice and cocoa powder to the hazelnut mix while the processor is running. This is where the magic happens, and it all starts to look like the spread we know and love. You’ll want to process it for another few minutes to ensure everything is well combined and smooth.
5. Taste and Tweak
Here’s where you get to be the taste-tester. Give your spread a sample and decide if it needs a bit more of something. Maybe a touch more sweetness or a little extra cocoa powder? Adjust according to your family’s tastes.
Once you’re happy with the flavor and texture, give it one final whirl, then transfer your freshly made hazelnut spread into those waiting glass jars. Allow it to cool and then refrigerate.
Congratulations, you’ve just made your family a batch of heavenly homemade hazelnut spread! Whether you’re slathering it on pancakes, dolloping it on toast, or (let’s be honest) sneaking a spoonful straight from the jar, you can rest assured that you’re indulging in a treat that’s not only tasty but made with a whole lot of love and a touch of nutritional goodness. Enjoy!
See more great Things to Do with Kids in New Zealand here. For more information see here
Disclaimer
The articles available via our website provide general information only and we strongly urge readers to exercise caution and conduct their own thorough research and fact-checking. The information presented should not be taken as absolute truth, and, to the maximum extent permitted by law, we will not be held liable for any inaccuracies or errors in the content. It is essential for individuals to independently verify and validate the information before making any decisions or taking any actions based on the articles.


