
Whip Up Delicious Mini Quiches That Kids Will Love
Hey there, super-moms and duper-dads! Are you on the hunt for a quick and easy meal that your kiddos will gobble up without a fuss? Well, guess what? You’ve stumbled upon a magical treasure chest of yumminess — the delightful world of mini quiches!
The beauty of mini quiches is that they’re absolutely customizable, deliciously nutritious, and so simple to make that even the busiest of bees can find time to whip them up. Whether you’ve got a picky eater or a little one who’s curious about every food under the sun, mini quiches are sure to be a hit for breakfast, lunchboxes, or even that tricky after-school snack time.
Let’s dive into the step-by-step process to create the perfect mini quiche that’ll have your family begging for more!
Why Mini Quiches Are the Perfect Solution for Busy Families
If you’re asking yourself why you should introduce mini quiches into your family’s meal rotation, let’s count the reasons:
- Versatility: From breakfast to dinner, mini quiches fit effortlessly into any meal plan.
- Customization: Cater to all taste preferences by mixing and matching ingredients.
- Meal Prep Dream: Make ahead of time and enjoy throughout the week!
- Kid-Friendly Fun: Involve the kiddos in the prep for a fun family cooking experience.
- Nutrient-Packed: Pack these little delights with protein, veggies, and dairy.
Now that you’re convinced, let’s get you equipped with the ultimate customizable mini quiche recipe!
Your Go-To Mini Quiche Recipe
Prep Time: 15 minutes
Cook Time: 15-20 minutes
Total Time: 30-35 minutes
Yield: 24 mini quiches
Ingredients:
- 1 package of ready-made pie crust (or homemade if you’re feeling fancy!)
- 5 large eggs
- 1 cup of milk (dairy or non-dairy options work great)
- Salt and pepper to taste
- 1 1/2 cups of shredded cheese (cheddar, mozzarella, or a mix are delish)
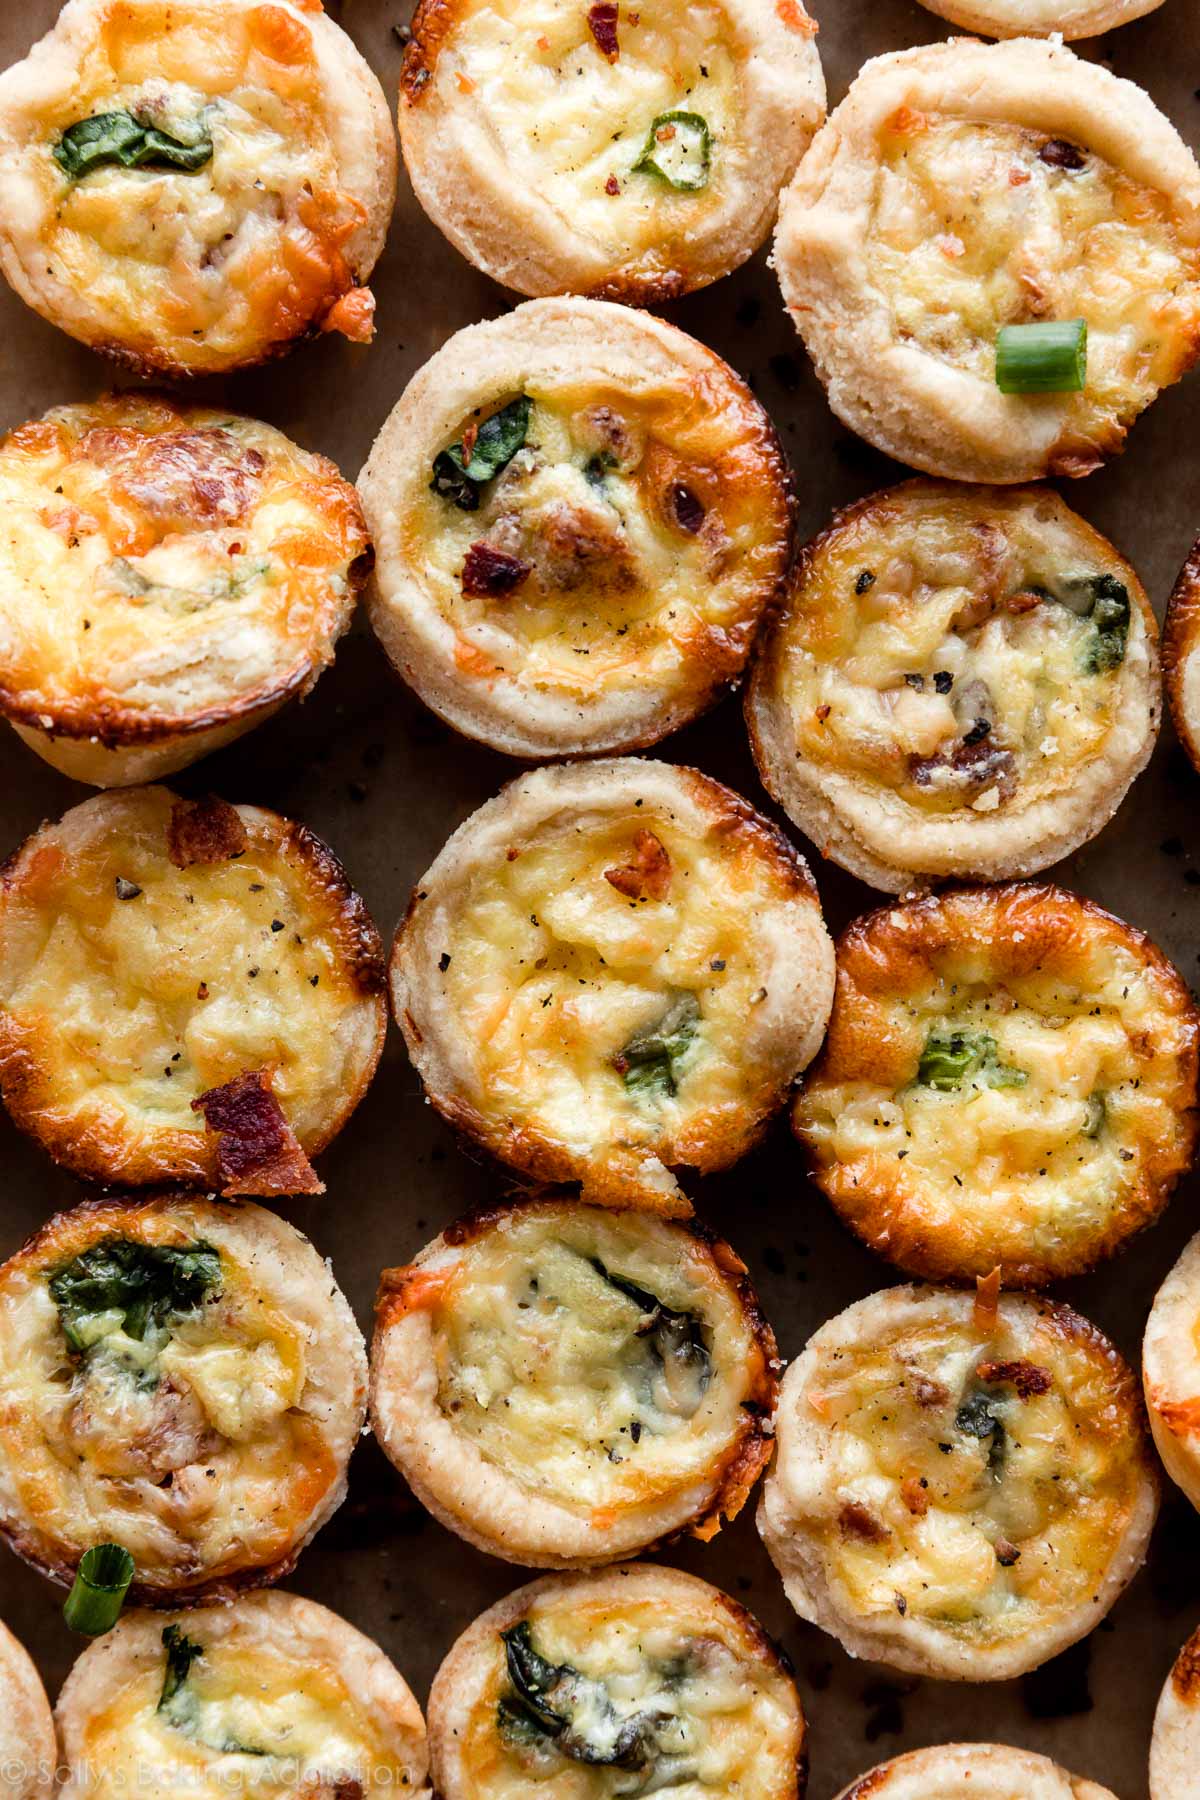
- Your choice of fillings:
- Vegetables (spinach, tomatoes, bell peppers, mushrooms, the sky’s the limit!)
- Meats (cooked bacon, ham, sausage, chicken – yum!)
- Herbs and extras (fresh basil, chives, or a sprinkle of paprika for a kick)
Instructions:
- Preheat your oven to 375°F (190°C) and lightly grease a 24-cup mini muffin pan.
- Roll out the pie crust and cut into small rounds using a cookie cutter or the rim of a glass. Press these dough rounds into the bottom of each muffin cup.
- In a large bowl, whisk together the eggs and milk. Season with salt and pepper.
- Place a pinch of cheese into each muffin cup, then add your desired fillings on top of the cheese.
- Pour the egg mixture over the fillings, filling each cup until about 3/4 full.
- Bake in the preheated oven for 15-20 minutes, or until the egg is set, and the edges are golden brown.
- Let the mini quiches cool for a few minutes before removing them from the pan. Enjoy warm or at room temperature!
With your mini quiches hot out of the oven, you’re well on your way to becoming the superhero of snack time! But wait, there’s more to these little wonders than meets the eye. Let’s explore some pro tips, ideas for variations, and how to make these mini quiches even more awe-inspiring for your little ones!
Remember, mini quiches are more than just a meal; they are a fun and engaging way to bring the whole family together in the kitchen. Keep smiling, because with these bites of joy, you’ll have more than just tasty treats; you’ll create memories that last a lifetime!
Five Things Parents Should Know When Preparing Mini Quiches
1. Master the Egg to Milk Ratio
When diving into mini quiche territory, remember that the foundation of a smooth and custardy quiche lies in the egg to milk ratio. Stick to about 1 large egg per 1/4 cup of milk for the best texture. This ratio ensures each bite is perfectly balanced, neither too dry nor too soggy. It’s all about that golden middle ground that makes for a heavenly quiche experience!
2. Pre-Bake the Crust for Perfection
No one likes a soggy bottom, especially when it comes to mini quiches! To avoid this, pre-bake your crusts for just a few minutes before filling them. This process, known as “blind baking,” sets the crust, so it holds up better against the wet filling. Just a brief toast in the oven and your quiches will be structured and satisfying from the first bite to the last crumb!
3. Chill Factor: Hot Filling vs. Cold
If you’re adding cooked ingredients to your mini quiches, like sautéed veggies or browned meats, let them cool down before adding them to the egg mixture. Why, you ask? Tossing hot fillings in can start scrambling the eggs before they hit the oven heat, leading to a less than ideal texture. Patience is a virtue, dear quiche-making warriors!
4. Veggie Volume Control
Vegetables are fabulous in quiches, but water content can be tricky. To ensure your mini quiches aren’t waterlogged, give veggies like spinach, mushrooms, and tomatoes a quick pre-cook to release and evaporate excess moisture. A little sauté goes a long way in preserving the lush texture that makes quiches such a crowd-pleaser!
5. Freezer-Friendly Tips
One of the superpowers of mini quiches is their ability to go from freezer to oven effortlessly. If you’re meal prepping, let the quiches cool completely after baking, then freeze them on a baking sheet before transferring to a freezer-safe container. When ready to enjoy, reheat them directly from frozen in the oven. It’s like having a quiche time capsule at your fingertips!
Quiche Variation Ideas – The Possibilities are Endless!
Now that you’re equipped with the basics, let’s sprinkle in some creativity. Mix and match ingredients to keep those taste buds dancing. Here are a few combination ideas to spark inspiration:
- The Classic: Ham and cheddar with a touch of green onion for that timeless taste.
- Mediterranean Magic: Feta, olives, sun-dried tomatoes, and a whisper of oregano to transport your senses.
- Garden Delight: Broccoli, sharp cheddar, and a swirl of red bell pepper for a colorful veggie bonanza.
- Breakfast Bonanza: Crispy bacon, hash browns, and chives because breakfast shouldn’t be confined to morning hours.
- Italian Feast: Mozzarella, pepperoni, and basil, because who doesn’t love a pizza party in mini quiche form?
And there you have it, the ultimate guide to creating mini quiches that are bound to bring smiles and satisfaction to your bustling household. Begin with our foundational recipe above and tweak it to your heart’s content. With each batch, you’ll find new ways to express your culinary creativity and keep your family’s palates delighted. The best part? Each mini quiche is a testament to your love and care, neatly packaged in a delightful easy-to-eat crust. So go ahead, roll up those sleeves, crack some eggs, and let’s make mini quiche history together!
Note: Always remember to check with your child’s dietary needs and restrictions when choosing ingredients to ensure a happy and healthy mealtime experience.
Smart Storage and Serving Suggestions
Mini quiches aren’t just delicious – they’re also marvelously convenient! Here’s how to make the most of them:
- Refrigerating: Keep mini quiches in an airtight container in the fridge for up to four days. Reheat gently or serve cold.
- Serving Size: One or two mini quiches make a perfect toddler-sized serving, while older kids and adults might enjoy three or four as a satisfying snack.
- Making Them Last: Cooked mini quiches freeze beautifully for up to two months. Just reheat in the oven or microwave for an on-the-go breakfast or last-minute appetizer.
- Lunchbox Lifesavers: Pop a couple of mini quiches in your child’s lunchbox for a protein-packed midday meal that will be the envy of the cafeteria.
- Party Platters: Display an assortment of mini quiches on a platter for an easy, self-serve party option that guests of all ages will love.
Now, brave kitchen adventurers, you’re all set to tackle the wondrous world of mini quiches. Get creative, have fun, and savor every bite along the way!
For more great articles please see here. For more information see here
Disclaimer
The articles available via our website provide general information only and we strongly urge readers to exercise caution and conduct their own thorough research and fact-checking. The information presented should not be taken as absolute truth, and, to the maximum extent permitted by law, we will not be held liable for any inaccuracies or errors in the content. It is essential for individuals to independently verify and validate the information before making any decisions or taking any actions based on the articles.


