
Embark on the Squishy, Stretchy Journey of Mixed Slime!
Hey there, awesome parents and guardians! Are you ready to step into the gooey, stretchy world of mixed slime with your kids? If you’re looking for a fun-filled activity that’s both creative and educational, you’ve hit the jackpot! Mixed slime isn’t just a craze; it’s a wonderful way to bond with your little ones while nurturing their scientific curiosity and artistic flair.
In this ultimate guide to mixed slime, we’re going to explore all the vibrant options and imaginative possibilities that come with this fantastic playtime material. Get ready to become the coolest parent on the block as you delve into the nitty-gritty of slime creation!
What is Mixed Slime, Anyway?
Mixed slime is the magical result of combining simple, safe household ingredients to create a gooey, tactile substance that kids adore. It’s a playful blend of different colors, textures, and even scents! From glittery galaxy slime to fluffy cloud dough, the varieties are endless – and the fun? Just as limitless!
Why Parents and Kids Love Slime-Time
- Encourages Creativity: Mixing colors and add-ins allows children to express their artistic side.
- Develops Fine Motor Skills: Kneading and stretching slime helps improve hand strength and coordination.
- Teaches Basic Science: The process of making slime is a fantastic introduction to chemistry for young minds.
- Stress Relief: Both kids and adults find the squishing and stretching of slime to be a great way to unwind.
- Sensory Play: Slime is perfect for tactile exploration, which is essential for cognitive development.
Creating Your First Batch of Mixed Slime
Starting out might seem intimidating, but making your very own mixed slime is surprisingly simple! Here’s what you need to know before you begin this sticky, sensational journey:
Slime Ingredients
To kick off your slime adventure, you’ll need a few basic ingredients that act as the building blocks for most slime recipes:
- Glue: This is the primary ingredient. White school glue or clear glue both work well for different effects.
- Borax Solution or Contact Lens Solution: These act as slime activators, helping to bind the ingredients together.
- Food Coloring: To add that pop of color! Liquid, gel, or even natural food colorings are great choices.
- Add-Ins: Get creative with glitter, foam beads, scents, or even small toys to mix into your slime for texture and fun.
Basic Mixed Slime Recipe
Now, onward to creating your first masterpiece! Remember, the key to great slime is a bit of experimentation and a lot of fun. Here’s a simple ‘starter’ recipe to get you going:
- Mix 1/2 cup of glue with 1/2 cup of water in a bowl.
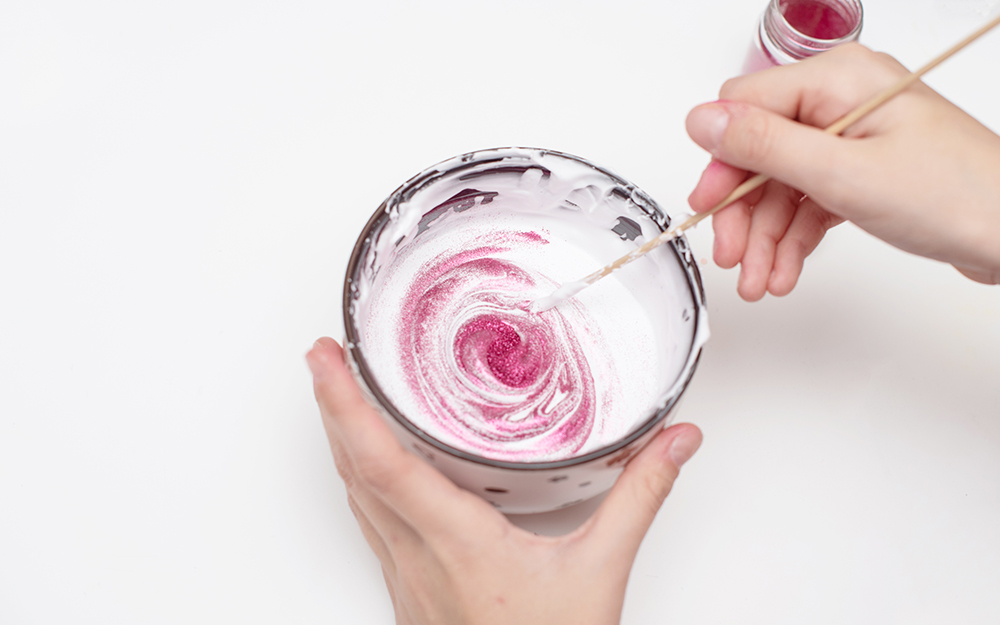
- Add a few drops of your chosen food coloring and mix.
- Stir in your fun add-ins like glitter or beads.
- In a separate container, mix 1 teaspoon of borax with 1 cup of hot water until dissolved, creating your activator.
- Slowly add the borax solution to the glue mixture, stirring until the slime begins to form and pull away from the sides of the bowl.
- Knead the slime with your hands until it’s reached the desired consistency. If it’s too sticky, add a bit more activator.
Voilà! You’ve just made your first batch of mixed slime. But don’t stop here; the world of slime is vast and dotted with many a concoction to try.
To ensure your slime-making journey is as smooth as your new creation, let’s talk about some pro tips and tricks to keep in mind:
Slime Pro Tips
- Consistency Matters: If your slime is too sticky, add more activator. If it’s too runny, add more glue.
- Storage: Keep your slime fresh by storing it in an airtight container when not in use.
- Allergy Check: Always make sure the ingredients are safe for your child, especially if they have any allergies or skin sensitivities.
- Clean Play Area: Slime can get messy, so cover surfaces with plastic tablecloths or parchment paper for easier cleanup.
There you have it, our guide to starting your mixed slime excursion. Stay tuned, because this is just the opening chapter in an endless book of slime possibilities! Remember, each squish and stretch brings a chance for laughter, learning, and lots of slimy fun – so let’s get to it, slime aficionados!
Want more info on advanced slime techniques, troubleshooting, and themed slime ideas? Keep reading for the next installment of our ultimate mixed slime guide, where we’ll dive deeper into the sticky details.

Five Things Parents Should Know in Preparing for Mixed Slime
Before diving into the wonderful world of mixed slime with your kids, there are some golden nuggets of wisdom to keep in your pocket:
1. Choose the Right Location
Slime-making can be a delightful mess, and that’s part of the fun! However, it’s wise to consider where this messy creativity will unfold. An ideal spot is a surface that’s easy to clean — think kitchen tables or counters with a plastic tablecloth or wax paper on top. Ensure there’s plenty of space for your kids to work and that any treasured items are safely tucked away from potential slime splatters.
2. Wear Appropriate Clothing
Slime has a sneaky way of getting on clothes and it can be tricky to remove. Dress for success with old T-shirts or aprons, and keep a stack of wipes close by for quick clean-ups. Explain to your little ones the importance of proper attire — they’ll be thankful when their favorite outfits remain slime-free!
3. Safety First
Safety is a top priority when mixing up a batch of slime. Non-toxic, washable glue is a must for safe slime play. When it comes to activators like borax or contact lens solution, ensure they’re used in appropriate, small amounts and always supervise your kids to avoid ingestion or contact with the eyes. If skin irritation occurs, discontinue use immediately.
4. Pre-Measure Ingredients
To keep the slime-making process smooth and stress-free, pre-measure all your ingredients. This not only makes it easier to follow the recipe, but it can also turn into a mini math lesson for your little ones! When everything is ready to go in small cups or bowls, children can focus on the fun part — mixing and experimenting.
5. Patience is Key
Not every slime recipe is an instant success. Sometimes, the mixture may be too runny or too stiff, and that’s okay! Patience and a little tweaking go a long way. Keep a relaxed attitude and encourage your kids to do the same. Part of the joy of slime-making is the process itself, discovering what works and what doesn’t, and enjoying the experience.
Slime Time Ready! With these helpful hints in mind, you’re all set to embark on your slime adventure. Remember, the goal is to have fun, learn together, and create memorable moments. So roll up those sleeves, gather your supplies, and get ready for some sensational mixed slime crafting!
Each step of the slime-making experience is a chance to grow and laugh together. Encourage your children to explore, ask questions, and shape their unique slimy creations. With the safety tips and preparation strategies we’ve shared here, you’re well on your way to becoming supreme rulers of the slime universe!
See more great Things to Do with Kids in New Zealand here. For more information see here
Disclaimer
The articles available via our website provide general information only and we strongly urge readers to exercise caution and conduct their own thorough research and fact-checking. The information presented should not be taken as absolute truth, and, to the maximum extent permitted by law, we will not be held liable for any inaccuracies or errors in the content. It is essential for individuals to independently verify and validate the information before making any decisions or taking any actions based on the articles.


