DIY Baking Basics: How to Make Self-Raising Flour from Plain Flour
Ready to take on a new kitchen adventure with the kiddos? This guide is perfect for all the baking enthusiasts and clever parents out there!
Crafting self-raising flour from plain flour is a delightful and rewarding experience – not to mention a fantastic educational activity to involve your children with. Why not teach them a bit about measurements and chemical reactions while you’re at it? Let’s whip up some self-raising flour, shall we?
What You Need to Know About Self-Raising Flour
Self-raising flour is regular plain flour with a little bit of magic – by which I mean baking powder! The baking powder acts as a leavening agent, giving volume and texture to your baked goods without the need for additional yeast or raising agents. It’s a staple in many recipes, from pancakes to cakes, and making it at home is not only easy but also ensures you won’t be left in a lurch when you’re in the middle of a baking spree!
Why Make It at Home?
- Freshness – Homemade means you know exactly when it was made.
- Convenience – No more last-minute grocery runs for one ingredient.
- Education – A great learning tool for kids in measuring and understanding ingredient functions.
- Customization – Adjust your raising agent for perfect results every time.
Gather Your Supplies
Before we start, make sure you have the following on hand:
- Plain flour (also known as all-purpose flour)
- Baking powder
- Salt (optional, but it can help stabilize the flour)
- A sieve or fine mesh strainer
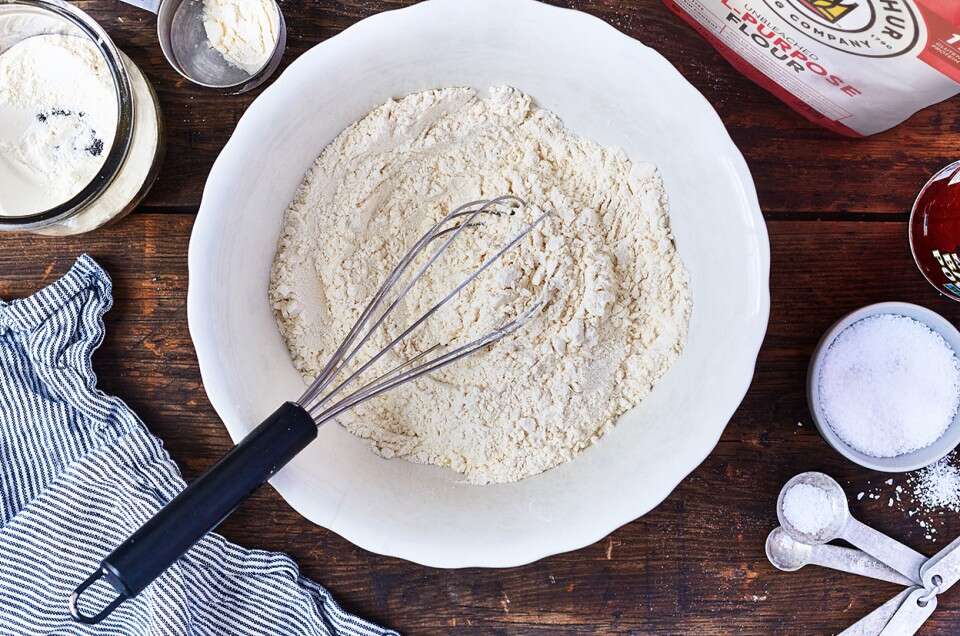
- A mixing bowl
- A whisk or fork
- Measuring spoons
Step-by-Step Guide to Homemade Self-Raising Flour
1. Measure Your Ingredients
Start by measuring out your plain flour into the mixing bowl. You’ll want to use 1 cup of plain flour for every cup of self-raising flour your recipe calls for.
2. Add the Raising Agent
For each cup of flour, you need to add 1 ½ teaspoons of baking powder. This is the perfect ratio to ensure a beautiful rise.
3. Optional: Add Salt
A pinch of salt, roughly ¼ teaspoon for each cup of flour, can be added to give a slight depth to the flavor and help balance the chemical reactions during baking.
4. Sift and Mix
Sifting is a big YES in this process! It helps to evenly distribute the baking powder and salt throughout the flour, removes any lumps, and aerates the mix for a lighter result. Use your sieve or strainer for this step, then whisk the mixture for about 30 seconds to ensure everything is thoroughly combined.
5. Store or Use Immediately
If you’re not using your homemade self-raising flour right away, store it in an airtight container to keep it fresh. Don’t forget to label it so you remember what it is and when you made it!
FAQs About Making Self-Raising Flour at Home
Now, let’s tackle some common questions that pop up:
Can I use gluten-free flour?
Absolutely! The process is the same, just make sure your baking powder is also gluten-free.
Is there a difference in the final product compared to store-bought self-raising flour?
In most cases, you won’t notice a significant difference. However, some people find that their homemade version results in a lighter and fluffier texture.
Can I make self-raising flour with baking soda instead of baking powder?
It’s not recommended, as baking soda requires an acidic ingredient to activate, whereas baking powder is already balanced to work on its own.

The Ultimate Guide for Parents: Making Self-Raising Flour at Home with Plain Flour
Welcome, baking buffs and creative parents! If your little helpers love to measure, mix, and learn along the way, then this guide to making self-raising flour at home will add an extra sprinkle of joy to your baking activities.
Understanding Self-Raising Flour
Firstly, let’s demystify self-raising flour. This isn’t just plain flour dressed in a cape; it’s plain flour combined with baking powder, and sometimes a pinch of salt. The addition of baking powder creates the leavening needed to make your bakes rise beautifully, making it a handy ingredient for effortless and quick baking adventures.
Parents, Here’s Why You’ll Love This Flour Hack
- Always Fresh: Knowing your ingredients’ shelf life means better tasting baked goods.
- Convenient Magic: Run out of self-raising flour? No need to dash to the store, make some magic in minutes!
- Teachable Moments: Use this as a mini science lesson about reactions and ratios.
- Ingredient Control: Perfect your bakes by tweaking the raising agent as you see fit.
Tools of the Trade
Gather these items before you begin, and make this baking prep a breeze:
- Your base: plain/all-purpose flour
- The lift: baking powder
- A pinch of sophistication: salt (if you fancy)
- The fluffy maker: sieve or fine mesh strainer
- The mixing arena: a mixing bowl
- A magic wand: whisk or fork
- The precise measurers: measuring spoons
Your Homemade Self-Raising Flour Recipe
1. Begin with Precision
Exact measurements are key – one cup of plain flour will soon become our star, self-raising flour.
2. Raise the Stakes
Mix in the lifter, 1 ½ teaspoons of baking powder per cup of flour, to guarantee the rise your baked treats deserve.
3. The Secret Ingredient
If desired, add ¼ teaspoon of salt per cup of flour. Not essential, but definitely an enhancer!
4. The Whirlwind Mix
Aerating your mix with a sieve is non-negotiable for an airy, lump-free flour. A 30-second whisking bonds the components into one.
5. Ready, Set, Store!
Not baking just yet? Store it right, and keep it tight! In an airtight container, that is. Label it and date it for future baking expeditions.
Top 5 Things Parents Should Know When Prepping Self-Raising Flour
- Take your time: Do this with your kids when you’re not in a rush. It’s a learning process and a fun activity, not just a means to an end.
- Fun with math: Use the opportunity to teach basic math and fractions – baking is delicious math, after all!
- Mess is part of the process: Flour spills, and that’s okay. It’s all part of the hands-on experience.
- Customize the flavor: Making your own allows you to add a personal touch, maybe a hint of vanilla or almond for a subtle flavor twist?
- Practice makes perfect: The more you do this, the more second nature it will become. So, keep at it!
Child-Friendly FAQs
Anticipate those curious little minds with answers to their burning questions:
What happens if we add too much baking powder?
Excess can lead to a bitter taste and cause the dough to rise too fast and then collapse – balance is key, little chefs!
Does the brand of flour or baking powder matter?
While brand preferences exist, any all-purpose flour and baking powder should rise to the occasion – experimentation is part of the fun!
If we don’t have a sieve, can we still make it?
Absolutely, but ensure you mix thoroughly. Try fluffing up the flour with a fork to introduce some air into it.
Can we make a big batch?
Yes! Just multiply the ratios and remember, freshness is fabulous, so only make what you’ll use in a few months.
There you have it, dear parents – you’re ready to replace those “Oops, we’re out of self-raising flour” moments with pride and a pinch of education! Gearing up for a bake-off with plain flour in hand means you’re already halfway to tasty, homemade treats!
For more great articles please see here. For more information see here
Disclaimer
The articles available via our website provide general information only and we strongly urge readers to exercise caution and conduct their own thorough research and fact-checking. The information presented should not be taken as absolute truth, and, to the maximum extent permitted by law, we will not be held liable for any inaccuracies or errors in the content. It is essential for individuals to independently verify and validate the information before making any decisions or taking any actions based on the articles.


